SLIDER

Burnside Bib Shorts // Sew Bibs

Wednesday, March 27, 2019

Burnside Bib Shorts // Sewing For Women

Hello!! Welcome back for my second make of the #sewbibs challenge!! (You can find my first make HERE.)

Burnside Bib Shorts // Sewing For Women

The Burnside Bibs. Oh, the Burnside Bibs. I've heard it said, that once you make a pair, you're instantly hooked!! And since this was intended as my muslin and I'm proudly wearing it and modeling it for you, I gotta say. That statement isn't wrong!

I purchased my copy of the pattern through Upcraft Club and for the rest of this week, you can can snag it there for 15% off in honor of #sewbibs. No coupon code required!

Burnside Bib Shorts // Sewing For Women

I will admit, that when this pattern was first released, I didn't really see it as something that would suit my style, or even my mom life for that matter. But since I do love fashion, and have seen SO MANY hot mamas (and non-mamas) rocking their Burnside Bibs, I had to see what the hype was about!!

Check out the hashtag (#burnsidebibs) HERE to see what I mean!

And what better time to try it out than during #sewbibs?? 

Burnside Bib Shorts // Sewing For Women

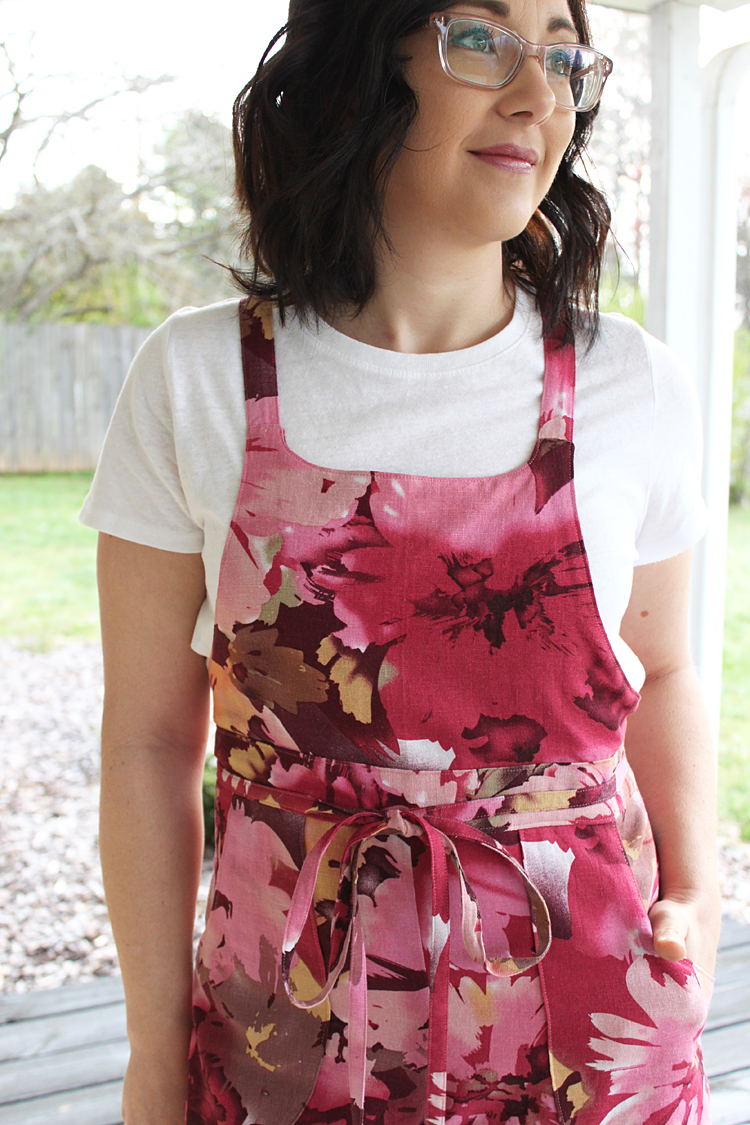
I find the rise in any pants pattern to always be a bit baffling and a game of trial and error for myself. I'm technically petite, I suppose, at 5'3". But regular length pants do usually work for me, especially the ankle length trend that has been around for the past few years. But my torso area is where I mostly struggle. 

I call myself "short-waisted", but I really need to dive into more research to find out what that actually means. I think that yes, I do have a short torso, but the upper half of my torso seems to be shorter in proportion to my lower. The distance below my bust to my belly button is very small. If I flatten my hand against my stomach in that area, the width of my hand pretty much fills up that space. 
Burnside Bib Shorts // Sewing For Women

So that leaves my lower torso, and the distance from (and now we're getting SUPER awkward) my "c" area to my belly button is pretty average. All that to say, that "regular" length pants typically fit me pretty well and hit my waist where they are intended, but then I'm left with a super short upper torso that can make me look and feel frumpy at times. 

Why am I telling you all this??? Well, because the rise on the Burside Bibs seemed shockingly long to me. My measurements span the size chart from a size 8 at the bust and waist, to between a size 4/6 in the hips. Since I had to grade up at the waist, I went with the size 8 rise finished measurement and it is 13 3/4" long. I can tell you with confidence, that is too long for this girl!

Burnside Bib Shorts // Sewing For Women

But how much too long? I was simultaneously working on my Jenny Overall's muslin (coming soon!) as well, and had to shorten that front rise (which is 13") significantly as well, so I settled on shortening this version 1 1/2". I gotta say, it felt like a lot! But it worked out well for me.

I did not change the bib at all, only the pants rise. It did work out well, and is indeed comfortable to wear, but for my next version, I will be adding 1/2" back on the the rise. I think for the style to be as intended this will be pretty close to perfect!

Burnside Bib Shorts // Sewing For Women

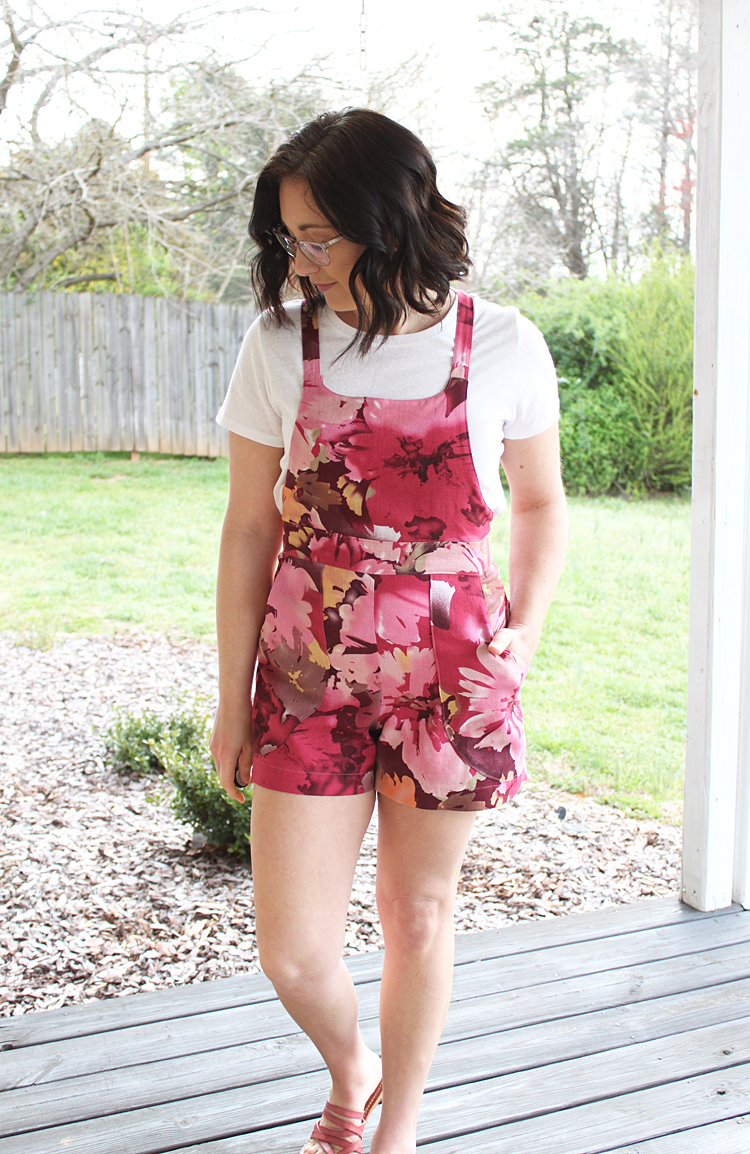
I made Version #1, with the side zip and more fitted back pant. I also included the optional back pockets.

Obviously, I made one pretty big pattern modification and turned these into Burnside Shorts! I did this out of necessity because I didn't have enough of my "muslin" fabric for pants length. I simply cut the inseam at 6 inches and then played with the hem until I liked it! I ended up hemming 1 3/4", for a finished inseam length of 4 1/4".

Burnside Bib Shorts // Sewing For Women

I love the playful vibe of this colorful fabric! It is a linen/rayon blend from Joann's that I grabbed on clearance a few years ago. It is one of my favorite substrates to wear and work with!

Burnside Bib Shorts // Sewing For Women

We are going on a beach vacation soon (YAYAYAY!!!), and these babies will be packed along for sure! And yes, I will be the mama schlepping the giant beach bag with everyone's stuff!

Burnside Bib Shorts // Sewing For Women

I also love how I can choose a couple of different ways to tie up the ties. I love the look of them tied in the front, and this the most recognizable style to me. But tying them in the back really cleans up the look in the front! And I actually really like the exaggerated length of the ties when they are tied up in the back. I know there's a lot going on with that and the pockets that I chose to add, but I'm totally into it!
Burnside Bib Shorts // Sewing For Women

Burnside Bib Shorts // Sewing For Women

Bonus, tying them this way means quicker bathroom breaks since there's no need to re-tie. Just use the side zip and you're good to to!
Burnside Bib Shorts // Sewing For Women

Yes, I am indeed thrilled with my first pair of Burnside Bibs. There is a second pair following hot on it's trail, so you know it really is a good one!

Burnside Bib Shorts // Sewing For Women

Thanks so much for reading!

Happy Sewing!! 

Links: (none are affiliates - I will always make you aware of any sponsored content!)


Fabric: Linen/Rayon blend from Joann's - this one is old, but linked other (lovely!!) options

Shoes: Target
Bag: Target - no longer available - linked to other bags
Corduroy York Pinafore // Sew Bibs

Friday, March 15, 2019

Corduroy York Pinafore // Sew Bibs

Happy Friday!

I am so excited to share with you my first completed make for the #SEWBIBS challenge!! Woo-hoo!! (If you don't know what I'm talking about, see this post HERE)

Corduroy York Pinafore // Sew Bibs

I purchased the York Pinafore pattern during release week and thought that since it seemed like such a quick make I'd get to it immediately. Well, that definitely didn't happen. It seems like it rarely does! :)

Corduroy York Pinafore // Sew Bibs

When Teri asked me if I'd like to co-host a challenge with her, of course I was very excited about it. Then we started brainstorming ideas for what the challenge theme should be and I sort of selfishly suggested we sew overalls and pinafores. Thus, #SEWBIBS was born! And I'm the happiest of them all for the push to sew some of the amazing patterns out there!

Corduroy York Pinafore // Sew Bibs

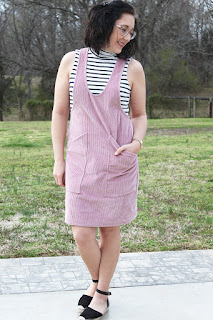
To start the ball rolling, I opted for what I knew would be the most instant gratification and sewed the York Pinafore, which has definitely taken the sewing community by storm. And for good reason!! It's so fluffy!! cute!!

Corduroy York Pinafore // Sew Bibs

It is really a quick sew. Though at one point it may start to feel like you are indeed sewing on miles of bias tape, but I promise, it's only yards. ;) And it really does go quickly!

Corduroy York Pinafore // Sew Bibs

I will admit, that part of my hesitation in tackling this project of my own accord was that I wasn't 100% sure that I would love the cocoon shape on my body. I am the opposite of a pear, with my hips being proportionately the smallest part of me, so I wasn't sure that ADDING volume to that area would work for me.

Corduroy York Pinafore // Sew Bibs

I hemmed and hawed a little bit about which size to cut at the hips, but ended up cutting out a straight size med, which all of my measurements fit into. I then followed Helen's tip and baste fitted the side seams before going too far with things and I'm so glad I did!

When I first put it on as a straight size med, I was definitely not loving it! It did indeed add bulk to my bottom half and I felt like I wasn't seeing me in the mirror. So I kept adding basting lines and more basting lines until I had taken it in to more of a pencil skirt shape. The pencil skirt shape was too tight, but I knew that I could safely cut the side seams down to a size small and go from there.

Corduroy York Pinafore // Sew Bibs

That's exactly what I did, and then attached my pockets and baste fitted once more at a straight size small and it was perfect!! I loved the shape and the way I felt in it so much!

Corduroy York Pinafore // Sew Bibs

And speaking of pockets, you've probably noticed they are not a shape included in the pattern. This was a really simple mod, I just straightened out the round pockets and slimmed + shortened them ever so slightly. They are huge! And so so fun! I got this idea from Tiahna's York that she blogged about HERE.

I did have to make a length adjustment since I'm only 5'3" and the pattern is drafted for a height of 5"6". I took 1 inch of length out of the bodice and split it between the 2 lengthen/shorten lines included. I also shortened the hem length 3/4".

Corduroy York Pinafore // Sew Bibs

I absolutely love this pinafore paired with this fun balloon sleeve top! It's a top that I made by hacking the Lana Top Pattern. It's a total hack job, haha, but I had decent confidence that it would turn out. My drafting skills are pretty limited, so I'm not sure if I can share an actual tutorial with you... We shall see!

The fabric I used for the pinafore is a wide wale non-stretch corduroy in Rose from Stonemountain & Daughter Fabrics. I love this fabric so much! I have limited experience working with corduroy, so I searched the web for some tips and found so many from this awesome community! I especially liked these three posts; 1 // 2 // 3. I found the most interesting thing that in working with it, it really didn't need to be pressed! I feel like that saved so much time in being able to just finger press as I went, especially when applying the bias tape! (I did use my iron to press the bias tape, since I made it from a cute coordinating quilting cotton ;) )

Corduroy York Pinafore // Sew Bibs

The fabric I used for my top is also from Stonemountain & Daughter Fabrics, it is Robert Kaufman Catalina Knit in white and is a very nice and heavy cotton/spandex. It was the perfect weight and body for a light sweatshirt like I was going for!

Stonemountain & Daughter Fabrics is also a sponsor for #SEWBIBS and they have an active discount code through the rest of the month (ends Mar 31st). Use code SEWBIBS15 to get 15% off all fabrics!

I think I'm almost done spilling all the things here now, so I'll leave you with a second way that I styled my York Pinafore. I feel like this second look is much edgier, and will be great for warmer weather!

Corduroy York Pinafore // Sew Bibs

I paired it with a rib-knit Nikko Top, which makes the perfect layering piece under so many things.

Corduroy York Pinafore // Sew Bibs

Corduroy York Pinafore // Sew Bibs

So there you have it! I could not be more excited about my first #sewbibs make and I'm already off on making the next!

Corduroy York Pinafore // Sew Bibs

Thanks for stopping by and happy sewing!
~Heidi

Gathered Shoulder Willamette Shirt // Sewing For Women

Wednesday, March 13, 2019

Gathered Shoulder Willamette Shirt // Sewing For Women

I have another super simple Willamette Shirt modification for you today!

Gathered Shoulder Willamette Shirt // Sewing For Women

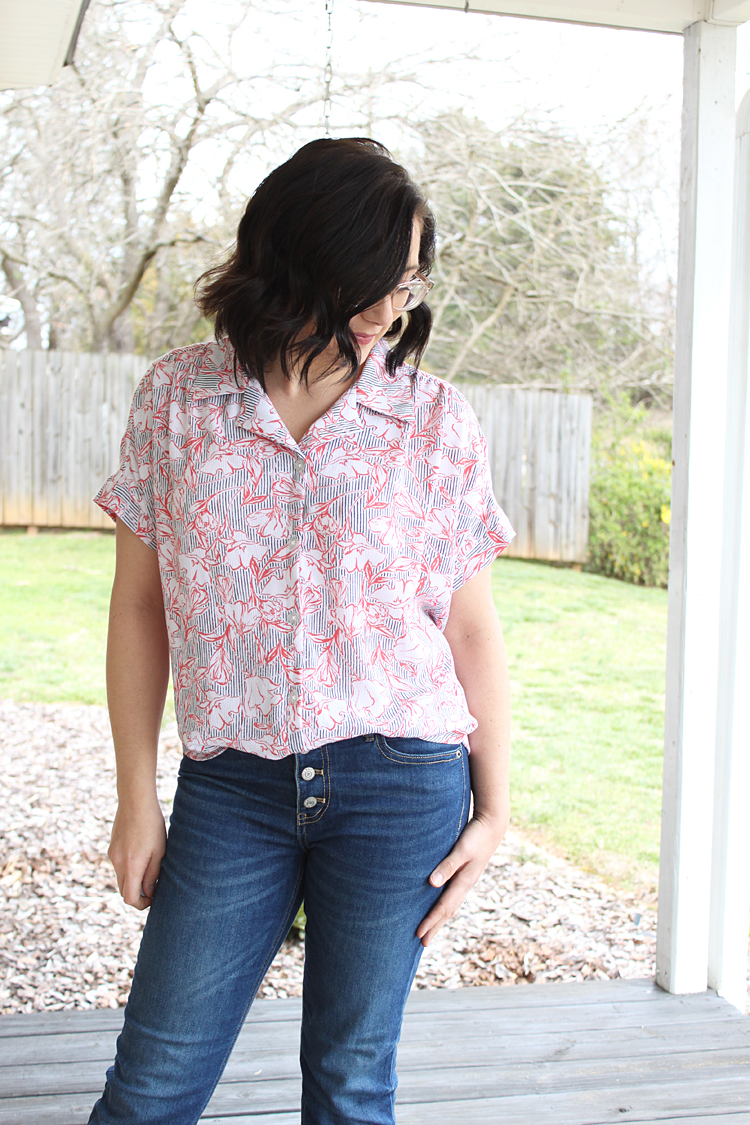
I was of course inspired by another Madewell version of a button-up. The Madewell Central Shirt has a loose slouchy fit, buttons down the front and a gathered detail at the shoulder that I loved and had to recreate.

Free shipping and returns on Madewell Central Cactus Floral Shirt at Nordstrom.com. Subtle gathering at the shoulders brings an ounce of joyful femininity to this soft cotton shirt with relaxed shoulders and colorful blossoms.

This hack required a small amount of altering the paper pattern. I wanted the gathers to be slightly more forward on my shoulder than the original Willamette, so I moved the shoulder seam forward 1 1/2". Apparently Loni of @HavinSewMuchFun and I were on the same wave-length, because just about a week before I was ready to dive into this project, she created a very similar version! She saved me some brain power and even made a tutorial for how to move the shoulder seam forward! You can check that out HERE.

I was going for a less dramatic gathered effect on my version, so instead of splitting and sliding the pattern apart like she did, I used a slash-and-spread method.

Gathered Shoulder Willamette Shirt // Sewing For Women

I picked 3 evenly spaced points across the (lowered) shoulder and cut slashes all the way down to the hemline. Then I spread each slash apart 1", for a total of 3 extra inches of width in the shoulder.

Gathered Shoulder Willamette Shirt // Sewing For Women

When assembling my shirt front, I started my gathers 2 inches from the neckline. The length of my gathered area was 6 inches. An easy way to do this is to mark the gathering area with pins, sew gathering stitches, and then pin the front bodice to the yoke. Start at the end of the sleeve and pin until you reach the gathering point, pin the 2 inches at the neckline and then gather what remains to fit.

Gathered Shoulder Willamette Shirt // Sewing For Women

I also gathered the back instead of making a pleat, I used the same method as the front and gathered the area between the pleat notches.

Gathered Shoulder Willamette Shirt // Sewing For Women

Another modification I made was to put buttons down the entire front of the shirt rather than overlapping and sewing. I just stitched the facing down and used that area as my button placket. I started at the optional button point included in the pattern and sewed 5 buttons and button holes, evenly spaced, down to the bottom.

Gathered Shoulder Willamette Shirt // Sewing For Women

I also shortened the back hem 1 1/2", because I plan to always tie or tuck the front of this shirt and I wanted it to have a little less fabric at the back of the shirt. This created a fairly even hemline, while still having the shirt hem look at the sides.

Gathered Shoulder Willamette Shirt // Sewing For Women

The last thing I changed up was the sleeve cuffs, I simply made them half the length of the pattern piece and then stitched it to the sleeve to finish it off. This basically gives the same look as the original pattern, but the cuff is not folded up.

Gathered Shoulder Willamette Shirt // Sewing For Women

The fabric I used for this shirt is a nice lightweight rayon crepe that I spied at Joann Stores. It has the perfect drape and flowiness for this type of shirt! It shows the gathers really well, and hangs loosely and beautifully around the body. It will be so perfect for a hot summer, I cannot wait for it to heat up so I can get some proper wear out of it!

Gathered Shoulder Willamette Shirt // Sewing For Women

The last thing I will note is that for all of my Willamette Shirts I've made so far, I have sized down one size from where my measurements place me on the size chart. I'm so pleased with the fit! It's loose without being super oversized and also not too small for this type of shirt. For reference, I make a size 6 (no changes), my measurements currently are; B: 36, W: 29, H: 37.25.

Gathered Shoulder Willamette Shirt // Sewing For Women

And that's it for my fourth, and in no way final, Willamette Shirt! You can see my other tops here; 1 - Tie Front Blue Stripe, 2 - Tie Front Cotton Hemp, 3 - Button Back Hack.

Gathered Shoulder Willamette Shirt // Sewing For Women

And since I've had some questions already, to tie the bottom, I simply unbutton the bottom button and tie the shirt tails together to create this look! Easy peasy!

Gathered Shoulder Willamette Shirt // Sewing For Women

Gathered Shoulder Willamette Shirt // Sewing For Women

Gathered Shoulder Willamette Shirt // Sewing For Women

If this hasn't convinced you that you need the Willamette Shirt Pattern in your life, I'm not sure what else I can do! ;)

Thanks so much for stopping by and Happy Sewing!!  xo ~ Heidi

Sew Bibs // Ready-To-Wear Inspiration

Wednesday, March 6, 2019


It's time for #SewBibs!!

*Links to everything I'm mentioning are included throughout this post - not affiliate*

I'm so very excited to be co-hosting this fun sewing challenge with 3 of my sewing buddies, Teri, Meg, and Jessamy!

All of the details of the challenge, including discounts, giveaways and prizes are HERE in Teri's introductory blog post. The sponsors we reached out to were amazing, there are so many goodies for you all!

On Monday, Meg shared a blog post round-up of over 30 (!) overalls and dungarees patterns. Coming Friday, on Teri's blog will be a round-up of Pinafore patterns and Monday, on Jessamy's blog will be inspiration from the community for sewing all the bibs!

We've got a full schedule planned for the next 6 weeks, so you may want to consider following all four of us on Instagram so you don't miss a thing! And if you decide to participate, be sure to use the hashtag #sewbibs on your public profile so we can see you. ;)

I'm here today to share with you one of my favorite things. Inspiration for sewing our own versions of Ready-To-Wear (RTW) garments. Why do I love RTW inspiration so much? Well, I have ALWAYS loved clothes and shopping. As an adult I found my love for making was a strong urge that I had to fulfill and garment sewing is that fulfilling outlet. So while I still love to shop, I've found that combining it with my passion for sewing is the best of both worlds.


You can fairly often find me in a dressing room with my almost 4 year old (who is wonderful and lets me do this), trying on and inspecting clothes. I find it's a great way to put together outfits, get styling ideas, and also try out new styles to see if it's something I want to commit a lot of time to and sew! Oh. And then my sewing list grows and grows and grows. Lol!

Another thing I love to do is to browse Pinterest AND my favorite retailers for inspiration. My Pinterest boards are a little extensive! But lots of fun to look through. :) You can find me HERE.

Okay, enough chat! Let's get to the inspiration!

First up is what initially pops into my head when I think of "bibs", or overalls, dungarees, or whatever you might call them!

{1 // 2 // 3 // 4}

On the top we have the very traditional style of overalls, and these could easily be recreated with the Mila Dungarees pattern or McCall's M7547.

In the second row are some looser fitting and relaxed overalls with a great casual vibe. These would be perfect made in linen or rayon twill. I would suggest the Ronja Dungarees or Sara Dungarees to recreate these looks.

{1 // 2}

I'm loving both of the above looks! These are definitely a pair of Burnside Bibs and Simplicity 8447 Vintage Overalls.

{1 // 2 // 3 // 4}

Let's not neglect the amazing thing that is shortalls!! I can't believe I don't have a pair of these hanging out in my closet yet, but that will definitely change this summer!!

Check the #sewbibs hashtag to see some great pairs that have already shown up! For some of the patterns this would be as simple as cutting the pattern to be shorts length, but there are patterns such as M7547 and the Jenny Overalls that include a shorts option as well!

{1 // 2 // 3 // 4}

We can't leave out pinafores. Or jumpers. Whatever you call them, they are taking fashion by storm. In the collage above I am without a doubt seeing York Pinafores and a Burnside Bib Dress; aka, Simplicity 8641. Lastly is a hack of any number of simple bib pinafore patterns, you could even change up the neckline shape of the York Pinafore to get this look!

{1 // 2 // 3 // 4 // 5 // 6}

See?? SO MANY amazing pinafores out there!! The top left is probably my favorite and I think it would be fun to hack a traditional overalls pattern into the skirt as shown! The bottom left deserves a look too, it's made in suede fabric. So cool!

{1 // 2 // 3 // 4}

Not only are there so many styles to explore, the fabric possibilities are endless! A great floral twill, a hefty tweed, how about a total 90s vibe daisy print?! And I LOVE the handdrawn stripes look along with a high contrast black & white. Have some fun with your fabric! Bibs aren't just for solids and denim!

{1 // 2 // 3 // 4}

The last thing I wanted to point out was the fun details that can be added to any type of bibs you might like to sew. I am crazy about the exposed side zipper in place of buttons. I'm loving the shorter pinafore with a yoke detail, the pockets and even the way the straps are made. All of these details can very easily be incorporated into your handmade garments for a touch that is unique to whatever you can dream up for your garment! And lastly, how about making a midi-length pinafore with a high back vent? Love.

Thanks so much for stopping by, and I hope you feel inspired to make a pair a bibs, and not only that, but to make them your own! ~ Happy Sewing!!
© Handmade Frenzy • Theme by Maira G.