SLIDER

jumpsuit
Showing posts with label jumpsuit. Show all posts

Sunday Romper // Sewing For Women

Monday, June 8, 2020
Sunday Romper // Sewing For Women // Love Notions Patterns
This post contains *disclosed* affiliate links. All opinions expressed are honest and my own. If you make a purchase using the links, I make a small commission which helps support this blog. So, thank you!!

Happy Monday, friends!!

Today is the exciting release of the brand new Love Notions pattern, the Sunday Romper!! {aff link}

Sunday Romper // Sewing For Women // Love Notions Patterns

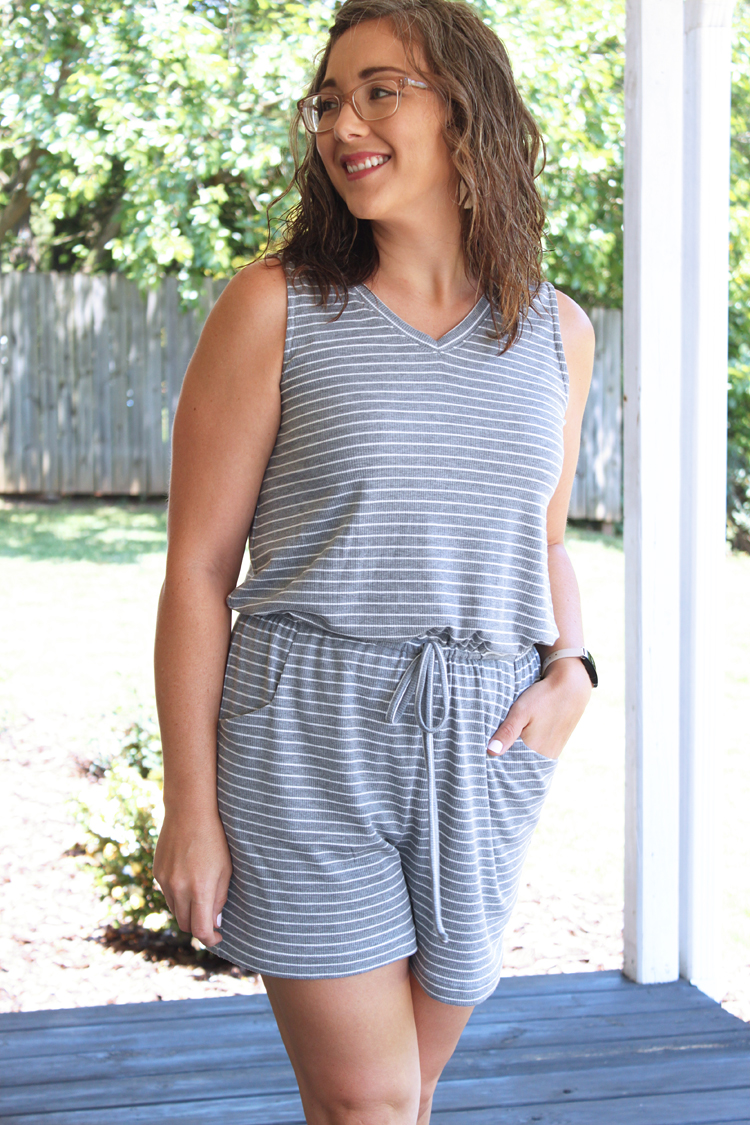
This romper features five different bottom options, and two top options, which can be combined to create an endless wardrobe of one-piece, grab and go, staples for easy dressing!

Sunday Romper // Sewing For Women // Love Notions Patterns

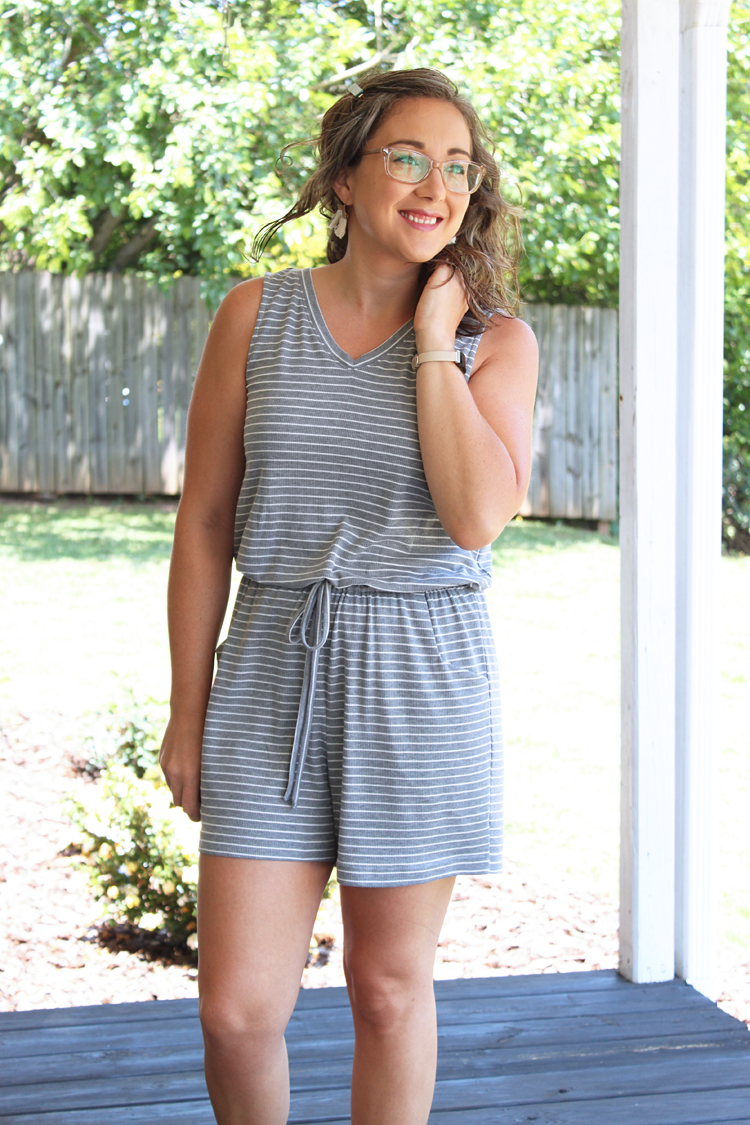
The bottom views include; shorts, pants, cropped pants, knee length skirt and maxi/ankle length skirt. The top views feature a full coverage tank view or dolman sleeves, and both include a v-neck in the front as well as in the back.

Sunday Romper // Sewing For Women // Love Notions Patterns

I personally love the back v-neck as it dips down a little lower than the front for a flattering cut, but can be worn with a regular bra with no issues at all!

Sunday Romper // Sewing For Women // Love Notions Patterns

There are no closures to the pattern, putting it on involves stepping in through the neck and pulling it on! When I saw how high the neckline of the pattern was, I did wonder how well this method of getting in to it would work, but I'm really happy to say there are no problems! It's really very easy!

Sunday Romper // Sewing For Women // Love Notions Patterns

The waist of the romper includes a casing for 1/2" elastic, as well as a drawstring option if you so desire. I'm always up for a good drawstring waist, and I absolutely love the self-fabric drawstring I made to go with this one. It really added that perfect finishing touch!

Sunday Romper // Sewing For Women // Love Notions Patterns

Pockets are optional on the pattern, but come on... Are pockets ever really optional?! 😉

Choosing fabric for the Sunday Romper is really fun! Recommended knits are those with good drape and decent stretch with good recovery. Stretch is not essential for the bottoms however, so don't leave out some good print and fabric, mixing and matching!

Sunday Romper // Sewing For Women // Love Notions Patterns

Depending on your fabric choices, you could create a one-piece outfit that looks like separates! You can also play around with coordinating accents in the bindings and drawstring. With so many fun pattern pieces to play with, you can dream up combinations to your heart's content!
Sunday Romper // Sewing For Women // Love Notions Patterns

With all those options, you can even use this pattern as a great stash buster! Do you only have a yard of a lightweight woven? A yard of a drapey knit you're not sure what you want to make with? Put them together and make a Sunday Romper!!

Sunday Romper // Sewing For Women // Love Notions Patterns

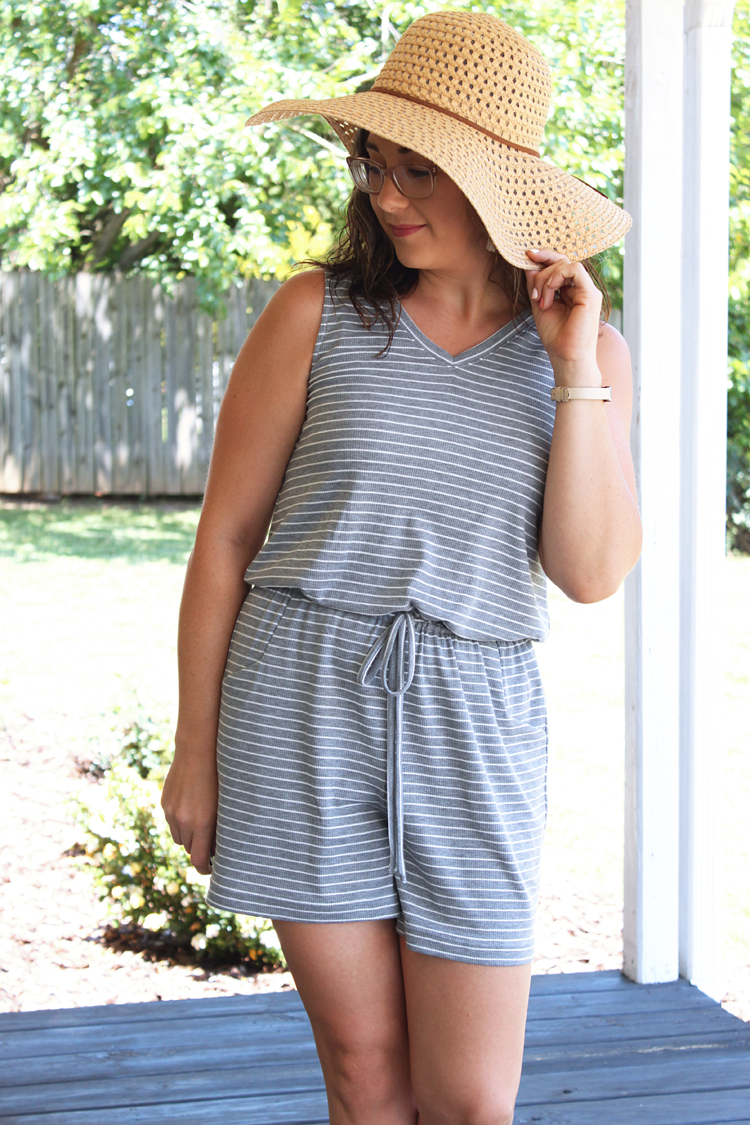
I went pretty basic with my fabric choice because I simply loved the idea of a neutral romper that could be played up with some fun accessories or just keep it simple for a super easy and classic outfit that takes virtually no thought!

Sunday Romper // Sewing For Women // Love Notions Patterns

This year I have been digging deep into the recesses of my extensive fabric stash and have been sewing up some absolute gems with treasures (aka fabric) that I have collected.

Sunday Romper // Sewing For Women // Love Notions Patterns

I consider this romper to be just such a gem! I'm not entirely sure where this particular rib knit is from, but I remember purchasing it with just a super basic cardigan in mind. I'm so happy I had the fore-site to buy 2 yards because I think turning it into this romper was so much more fun than a cardigan!!!

Sunday Romper // Sewing For Women // Love Notions Patterns

Don't get me wrong, I don't think you can really ever have too many cardigans, but I don't have that many fabulous rompers in my wardrobe, YET. 😄 (Hint, this pattern will change that!)

Moving on, I wanted to talk a bit about the sewing and sizing of this pattern. Once I had the pieces all cut and the stripes matched up, the sewing went so fast! I couldn't believe how quickly it really came together!

Sunday Romper // Sewing For Women // Love Notions Patterns

You can have the main romper sewn up and able to try on for fit in what feels like no time. Since the neckline is two v-necks, it's a little more time consuming than the rest of it, but if you've sewn v-necks in the past, you know it's really not that scary! I really had fun with making this whole thing.

Sunday Romper // Sewing For Women // Love Notions Patterns

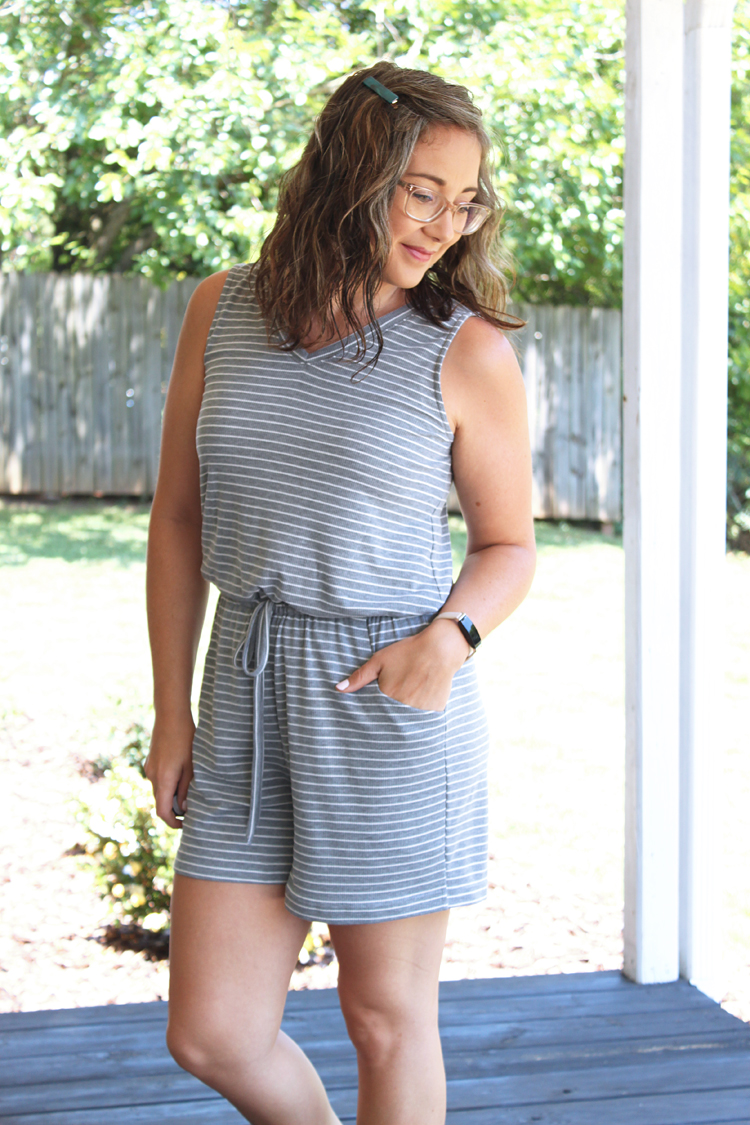
The armscyes of the tank are finished with binding from the main fabric, and hidden on the inside. I absolutely love the clean finish of this! I think the whole romper has such a lovely, polished look.
Sunday Romper // Sewing For Women // Love Notions Patterns

Because the top and bottom are separate, it is very easy to blend sizes! I think most of us fall into the category of spanning more than one size on a pattern. For myself, I spanned 3 sizes and was able to blend them together seamlessly! I made a size 10 upper bust, size 8 full bust, graded to a 6 in the bottoms. My waist was also technically a size 10, but because there is plenty of ease at the waist, and it's pulled in with the elastic, I was able to sew a straight size 6 from the waist down.

Sunday Romper // Sewing For Women // Love Notions Patterns

This was actually the second romper I made during the testing process and the first one I had graded from a size 8 waist to 6 hips and actually found the fit to be better and more comfortable as a straight size 6. When I blended the two sizes, I found the upper part of the shorts to be too "blousey". So if your waist falls into a different size than your hips or bust, don't worry about it and choose accordingly.
Sunday Romper // Sewing For Women // Love Notions Patterns

I chose to test my personal favorite option combo of this pattern, the tank + shorts, but be sure to check out the listing HERE {aff link} for a look at all of the other fabulous combos and Sunday Rompers that the testers made!

Oh. Did I mention there is a GIRLS version {aff link} of this pattern, too!?! OHHHH, the mommy-and-me looks have me all 😍😍😍. I can't wait to sew one up for my little mini-me!


Sunday Romper // Sewing For Women // Love Notions Patterns

Thanks for stopping by, friends!!

Greer Jumpsuit // Sewing For Women

Thursday, May 7, 2020

Greer Jumpsuit // Sewing For Women

This post contains *disclosed* affiliate links. All opinions expressed are honest and my own. If you make a purchase using the links, I make a small commission which helps support this blog. So, thank you!!

Hi friends!

Today is all about the Greer Jumpsuit!! {aff link} This is the brand new pattern from Hey June, and it's a crowd pleaser, FOR SURE.

Loose fitting, easy-to-wear jumpsuits are all the rage right now, and Adrianna nailed that style in this pattern.

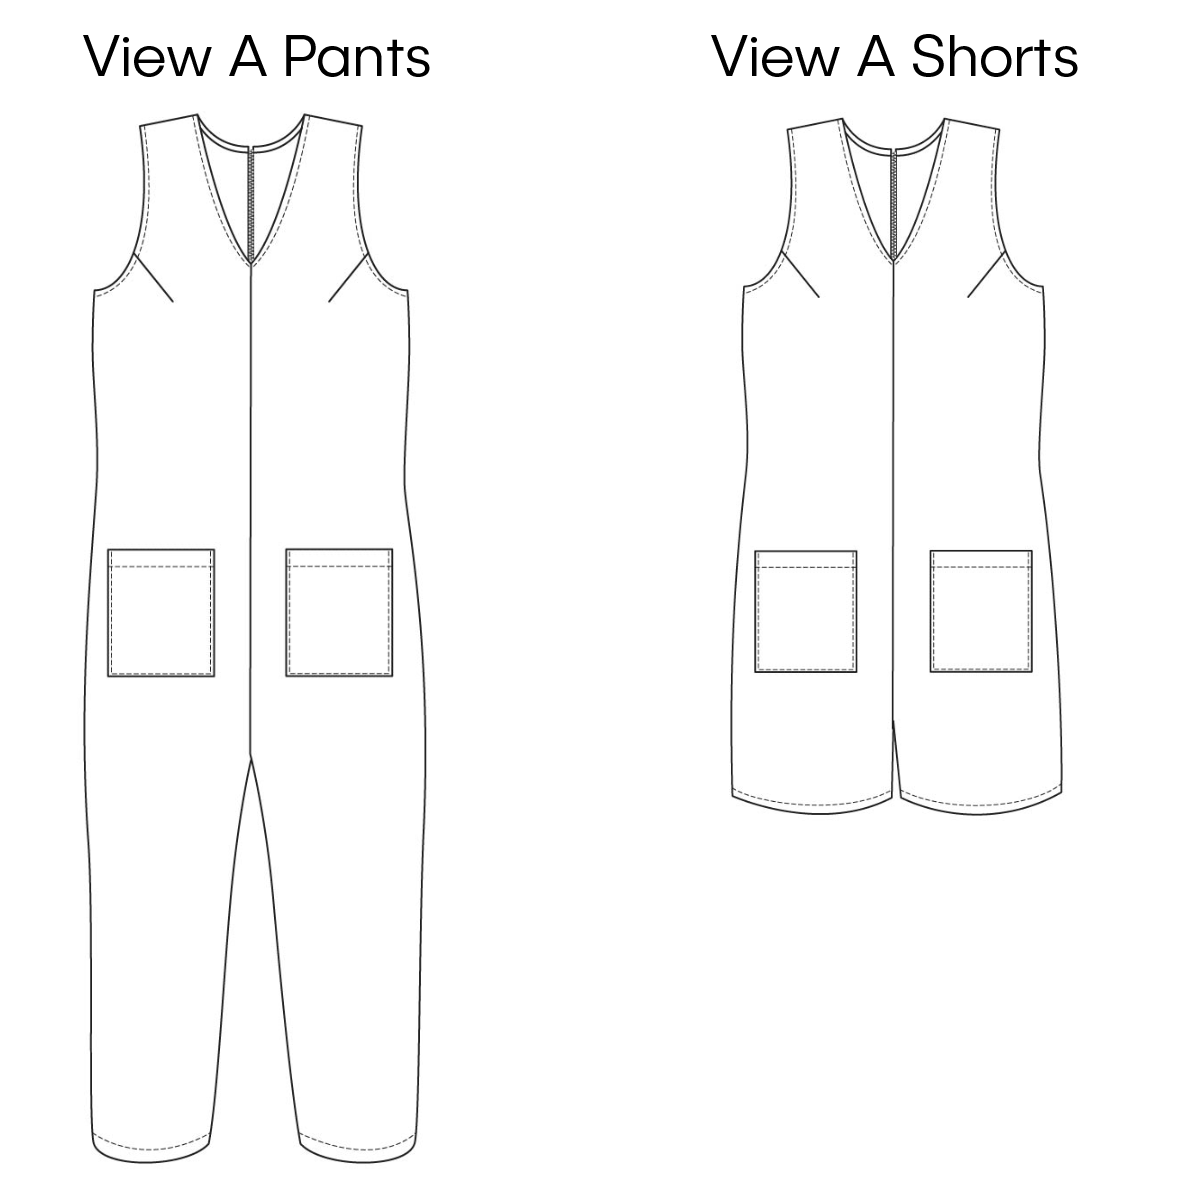
The pattern includes two views, with two leg lengths for each view. View A is a sleeveless, full body jumpsuit with a zipper in the back and a v-neck front. Choose to layer over a tee, or wear on it own!


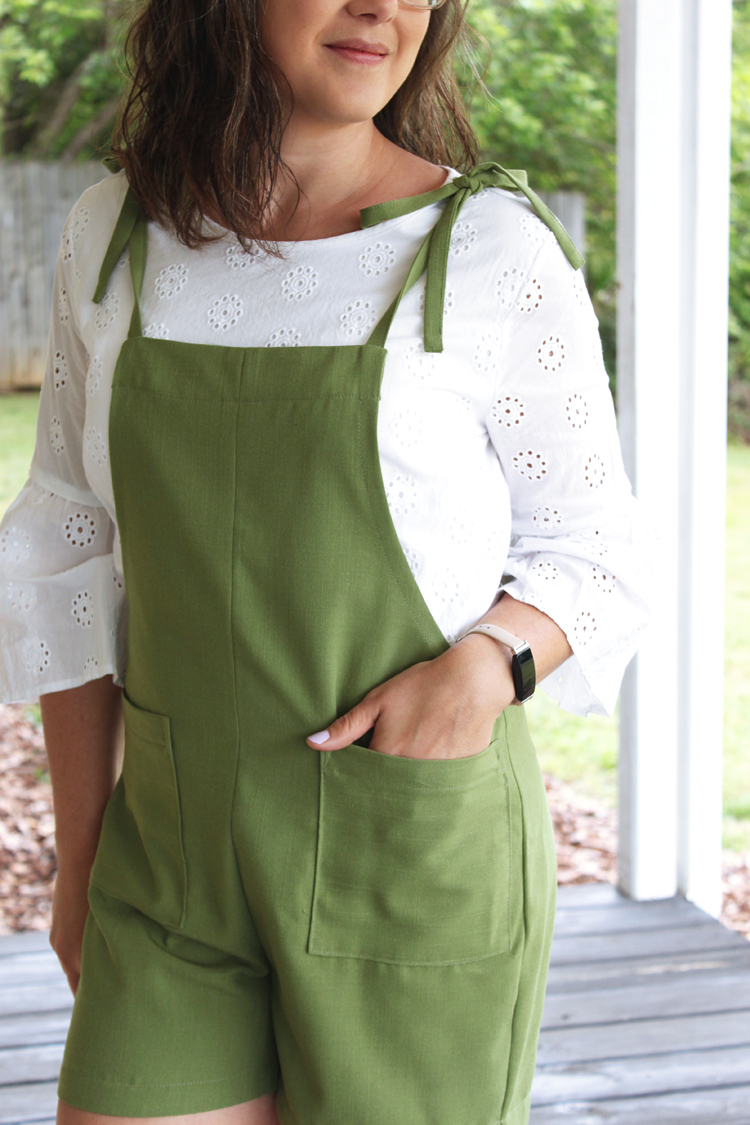
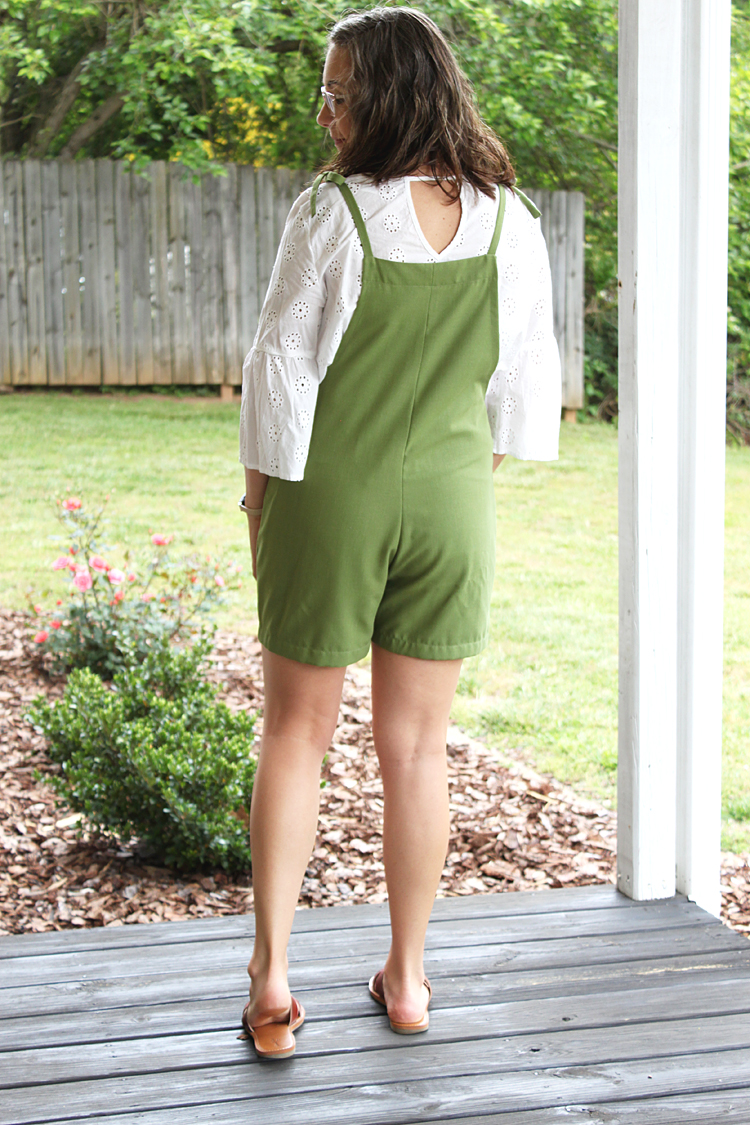
View B is the view I sewed and is a bib-front, loose fitting jumpsuit that closes with ties at the shoulders and is intended for layering.

Greer Jumpsuit // Sewing For Women

Both views include either shorts or pants options, and the pants can be sewn with or without elastic at the ankles for a cute jogger-style cuff!

Greer Jumpsuit // Sewing For Women

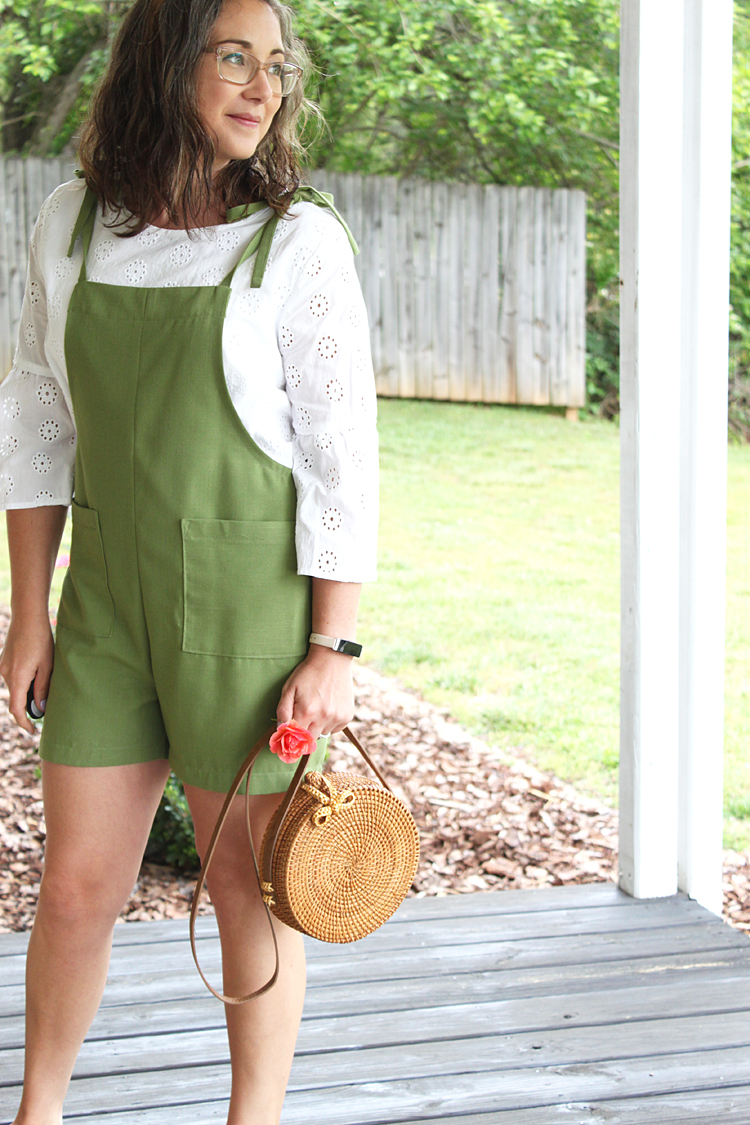
I sewed a size 6, based on my measurements of; B:36.5", W:29.5", H:38". The fit is absolutely spot on! While I LOVE this style of jumpsuit, I honestly wasn't completely sure how much I would love it on myself. Well, I was blown away. After having some fun styling it, I am hooked!!!

Greer Jumpsuit // Sewing For Women

I'll also admit, that getting in and out of jumpsuits (hello bathroom breaks) isn't always my most favorite thing and keeps me from wearing them a ton, this one is different! All I need to so is slide the straps off of my shoulders (still tied) and ta-da! Lol. What a weird thing to talk about on the internet. But seriously. It's the easiest on and off jumpsuit I have worn yet!

Greer Jumpsuit // Sewing For Women

The sewing of this view was also really quick! Adrianna's binding method makes it faster than the traditional way that I typically use, so don't let all the finishing required, deter you!

Greer Jumpsuit // Sewing For Women

The patch pockets are optional, of course, and you could place them on the back for a different look as well! I like having a back pocket to put my phone in, so my next version I may play around with putting them on both the front and the back, because I really like the look of having them on the front, too.

Greer Jumpsuit // Sewing For Women

I used a fabric from my stash for this version, and to be completely honest, I thought this was going be "just a muslin". I only had about a yard, but with some creative cutting I was able to get all of the pieces from that small piece of fabric! I used a different fabric for the bias binding on the inside, but the green was a very similar color, so it's not even obvious that it isn't the same thing!

Greer Jumpsuit // Sewing For Women

After sewing it up most of the way and trying it on, the fit was so good, and the fabric drape was so lovely that I finished it, and it became my final version! I'm in love with the color. I had originally planned to make a pair of shorts with it, but it was destined to become something greater than that. 😉

Greer Jumpsuit // Sewing For Women

The fabric is from Joann and is from the Amaretto Linen Look collection, I'll link the current color options HERE. {aff link}

Greer Jumpsuit // Sewing For Women

Are you a jumpsuit lover? I know they're not for everyone, but I sure am catching the fever with this one!!

Greer Jumpsuit // Sewing For Women

LINKS:

Pattern: Greer Jumpsuit - Hey June Handmade {aff link}

Fabric: Amaretto Linen Look - Joann {aff link}


August Project Round-up // Sewing For Women

Monday, September 10, 2018


August 2018 was one of my very favorite sewing months ever. I feel like I made so many staple wardrobe pieces and they have already been worn non-stop! I decided that it really needed it's own round-up post.


First up; I made a pair of Blackwood Cardigans.

This pattern is an ABSOLUTE staple in my wardrobe! It's a cozy layer that is practical, but the hip-length makes it stylish and helps me feel put together, no matter what I throw it on top of.

I batch sewed the cardigans, so they were finished at the same time. I made the same slight fit alterations to both. I shortened the bodice by 1 inch, and the hem band by 1 inch as well. Next time, I will take an inch out of the sleeve length as well.

This dreamy, creamy 1x1 rib knit is from Imagine Gnats, and is blogged HERE.

Outfit: Blackwood Cardigan; Tank = Target; Lander Shorts

The next one is made up in a textured stripe knit in white, also from Imagine Gnats, click HERE for the fabric. This knit doesn't have the same amount of recovery as the 1x1 rib, and I like the slouchier fit that it has. However, the sleeves ended up way too long. I still need to take a couple of inches off the sleeve length and re-attach the cuff.


Outfit: Blackwood Cardigan; Union St Tee, blogged HERE; Morgan Jeans, blogged HERE

I also snagged some Olive Green Cone Mills Denim at the beginning of the month, and even though it wasn't in the plans, I carved out some time to sew up a pair of Lander Shorts from it, because... !!!!!

If it were socially acceptable to wear them every day, I would definitely do it this fall! 😄 Click HERE to read the blog post about them.


I was into sewing pairs this month. I sewed a pair of Willamette Tops next.


I have had this pattern since the release and just never got around to sewing it. I'm very much regretting my procrastination because I missed out on so much goodness for so long!

This blue stripe version was my test round of the pattern. It turned out perfect and I made no additional changes to the second version!


The fabric is a lightweight cotton shirting from Joann's, and the button is from my stash.


The second is made in hemp/organic cotton, available at Imagine Gnats, all the fit and pattern alteration details are blogged HERE.


Whew! There's still more!!

Up next is my very favorite make, probably ever. I made a Fringe Dress with a Wrap Front Hack, and blogged the process and tutorial over at Chalk and Notch. Make sure to head HERE to read the post!


Lastly, I made another pattern hack. See? I was really into the pairs this month!


This is my jumpsuit sewn from absolutely incredible Italian linen. You can read all the information HERE!


And there they are! I feel like they create an unintentional little capsule wardrobe as a bonus! They've all been hanging on this rack, one-by-one, as they came off the machines. I wear them and just put them right back, because I'm enjoying the eye candy for now!

Stay tuned for September's makes, because there is quite a line-up coming this month too!

Link Round-up:

Blackwood Cardigan
Union St Tee
Morgan Jeans
Lander Shorts
Willamette Shirt
Wrap Front Fringe Dress
DIY Jumpsuit

DIY Linen Jumpsuit // Marcella Romano Blog Tour

Tuesday, September 4, 2018

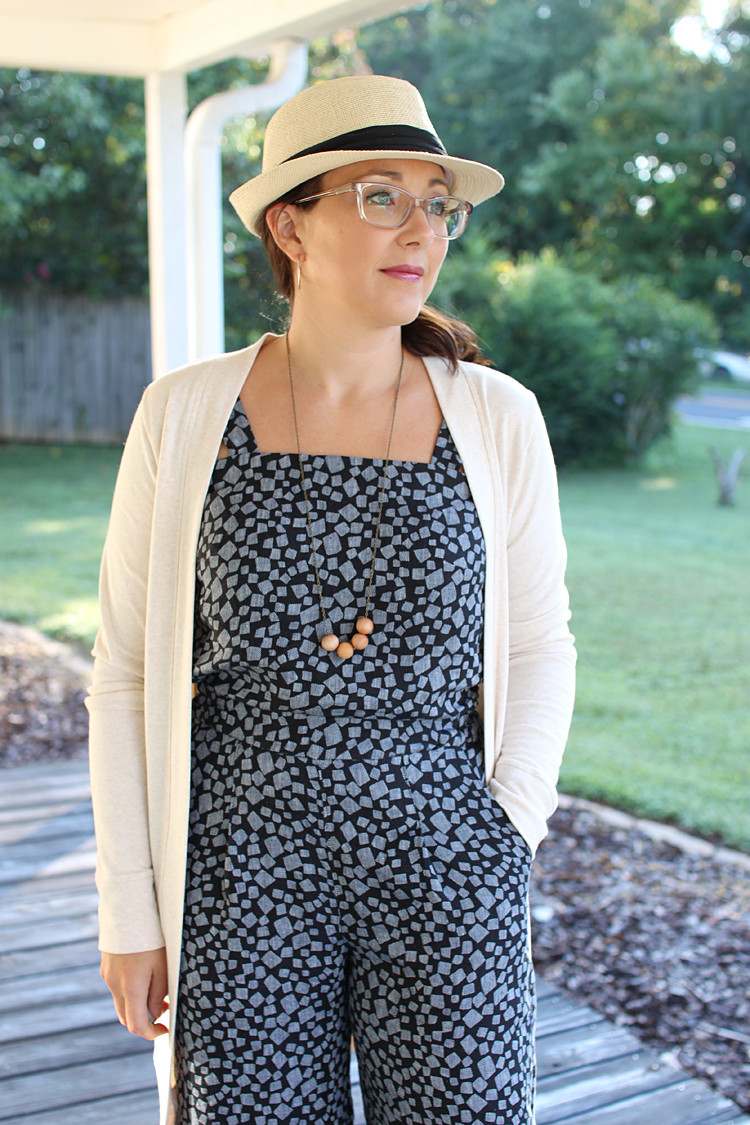
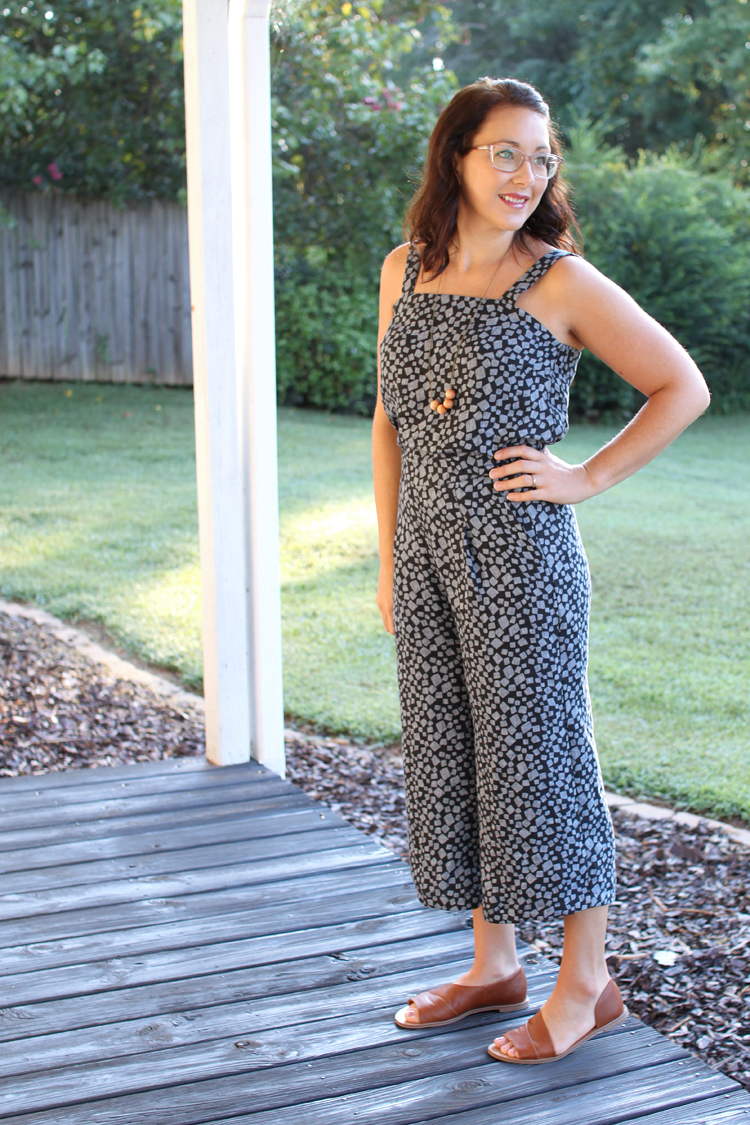
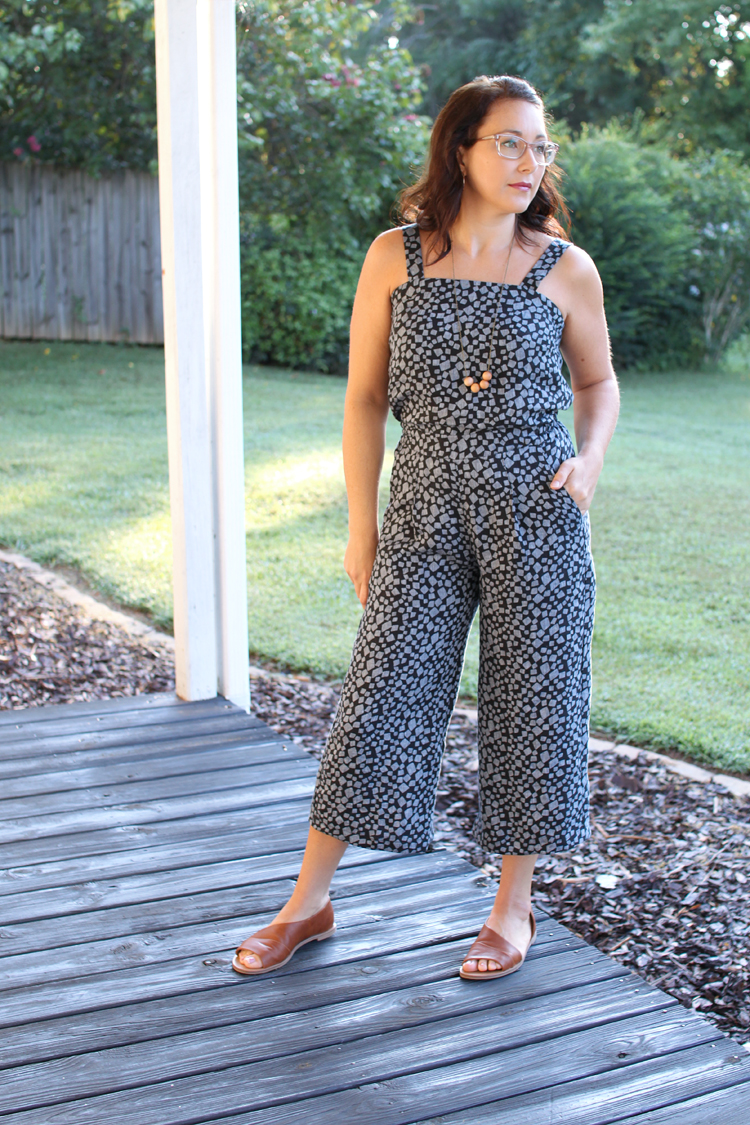
DIY Linen Jumpsuit // Sewing For Women

Hi friends!!

I am honored to be a part of the Marcella Romano Blog Tour today. Marcella Romano is a tiny fabric and fashion company in Italy. They have a beautiful selection of amazing, quality fabrics in bold colors and beautiful textures. They also offer a small collection of unique handmade garments for sale.


MARCELLA ROMANO BLOG TOUR SEPTEMBER 3rd - SEPTEMBER 6th 2018

Myself, along with the other bloggers on the tour, all independently chose fabrics to work with and each one chose a different print and/or substrate. The makes on this tour are STUNNING! So make sure you check out each post throughout the week!

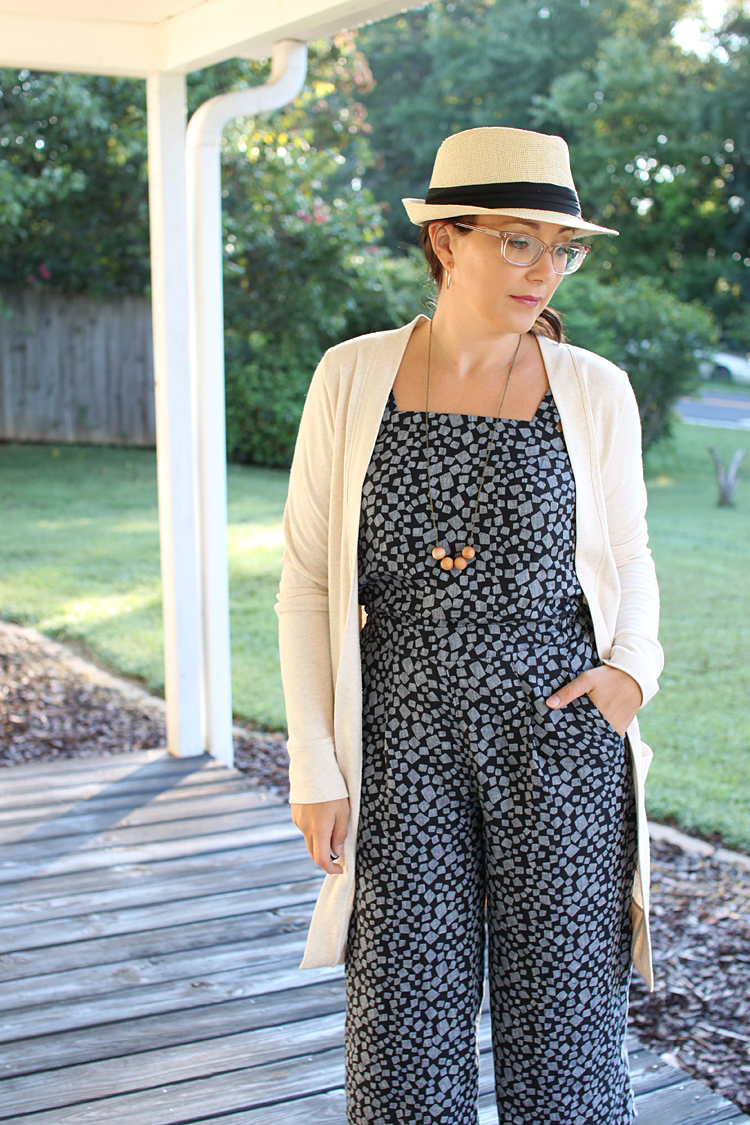
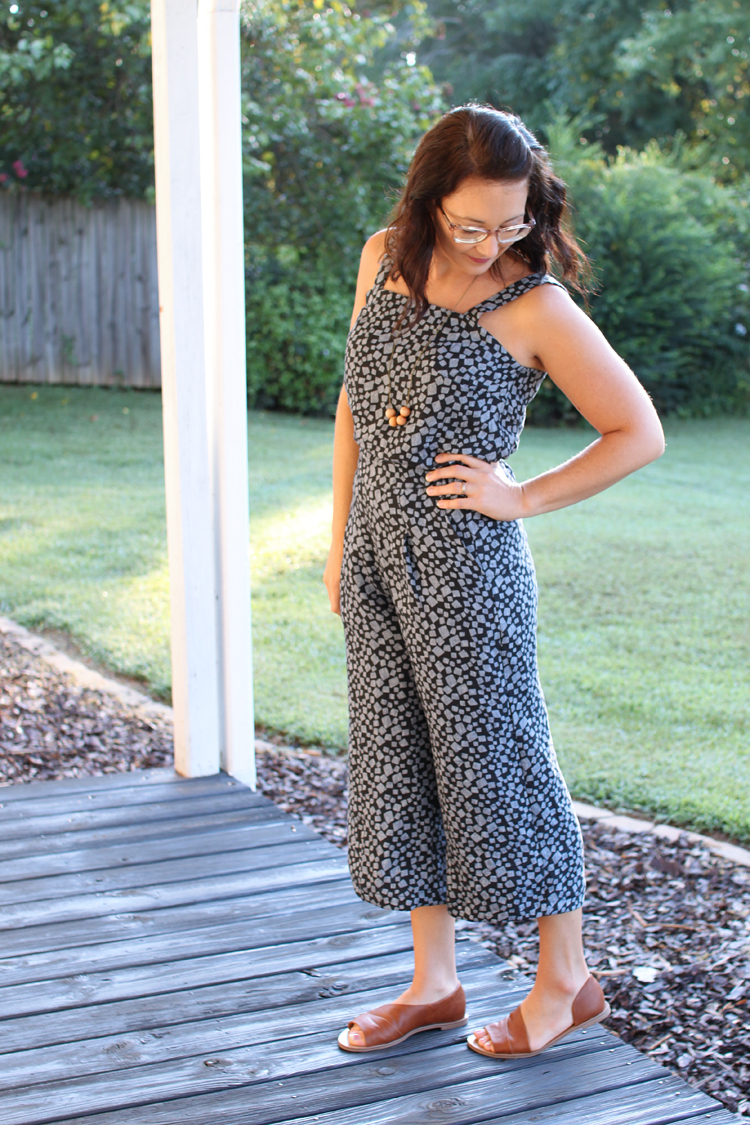
I chose this beautiful 100% linen fabric called Little Square Black and White Collection. The fabric was soft and lovely when it arrived in my mailbox, but after a pre-wash and dry, it became even softer!

DIY Linen Jumpsuit // Sewing For Women

This fabric is stellar quality and the drape and texture is perfection. The more I wear it, the better it molds to the right shape and becomes even more comfy!

DIY Linen Jumpsuit // Sewing For Women

I debated far too long about what I wanted to make from this fabric. How could I not?! I wanted it to be something that would showcase the fabric in the best way possible, and also something that I would love to wear.

DIY Linen Jumpsuit // Sewing For Women

I finally settled on a jumpsuit! I had a pretty specific picture in my head of what I wanted it to look like. Of course, I couldn't find a pattern just like it! So I did what any determined sewist would do, and made it work. ;)

DIY Linen Jumpsuit // Sewing For Women

I chose to mash two patterns together; and used the top of the Marigold Jumpsuit, by Tilly and the Buttons, combined with the Emerson Crop Pants by True Bias.

DIY Linen Jumpsuit // Sewing For Women

I didn't write a tutorial because I ran into some hiccups along the way, but I'll walk you through the basic steps and give some tips that may help, should you want to try it yourself.

First of all, I modified the Marigold Jumpsuit to have a straight neckline, rather than the sweetheart neckline design included in the pattern. This is a very straight forward modification, and you'll need to make the same adjustment to the front facing piece.

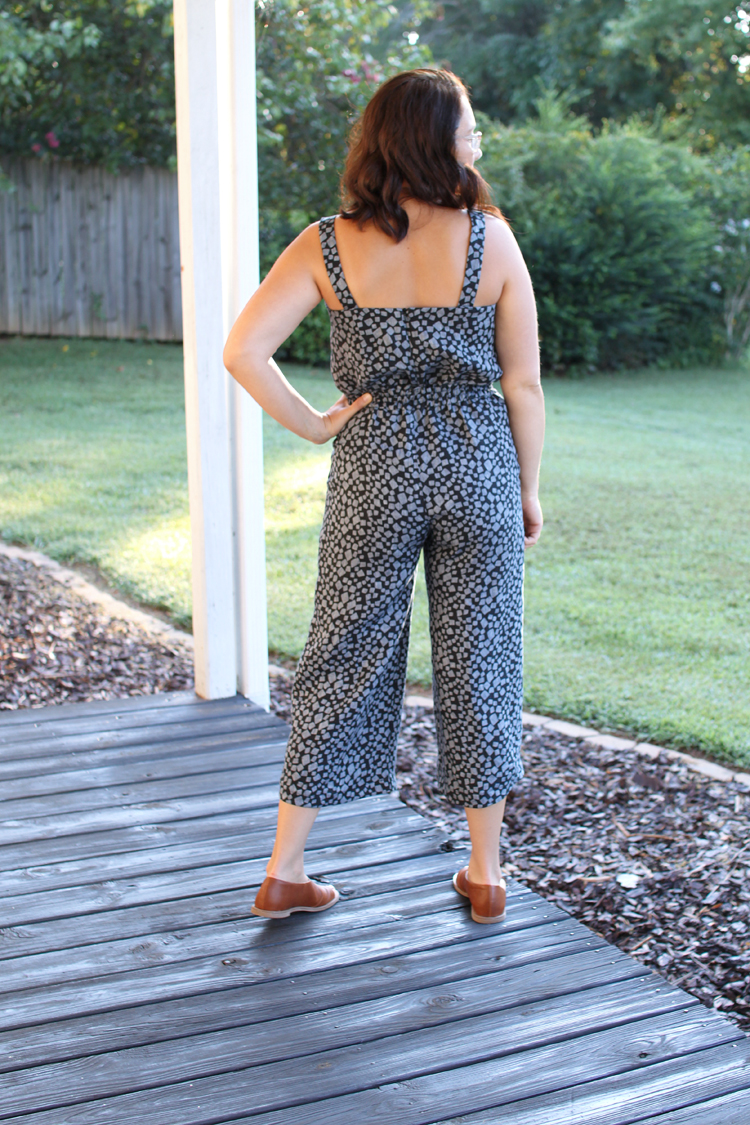
The second modification I made was to insert the zipper into the center back instead of the side seam. This was as simple as cutting the back bodice in two pieces rather than on the fold and including a 3/8" seam allowance for the zipper.

Lastly, I slimmed the straps by 1 inch total, taking 1 inch from each side of the pattern piece.

DIY Linen Jumpsuit // Sewing For Women

I sewed the Marigold exactly as per the pattern, making no adjustments to the sizing. I found the sizing to be spot on, and the bust darts hit in exactly the right spot as well.

Next I cut out my Emerson Crop Pants, adding 1 1/2 inches to the rise. Here's where a tip comes in. As I raised the height of the rise, I forgot to make sure that the waist didn't continue to taper in more at the top. Because of this, I can juuuuust pull this up over my hips. Oops!!! But also, because of this, once it's on, this jumpsuit fits like a GLOVE on the bottom half of me. And I don't hate that. ;)
DIY Linen Jumpsuit // Sewing For Women

Even with my near miss at being able to pull the jumpsuit on, I have no trouble at all sitting and bending over, so I'm pretty happy about that as well!

DIY Linen Jumpsuit // Sewing For Women

Attaching the top to the pants is where I ran into the most difficulties. And it was definitely a make-it-work-as-you-go sort of project. In the end it all worked out fantastic, so I'm just going to stick with that memory, and forget the rest. Haha!

The problems were mainly just my errors, since there is a lot of fabric going on when sandwiching both the top and the bottoms between the waistband, and things were getting stitched that weren't supposed to be stitched. There was also an issue where the seam pulled apart because I graded too closely. A rookie move when working with linen!!

No modifications were needed to attach the waistband to the top, and if I make it again, I will just double check the size of my waistband before sewing it all together. The jumpsuit top needed to be gathered just slightly into the pants waistband to make things fit, but had I made the waistband the correct size, things would have fit even better.

DIY Linen Jumpsuit // Sewing For Women

I changed up the pleats from the Emersons to be just one big pleat and pointing out toward the hip, then I sewed it down 2 1/2" from the top. This was a design choice, because I like the sleek look it produced. I had played around with gathers in front rather than pleats, but that look was not something I was happy with at all.

DIY Linen Jumpsuit // Sewing For Women

After all that sewing, I was so excited to play around with styling! I was waiting on a pair of mules to come in the mail, but they didn't arrive in time, so I styled it with these fun sandals. I really like the look for summer!

DIY Linen Jumpsuit // Sewing For Women

And since we are heading into fall, I also paired it with a Blackwood Cardigan and now I just want it to be cooler already!

DIY Linen Jumpsuit // Sewing For Women

The necklace is also a very simple me-made, and I just absolutely love how it looks with this outfit!

So there you have it! My latest make, and I love how it pairs with some other basic me-mades already in my wardrobe. I can't wait to wear it throughout the rest of the summer and this fall!

DIY Linen Jumpsuit // Sewing For Women

Here are the links for the other ladies on the tour again, please be sure to visit them and share some love!

MARCELLA ROMANO BLOG TOUR SEPTEMBER 3rd - SEPTEMBER 6th 2018

Outfit Details:

Fabric: Little Square Black and White Collection (100% Linen) by Marcella Romano

Patterns used for Jumpsuit:

Necklace: Me-made

Sandals: Target
Hat: Target (similar)
Glasses: Warby Parker

*This post does not contain affiliate links. The fabric was given to me in return for an honest review. All opinions expressed are my own. The patterns were purchased by me.*
© Handmade Frenzy • Theme by Maira G.