SLIDER

fabric scraps
Showing posts with label fabric scraps. Show all posts

All You Need Jammies - Gathered Top // Sewing For Girls

Wednesday, December 18, 2019

All You Need Jammies - Gathered Top // Sewing For Girls

Hi friends!

Today I'm sharing with you a quick, cute, scrap-busting project I made recently for my daughter.

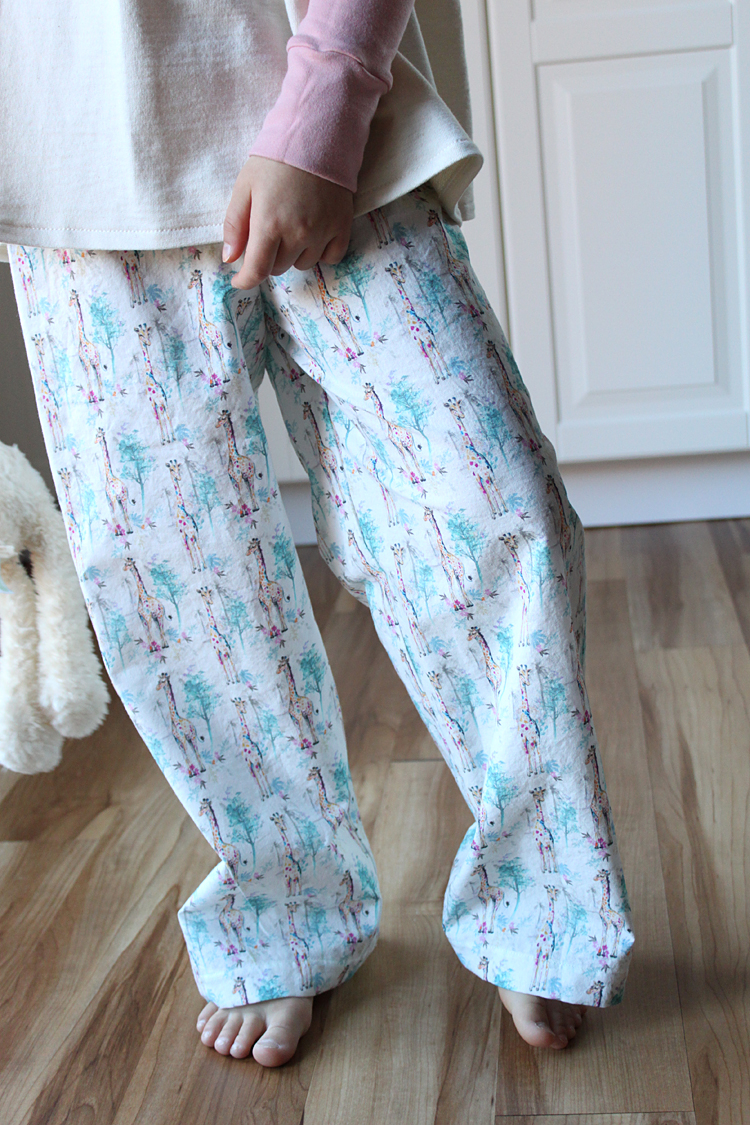
I was sent this absolutely adorable Zarafa Collection Cotton Fabric {affiliate link} by Minerva, and I knew immediately it would become pajama pants for my daughter. But every cute pair of pj pants needs a cute top to go with them!
All You Need Jammies - Gathered Top // Sewing For Girls

I used the Gathered Top from the All You Need Jammies pattern last year for her, and since it was a TNT pattern, I immediately thought of it for this project!

All You Need Jammies - Gathered Top // Sewing For Girls

I've been trying to use up scraps and leftovers from projects as much as possible lately, so I was very pleased to pull these two french terry fabrics from the scrap pile and be able to make this cute color-blocked top that coordinates perfectly with the pants!

The pink fabric I used for the bodice and sleeves is leftover from this project HERE, and the cream fabric I used for the "skirt" is leftover from my Toaster Sweater #1, blogged HERE.

This top pattern is really adorable, I love the girly-ness the gathered skirt portion adds to the top. Having made this pattern a few times now, and in different types of knits, I've discovered the sleeves are drafted to be quite snug. In fact, I had originally cut the sleeves from the cream colored knit, which does not have a lot of stretch and the sleeves were definitely too tight! So I took them off and thankfully had enough of the pink fabric (which had a lot more stretch) left to cut them from that.

All You Need Jammies - Gathered Top // Sewing For Girls

My conclusion to the snug sleeves is that it is very dependent on the type of knits that are used. Using cotton/spandex or interlock knit requires no adjustments, but fabrics with better recovery will need some adjustments to the pattern.

I've made a note to myself and will widen the sleeves according to the fabric I choose. The pattern includes a ton of options for different pajama tops and bottoms, so you can mix and match to create a combo for both boys and girls! However, all the tops have the same sleeve pattern piece, so it's a change I'll need to make universally for my kids.

All You Need Jammies - Gathered Top // Sewing For Girls

The pants pattern is the same pattern I used for my Sew Family Jammies project (blogged HERE), and the blog post with all of the details about them and the fabric will be able to be found on Minerva in a few months. I'll be sure to let you know on my IG (@heidi_handmadefrenzy) when it goes live, so feel free to follow me there if you don't already so you don't miss it!

DIY Anthropologie Inspired Ciao Tee // Sewing For Women

Friday, October 4, 2019

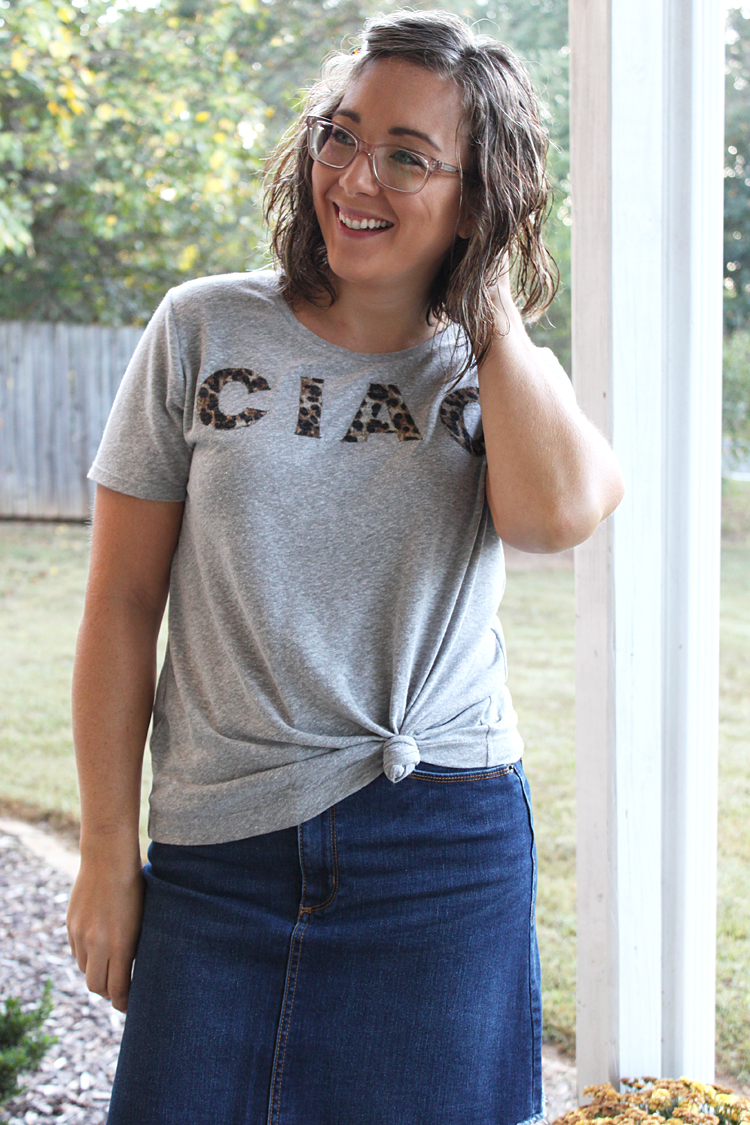
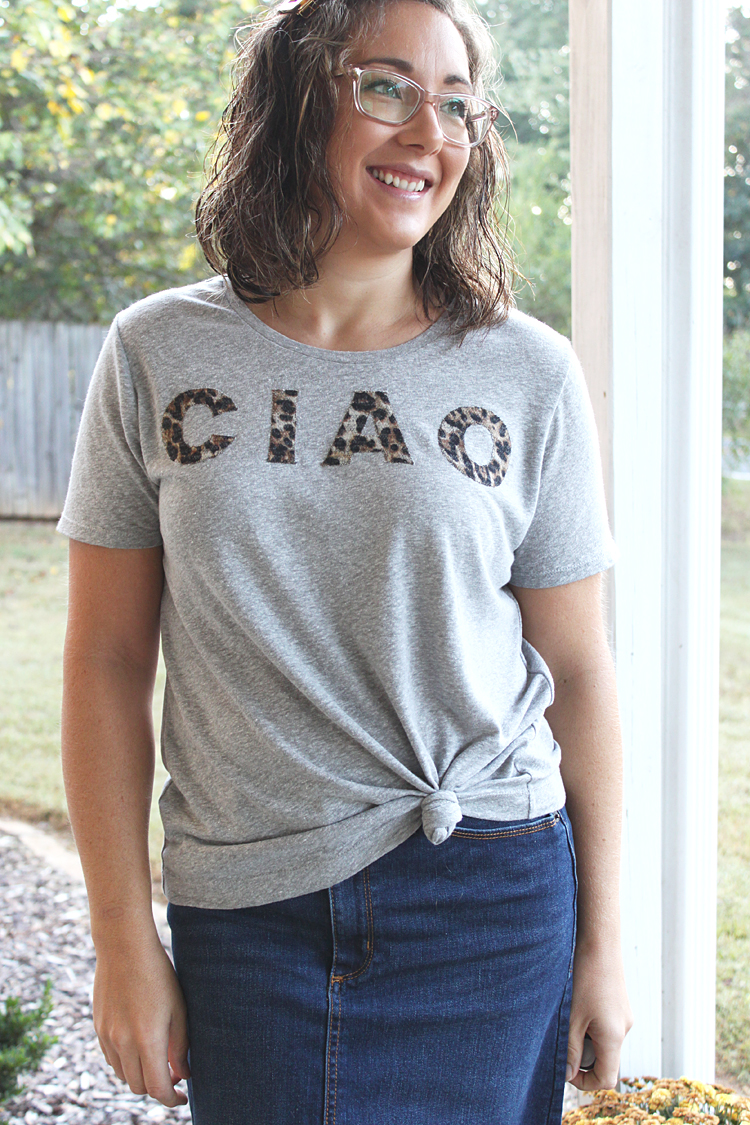
DIY Anthropologie Inspired Ciao Tee // Tutorial // Sewing For Women

Happy Friday, friends!!

I am bursting with some exciting news for you today. First of all, I finished up this adorable Ciao Tee earlier this week, and I get to post about it!

DIY Anthropologie Inspired Ciao Tee // Tutorial // Sewing For Women

I used the Union St. Tee pattern by Hey June Handmade {aff link}, a linen blend jersey knit from Imagine Gnats, sold out, but there is currently a similar knit in the shop HERE.

DIY Anthropologie Inspired Ciao Tee // Tutorial // Sewing For Women

I made a size medium for a more oversized fit, shortened the bodice 1 inch, and otherwise sewed as per the pattern. My sweet spot with the Union St Tee is a size small for drapier knits, such as rayon or bamboo spandex jerseys. For knits with less stretch such as this linen blend jersey, or cotton knits with little to no spandex, I prefer to sew a medium and tuck or tie at the waist.

For reference, my measurements are B: 36", W: 29", H: 38". I could probably stand to grade down at the hips in a size medium, and that would eliminate the need to tuck or tie, but I'm a huge fan of that look so I'll probably just keep making them more oversized. 😊

DIY Anthropologie Inspired Ciao Tee // Tutorial // Sewing For Women

For the letters, I used scraps from another Union St. Tee that I will post about a little later (IT'S SO GOOD). I fused the letters to the tee using EZ-STEAM II {aff link}.

This brings me to the second part of my exciting news. I put together a little video to show you how to stitch around the edges of the letters in a way that won't pull and distort your delicate knits!

You can watch that on my IGTV channel right here in the post, or you can click HERE and watch it on the Instagram app!


Bear with me as I'm still learning with these IGTV videos. 😉 I feel quite amateur putting them together, but I'm finding out exactly what info I need to add/record/photograph, etc. So hopefully they will get better with time!

DIY Anthropologie Inspired Ciao Tee // Tutorial // Sewing For Women

Regardless of all that, I'm super pleased with how my tee turned out! And I can now twin with my good friend, Teri! 😄 Click HERE to see what I mean!

DIY Anthropologie Inspired Ciao Tee // Tutorial // Sewing For Women


The third and final piece of exciting news is that I now have a LIKEtoKNOW.it page!! This is a place where I can post all of my daily outfits and link to the items I'm wearing for easy shopping for you all, if you are interested!

DIY Anthropologie Inspired Ciao Tee // Tutorial // Sewing For Women


I get a lot of questions about where I purchase my shoes, accessories, and other items that I wear that are not handmade, so this is a place where I can easily gather all of that information for you!

To view my outfits, you simply need to find my account on LIKEtoKNOW.it (My name is Handmade Frenzy) and click on the pictures for all the info. HERE is the link to my account!

I will still be linking all the info in my blog posts here as well, and it will look a bit more polished as you can see below! Simply click on the little icons to shop.


I'm really excited about this little addition, and I hope you all are too! I cannot express how much it means to me for you to support my blog through these links. Thank you!! 😘


Baby Boy Outfit - Using FREE Patterns!

Wednesday, March 19, 2014


Charlie Sweatshirt & Rae's Basic Newborn Pants

I made another baby outfit! And oh my, it is so much fun making tiny little things :) For this outfit I used two FREE patterns! The sweatshirt is the Charlie Sweatshirt pattern by Shwin & Shwin. I modified this to make it smaller, I'll go into detail on that in a bit. The pants are Rae's Basic Newborn Pants pattern. How awesome are these ladies for sharing these free patterns with us!?

Baby Circle Skirt & Bow Onesie

Monday, February 10, 2014

Baby Circle Skirt & DIY Bow Onesie

Sewing baby gifts is so much fun! It gives me the chance to sew up these teeny tiny things I see out in blogland and on Pinterest that are just too small and babyish for my own two munchkins. (Although, I would totally wear this outfit on my 2 year old!) For this little outfit I chose to make the newborn size circle skirt from the MADE tutorial here.

Image Only Interview on Caila Made

Wednesday, July 31, 2013

Hi guys!

I am so so SO excited to be guest posting over at Caila Made today!

The minute I stumbled onto Caila's blog, it was love at first sight. Her writing is so genuine and down to earth. Her sewing is AMAZING and her sweet little models are just so adorable! And when I reached out to her for a little blogging advice I found out she is so sweet and kind in real life too! I want to be just like her when I grow up :)

Along with four other lovely ladies and myself, Caila is conducting an Image-Only Interview all week long, with a line of description if necessary.

Hop on over and see what questions she has been asking and the creative ways everyone is answering them with a photo!

Here is a sneak peek at my photos. Head *HERE* to read the interview!


Until tomorrow!

Follow on Bloglovin

Chair Cushion Tutorial

Tuesday, May 28, 2013


We have a "new" highchair in our kitchen! But this isn't just any highchair, it's an heirloom. My dad is the youngest of 3, and he and his 2 brothers used it when they were children! I am so happy my kids get to use it now as well! The chair was in it's original condition when we got it, which wasn't terrible, it's still very solid. Evan used it for about 2 years just like it was. The finish however, had worn off completely in places, so I wanted to refinish it to protect it. I decided to give it a face-lift and paint it a fun, happy color!

I decided to make a fun little cushion for it too. Since Olivia is using it these days, I decided to make it a bit girly. Because girly is just so fun. :)

Tutorial - Owl Case For iPod Touch

Thursday, May 23, 2013

Today I have a really fun and adorable little project to show you! And since it's just so cute, I know you're going to want one for yourself, so I'll show you how to make it!


For my sister's birthday, she not-so-subtly hinted that she would like an owl case for her iPod Touch. I really didn't mind, I'd rather give her something that I know she really wants than shopping for hours on end and not finding the exact right thing! That, and I really love giving handmade gifts!
© Handmade Frenzy • Theme by Maira G.