This post contains *disclosed* affiliate links. All opinions expressed are honest and my own. If you make a purchase using the links, I make a small commission which helps support this blog. So, thank you!!
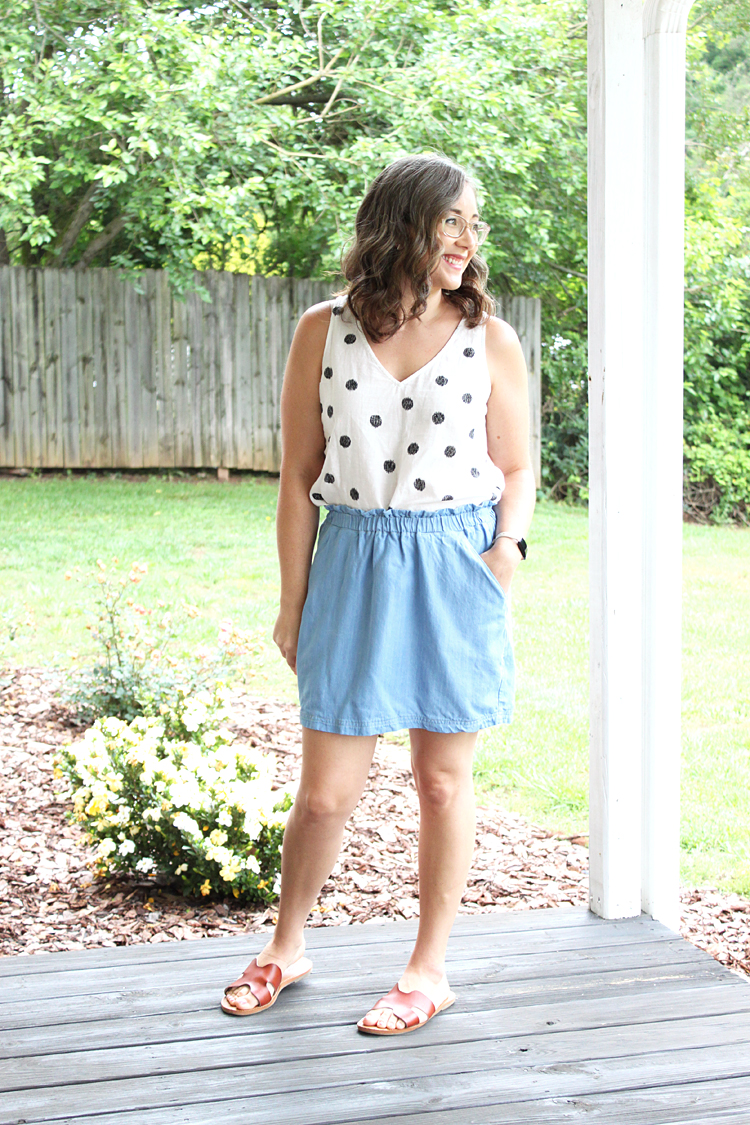
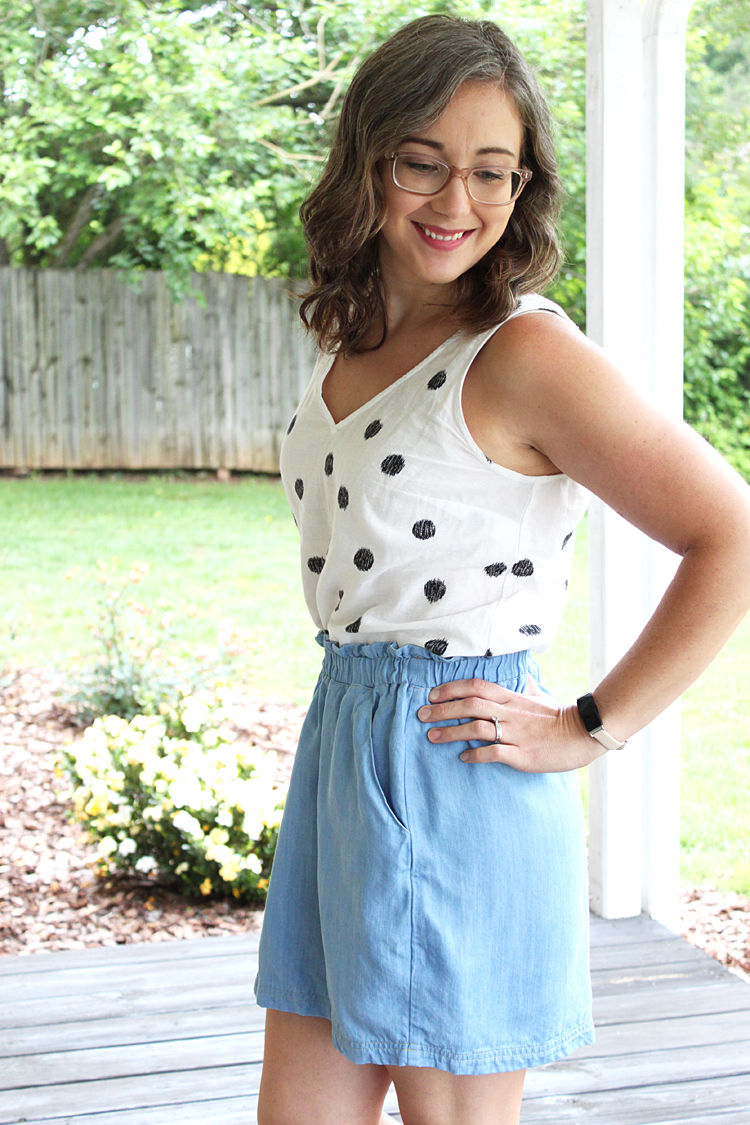
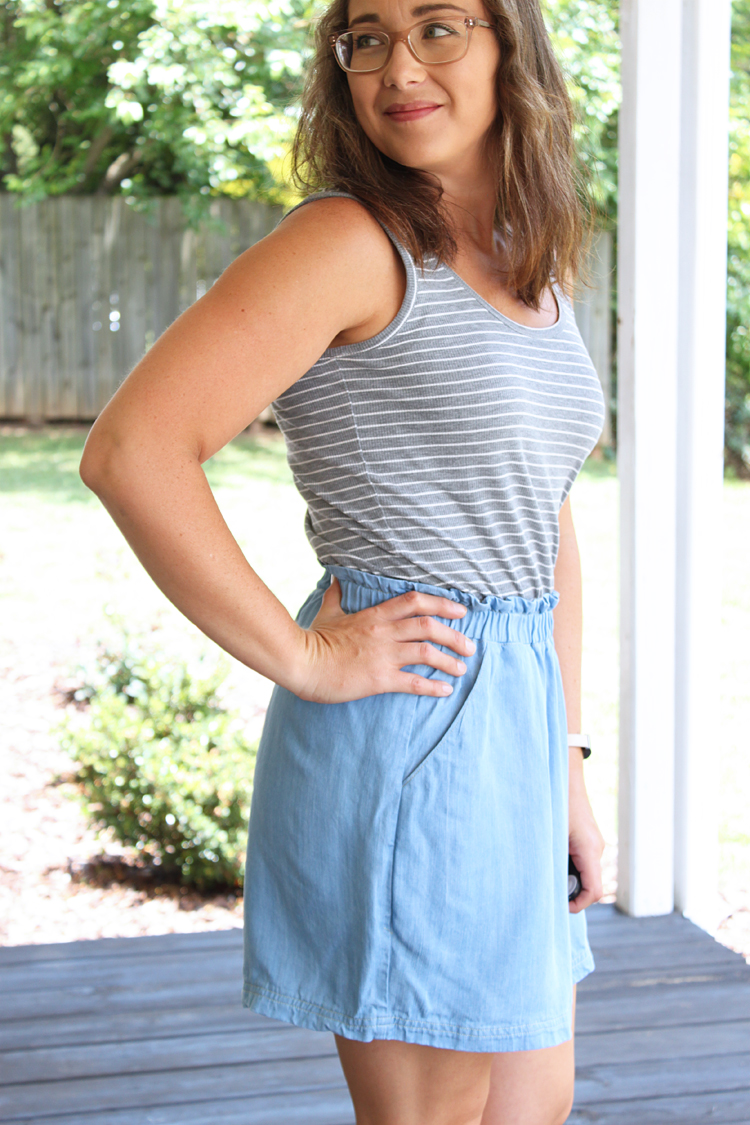
Hello, friends!! Happy Friday, again!! I have a super fun little tutorial for you today on how to hack the Allegro Skirt pattern {aff link} by Love Notions into this super cute paper-bag waist mini skirt! **Scroll to the bottom for some amazing sale news!!**
For the skirt, I used a straight size 8 (my W:29.5, H:38), and only made a couple of small, very simple adjustments to get a very different look!
The first thing was to straighten out the side seam from the pocket down to the hem.
Next, you will want to do the same thing to the pocket so that it still lays nice and flat inside the skirt.
I shortened the skirt by cutting straight across at the lengthen/shorten line. Now, cut all of the pieces out, including the waistband; making no changes to the waistband.
At this point, I assembled the skirt as usual. When I came to the waistband, I attached it as per usual, and then sewed a channel for 1 1/2" elastic, rather than 2" like the pattern calls for. This super simple change gave me the paper-bag waist look I was after!
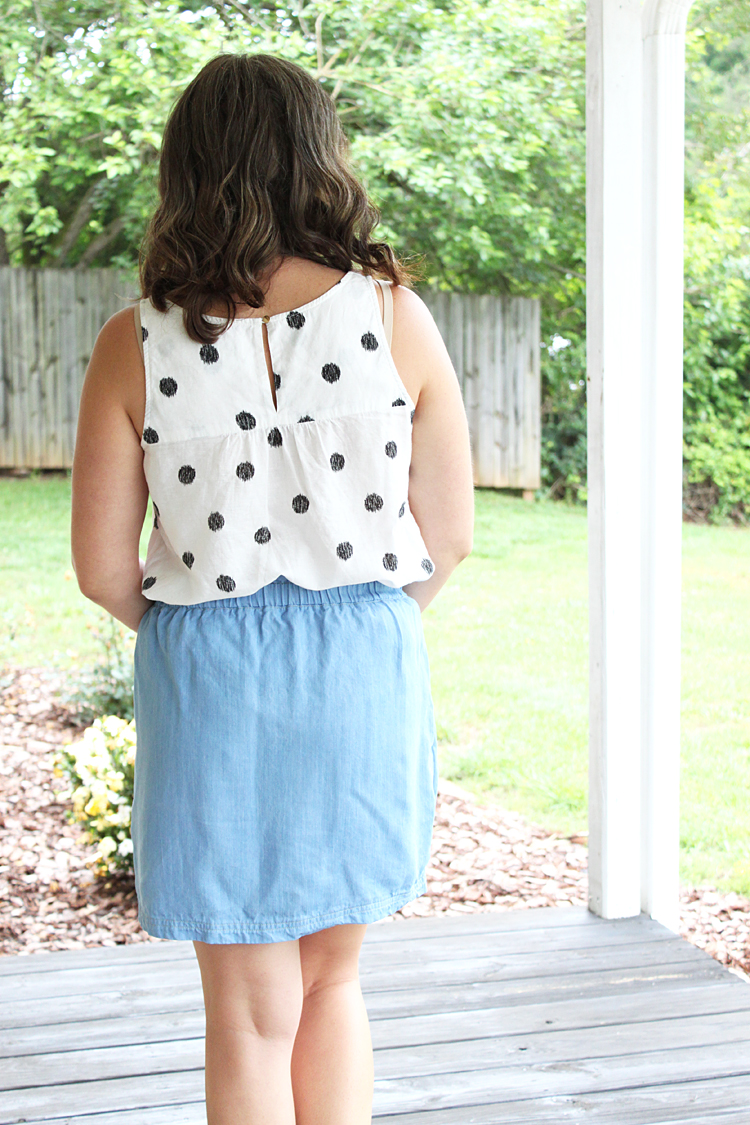
After I had the waistband attached and the elastic inserted, I tried the skirt on. The hem still flared out a bit more than I wanted, so I curved in the side seam a bit to create more of a pencil skirt shape. The ruler below reflects the type of curve I sewed to get the end result. I'm in looove!!
After trying it on, I also determined the hem length I wanted and hemmed accordingly. This is highly individual and will be different for everyone. For mine, I did a fairly deep hem and hemmed another two inches from the length I had originally cut.
I used the tencel denim from Joann for this skirt. Tencel denim was the perfect choice!! It drapes beautifully and wears so nicely as well. I also used traditional jean top-stitching thread for a classic denim look.
At the hem, I sewed two straight lines, 1/4" apart for a more casual look as well.
I was 100% inspired to make this skirt by a skirt I tried on about 2 years ago at Target! I'm so glad I didn't purchase it back then and finally made it myself! I did buy the tank top though. 😉
The Allegro Skirt was the PERFECT base to work from. I couldn't be happier with how it turned out!
Let me know if you try this hack or something similar, I'd love to see it!
Happy Sewing!!
**In celebration of Love Notions moving into a new space, they are running a FLASH SALE where ALL patterns (excluding LBD) are FIFTY PERCENT off!! (No code needed) That is an amazing deal, y'all! And likely one that won't be repeated! So if you have had your eye on any patterns, now is the time to grab them! I've linked to the Allegro Pattern as well as the entire pattern catalog below. Happy Shopping!**
This post contains *disclosed* affiliate links. All opinions expressed are honest and my own. If you make a purchase using the links, I make a small commission which helps support this blog. So, thank you!!
Happy Friday!! We've made it to the end of another week... One more down in 2020, woot!!
So to celebrate, how about a Feature Friday pattern!? Over at Love Notions, the La Bella Donna pattern {aff link} for women (Oh, and the Girl's La Bella Donna {aff link}, too!) is on sale for just $5 for today only!
The women's pattern has been newly updated with the extended women's sizing block, and includes so many options, as shown below. In celebration of the re-release, the pattern will continue to be on sale for $9 after today, through Thursday, the 30th.
I helped test the new version of this pattern and made the tunic length. In truth, this is the first short sleeve tunic I have ever sewn, or worn. It's not a style I gravitate towards, but I'm so glad I tried it, because I completely love it!
I tend to stick to mostly shorts, tanks, and tees in the summer, maybe some flowy tops and a dress here or there; but tunics isn't something I've ever tried before.
But the La Bella Donna in tunic length and short dolman sleeves is so perfect for pairing with some lightweight leggings!!
If you are looking for a quick, and I mean QUICK, and easy sew for this summer, this is the one for you! I sewed this up in about an hour, and for me, that is super fast. I even used the more time-consuming binding method on the neck and it was still so fast!
For sizing, I sewed a M on top, graded to a S in the hips. This is 100% the standard for me in Love Notions patterns, and the fit is spot on! I also shortened the tunic 1" for my height (also standard with LN for me), but if you preferred more length, more is easily added!
I made this up in a rayon spandex from my stash. I believe it is from Girl Charlee, waaaaaayyyy back in 2016. 👀 Their selection of tropical fabrics is fun to peruse from time to time! I've linked it HERE.
I really am enjoying my new tunic, and I can't wait to sew up some more of these quick to sew, and easy to wear, pieces for both summer and the rest of the year! Hoods, cowls, hem bands??? So many cute options!
The Summer Basics Tank has been revised! This essential Love Notions pattern now has sizes from XS-5X, and has a brand new shelf-bra feature!
In addition to all that, it is the Feature Friday pattern and is $5 for today only! You can grab your copy of the pattern HERE. {aff link} After today, the re-release sale will continue until Thursday, June 18th at $9.
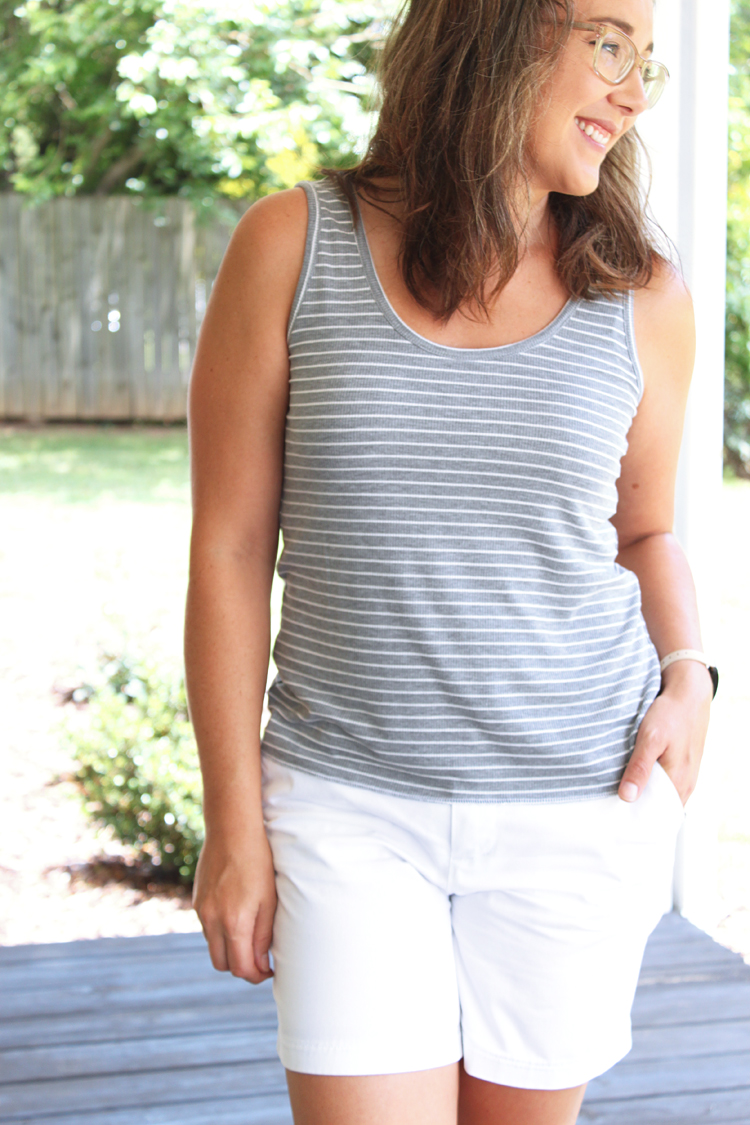
This was my first time sewing the Summer Basics and oh my goodness, I'm going to fill my drawers with these!! The fit is so spot on!
I made a medium, based on my measurements of UB:35.5, B:36.5, W:29.5, H:38. I used the scraps from my Sunday Romper, so I had to shorten 4 inches and piece the bands!
Shortening the tank worked just fine, especially since I'm not very tall (5'3"), but I decided to leave it unhemmed for just a bit more length. I serged the hem, and I think it looks good!
I will likely be wearing it tucked in to things anyway, but I think it looks great paired with my shorts, unhemmed.
I love the scooped back, it's low enough to be cool and flattering, but doesn't show a bit of a regular bra. The straps are perfectly placed as well for complete bra coverage!
I didn't use the shelf bra for this tank, but I'd like to try it in an athletic fabric for sure! I think it would make a fabulous hiking tank, and in our summer heat, I think a shelf bra might just be ideal.
Other than shortening at the hem, I didn't make any changes to the fit at all! I absolutely love how this tank turned out. I think the bindings look very polished. As soon as I tried it on, I knew I would LOVE it with this Allegro skirt {aff link} hack I made a couple of weeks ago!
I promise I'll have a post about that skirt soon! It's one of my very favorite things I've made recently!
I hope you are all having a wonderful Friday! Happy Sewing!
This post contains *disclosed* affiliate links. All opinions expressed are honest and my own. If you make a purchase using the links, I make a small commission which helps support this blog. So, thank you!!
Happy Wednesday, friends!
I'm really excited to share my second Sunday Romper {aff link} with you today! **Don't forget, this pattern is currently on sale through June 14th for $9 (save $3)! I made two versions during testing, and while this was technically the first version I made, it ended up being finished last because of how the testing process went.
As is the purpose of testing, the pattern underwent several changes, and the first version I made had too much extra fabric. This worked in my favor, since I was able to simply trim it down and make the fit reflect the final version of the pattern!
I made this version from a ponte that was also deep in my stash. To be honest, I think it was one of the very first cuts of ponte knit I ever bought! Another change made during testing was that the recommended fabrics do NOT include ponte. The pattern is designed with a blousey drape and ponte just poofs out in a not so flattering way. However, do know that if you are dying to use it, it definitely is possible!
To alter the fit in the way it was intended, I simply took out quite a bit of width from the sides, and length from both the top and bottom. I didn't measure exactly, I just trimmed until it looked "right" and checked the fit while sewing it up. I'm absolutely in love with the outcome! There is still some excess fabric in the back, so if I decide to make another ponte version, I will do a sway back adjustment to the pattern before cutting.
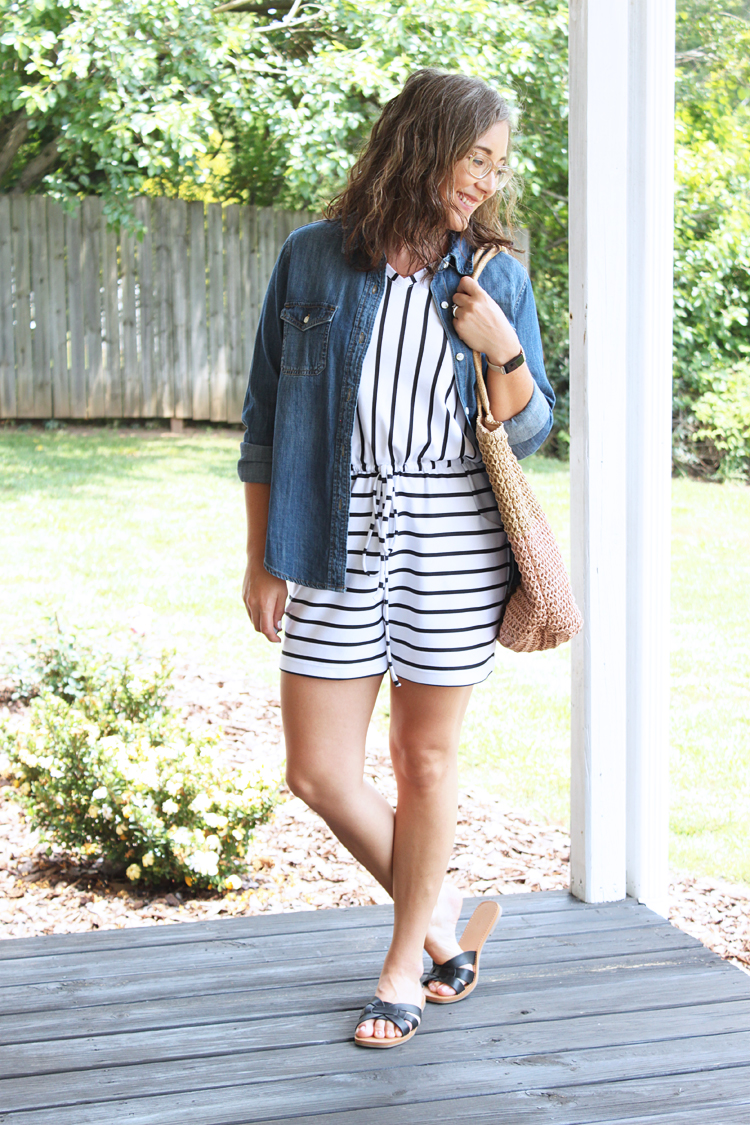
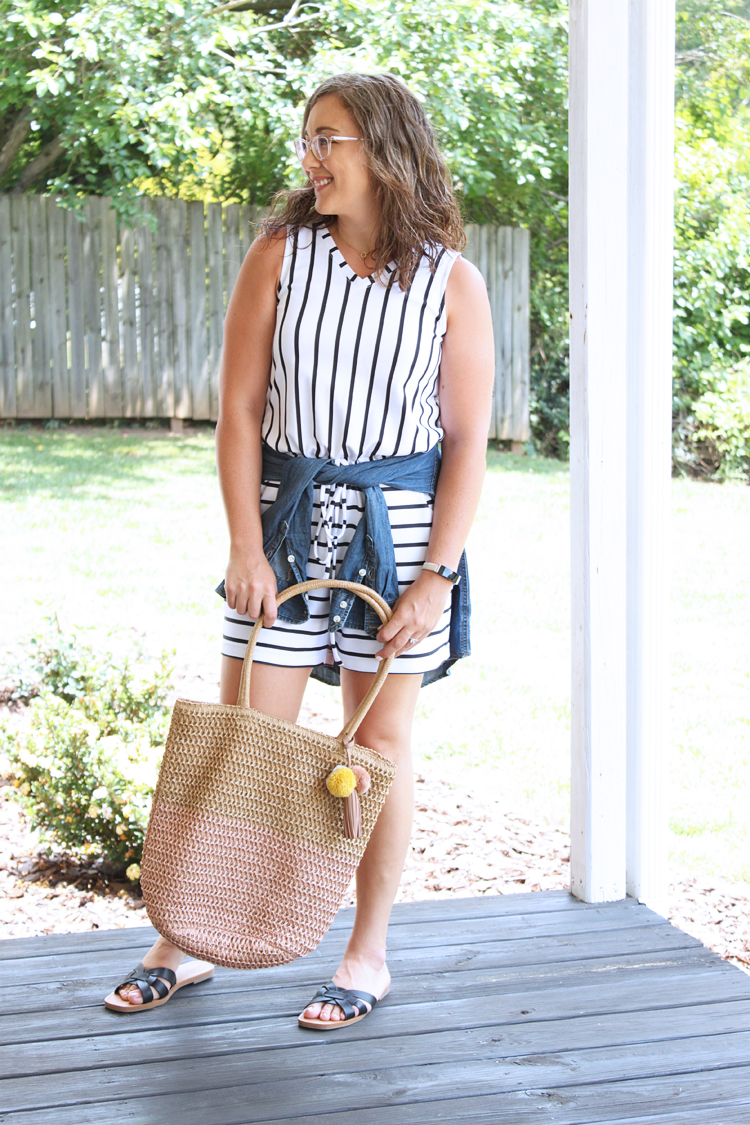
I had fun playing with the stripes on this version, too! The stripes are printed vertically, so I cut the top on the grain to make sure there was enough stretch to get it on and off. Since the bottoms don't need stretch, I was able to cut the stripes horizontally for a fun effect!
Now for the real meat of this post, I wanted to show you how versatile a one-piece romper really is, and how the styling options are practically endless!!
I have 5 looks to show you, but I could have kept going and probably come up with 5 more without a real struggle!
Look #1 is SUPER simple and minimal. All I did was added my Kelly Waist Bag for some extra emphasis at the waist, and hands free practicality! This would be perfect for a day at the park with the kiddos, or a trip to the zoo, etc. The bag is roomy enough for my phone, sunglasses, and even a small snack or two for the kids. Oh, and lets not forget wipes and/or tissues. Those fit too!
Notice the contrast of the brown accessories with the black in the romper. I love the black/brown contrast, and for this look, I kept the belt, bag, and sandals all in the same warm brown tone for a cohesive affect.
Look #2 is also quite simple, but I added the "3 elements" to the look. In styling, whether in home decor, photography, or fashion, grouping things in odd numbers is visually more appealing. So if you have 3 elements to an outfit, you will automatically look more pulled together!
For this look, I chose black sandals to coordinate with the stripe in the romper, as well as the black band on the hat. Like I mentioned before, I also like the black/brown contrast, so I added in my straw circle bag. Now if I had a round BLACK bag, I would have added that in instead, but since I don't own all of my dream accessories, I made do with what I have. 😉
That being said, I think the natural tones in the bag add a lot of warmth and depth to this outfit! And I'd also love to take this little number on a stroll through a beautiful scenic city, such as Charleston, SC... One of my favorite places to visit!
Look #3 is perfect for a day where you will be in and out of the air-conditioning, or a stroll along a breezy oceanside. And while that may happen once a year or so... in reality, I'll likely just wear this to a girls' night or even a day of shopping. If that ever happens again! 😜
I threw on my favorite denim shirt, kept the black sandals, and added an over-sized summer bag to keep it looking breezy.
The great thing about denim shirts is that they can act as an extra layer when needed, whether inside against the freezing a/c, or when the weather turns cooler in the evening. But, then they are also sturdy and won't stretch out when you tie it around your waist, because the extra layer isn't needed!
Notice how the shirt also brings in that 3rd element and really ties the outfit together? It's magic!
Look #4 is for a lazy Saturday chill-axing, either at home or at your favorite brunch spot!
I threw on my uber comfy and favorite Carrie Cardigan, grabbed my favorite monogrammed mug, switched out for some fresh white sandals, and voila! I'll wave from my porch couch, because that's where you'll find me from now on! 😄
I'll just take this moment and address a question I see a LOT regarding rompers. Is it annoying to go to the bathroom!? Honestly, NO. I found this pattern to be the least frustrating romper I've ever worn while needing to take bathroom breaks. I've even had the "privilege" of wearing it on a road trip and using public restrooms and it was not a problem at all!
Yes, you do need to pull it down, so there's that bit, and if that bothers you, then you may not enjoy it. But as far as worrying about it dragging on the floor (gag), it doesn't at all because of the elastic waist. Everything stays up off the floor and free of (cringe) the nasties.
Now obviously, if you layer over top, that will also have to be removed, and if you're in public you will have the added element of finding a safe place to hang it. Hopefully there is a bag hook at your disposal and you'll have no problem with that. 😊
Look #5, I decided to get a little sporty on you!
All my life, I have never been into sports, or athletic in any way! In fact, I would almost always choose indoor activities if possible unless there was a body of water involved.
Things have pretty drastically changed in the past several years! As my kids have gotten older, and it seemingly takes even more energy to keep up with them, I have learned to LOVE staying active!!
If you follow me on Instagram, you most likely know I've developed a consistent exercise routine, and that in turn has made me crave much more physical activity in my life!
I now absolutely love hiking, I'm dying for all of our kiddos to learn how to ride their bikes without training wheels so we can go on family bike rides, and I'm slowly building up an appropriate wardrobe for those activities!
This romper is both adorable and practical for those fun family outings!
So there you have my 5 looks! I hope you enjoyed this post. I really had a lot of fun putting it together, and to be honest, I could easily do another style session for early spring and fall when the weather is much cooler!
I hope you've been inspired to come up with ways to style your Sunday Romper {aff link} as well. I'd love to see your outfits!
I've linked to similar accessories in the box below. Some of the items I'm wearing are no longer available, but since they are super classic, I was able to find very similar pieces!