SLIDER

dawn jeans
Showing posts with label dawn jeans. Show all posts

Style Maker Fabrics Spring Style Tour 2021

Thursday, April 8, 2021

Hello friends! I am so, so excited to be here sharing my Style Maker Fabrics Spring Tour garments!
*Find a list of pattern and fabric links at the bottom of the post* 
I get so excited to see all the amazing creations every spring and fall when Michelle holds her Style Tours. It's so much fun to see all of the new fabrics, but even more fun to see them sewn up in all types of different styles! What one person envisions in a particular fabric can be so different from what another person sees. One of my favorite things about this online sewing community is all of the inspiration that is shared.

So hang on, or rather, grab a beverage, and let's dive in! I've got plenty to share! 😀

It was truly a difficult decision in choosing which fabrics to go with, and I waffled a bit, but pretty quickly settled on a palette that caught my eye. As it often does, my ideas changed and shifted before I finally got to actually cutting out my fabric. 

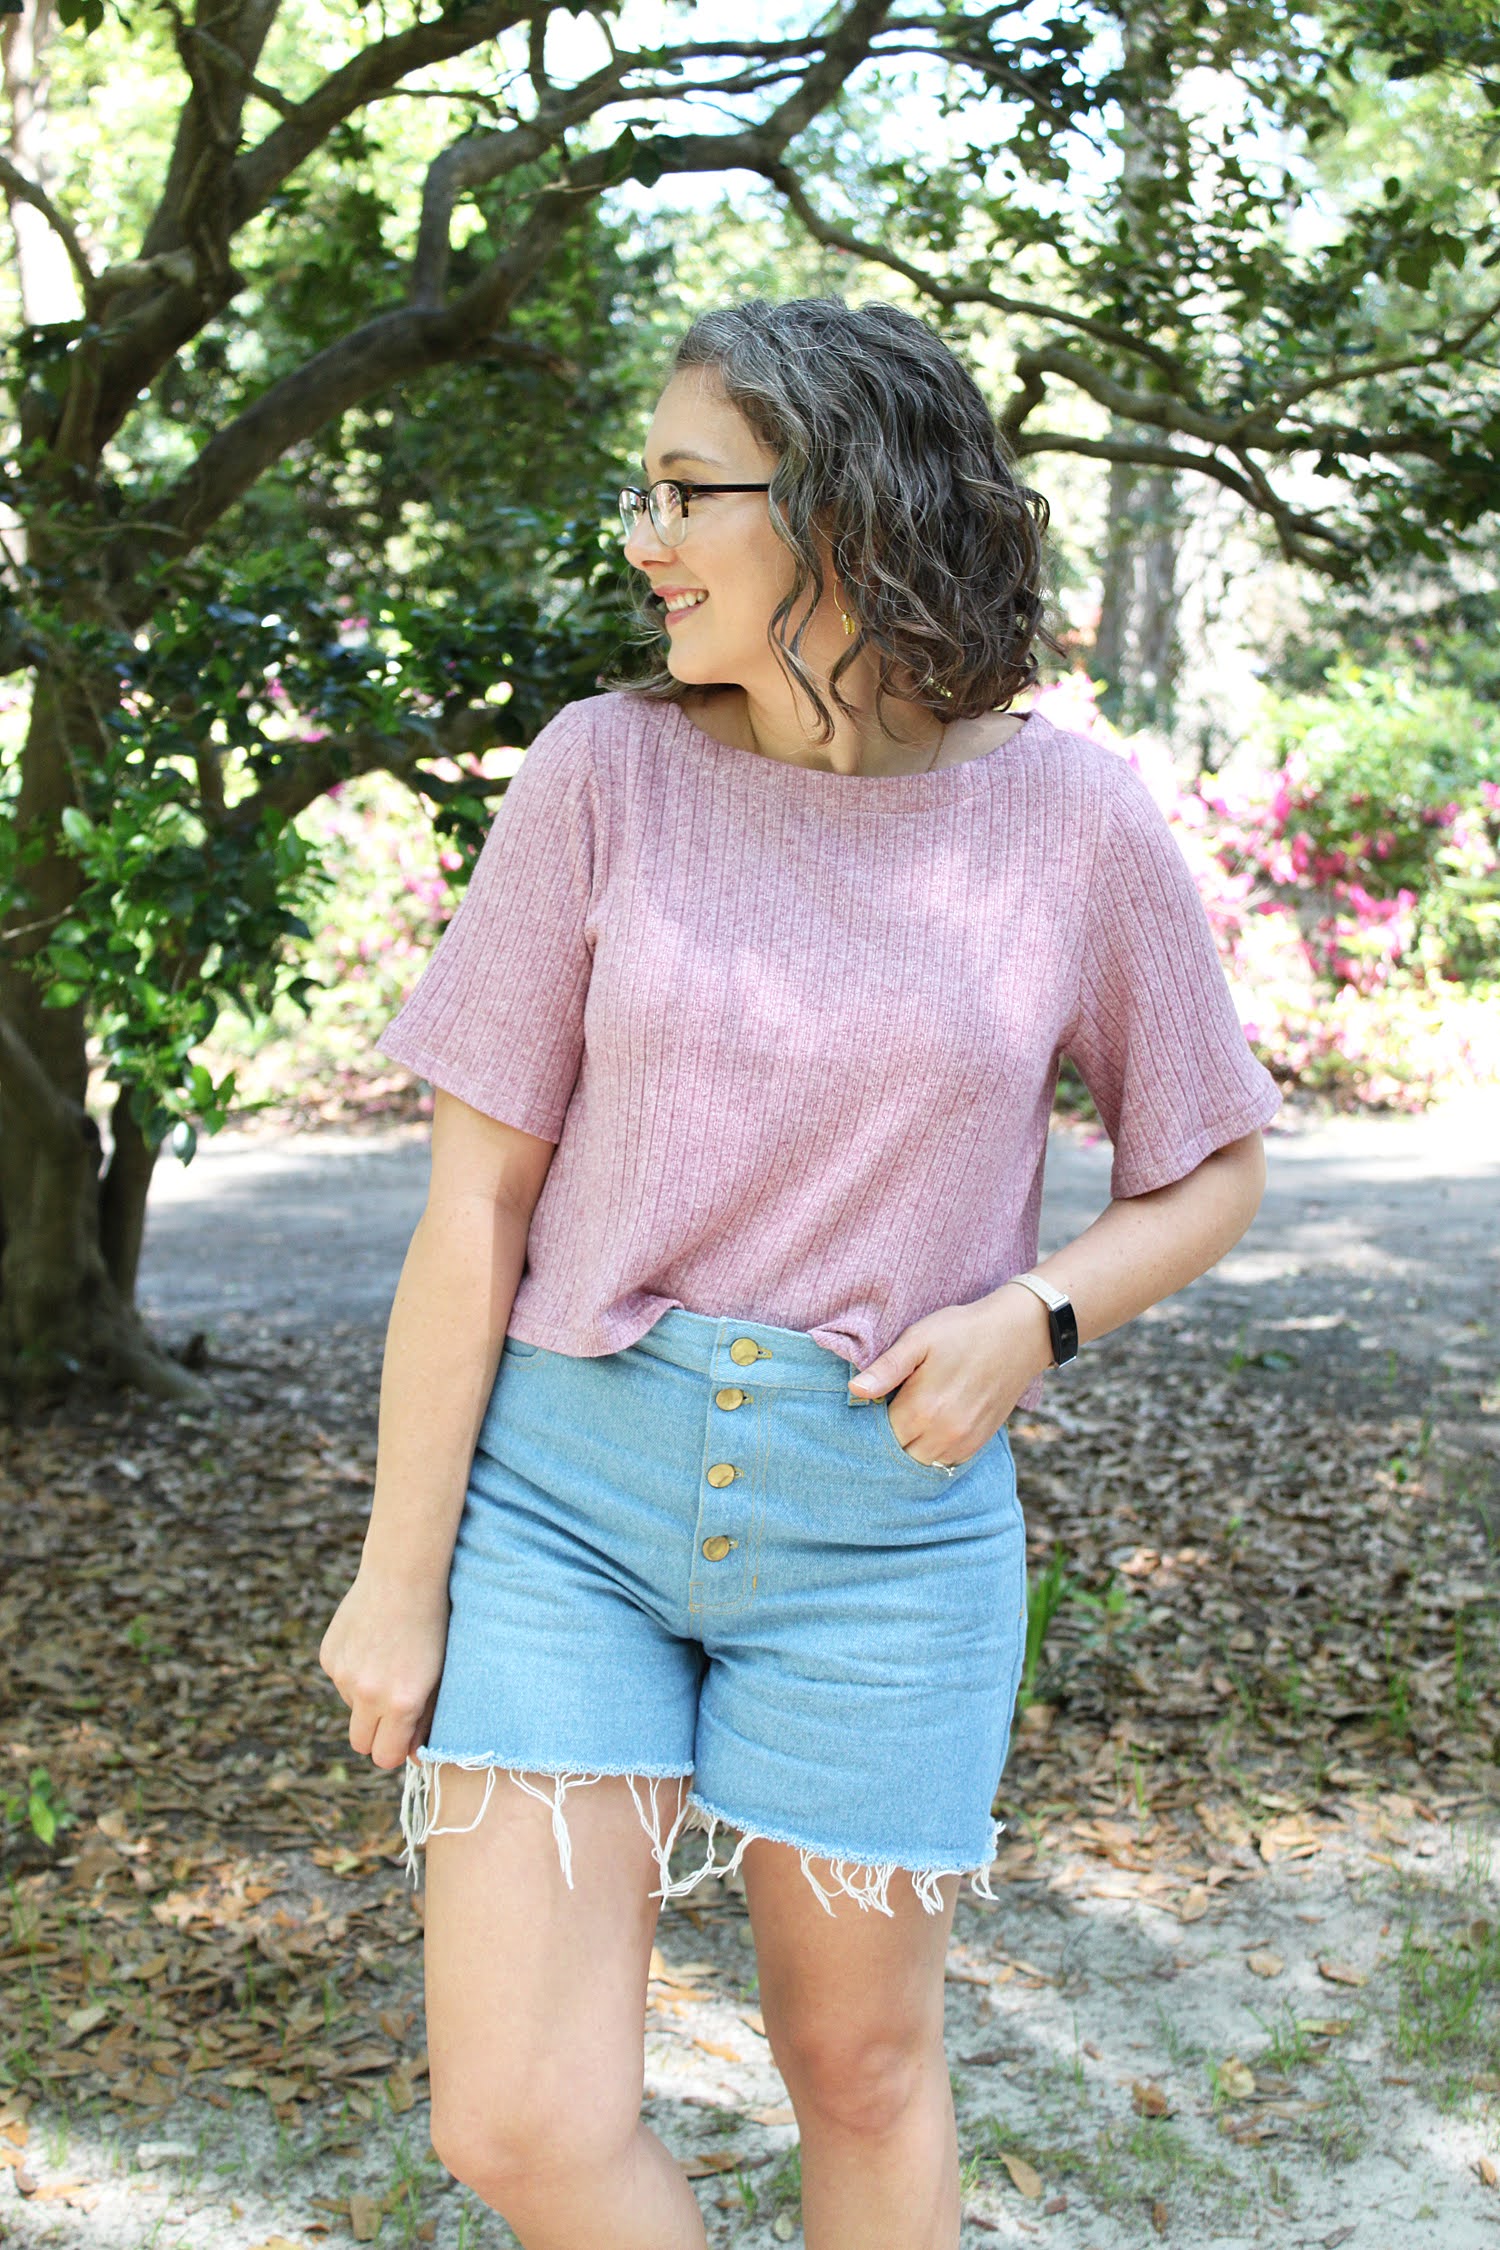
I chose 3 gorgeous fabrics in different substrates with plans to create a coordinating outfit. My initial plan for the denim didn't change, I stuck with my vision of cut-off jean shorts. I did however waffle between which pattern to use, but I'm SUPER happy with the Dawn Shorts (pattern by Megan Nielsen) that I ended up making!

Dawn Shorts

The size chart had me floating between an 8 to an almost 12, but based on the finished measurements I decided to make a straight size 10. (Measurements are approx W:29.5", H:38(1/2"ish))

I made a couple of small alterations to the pattern, the first was to shorten the rise around 3/4" from the top. I did this simply by cutting at the size 0 at the waistline. I also sewed the waistband to the pants with a 3/4" seam allowance to shorten just a smidge more. I scooped out the front pockets just a bit, to accommodate lowering from the top. 

I have a very short torso, but lowering just a little bit did the trick to hit me at a great spot! Next time I think I will shorten the yoke by about 1/4" as well. And I also have just a bit of extra fabric at the center back seam that I need to scoop out. I'm planning to take out my topstitching on this pair and fix it as it is very obvious when I wear them and walk around in them. I am pretty sure the adjustment I need to fix this is a low butt adjustment, which I will also make to the pattern so the next time I sew it up, it will be a non-issue.

The second thing I did was to lengthen and widen the legs slightly. I was going for a vintage cut-off vibe. I lengthened the hem only by 1/2", but left it raw so that it will fray more over time. By leaving it raw, it's currently 1 1/2" longer than the pattern. I also widened the side seams and inseam (slightly) for a more roomy vintage feel.

To get the hem to fray like this, I simply ran the shorts through the washer and dryer before adding the hardware. I will stitch a line 1/2" from the raw edge to prevent any fraying that might exceed that point over time, and I'm sure I'll be giving the hem "haircuts" over time as well. 😊

Did you notice the special little detail I added to the back pocket!? I am working at a gorgeous little sewing shop these days, and I had a little fun playing with embroidery! I think this little detail adds the perfect little touch to this handmade pair of shorts. I'm definitely completely smitten with that tiny little tone-on-tone detail!

Michelle was so kind to send me a gorgeous jeans hardware kit with the denim, but I decided to go a different route and sew the button front, so I used up some hardware that I had in my stash. I'm certainly itching to use up the beautiful set she sent me, and sewing these shorts has lit the fire for sewing ALL. THE. SHORTS. again this year! Step aside elastic waist, I'm coming for the denim stash. Lol.


Norma Top 

This gorgeous Watercolor Floral Digital Cotton Lawn was an easy choice! I knew immediately that I wanted to make some kind of statement blouse from it. I also settled pretty easily and quickly on the Norma Blouse by Fibre Mood for this fabric. I had been wanting to make this pattern since the minute I first laid eyes on it, and was so excited to finally get the chance!

The pattern did not disappoint! I made a straight size 8, and I'm very pleased with the fit! The pattern went together really well, and the finished product is so good. The length is perfect for tucking into high-waisted bottoms and a great length to wear untucked with mid-rise bottoms, too.

I'm absolutely head-over-heels with statement 3/4 length sleeves at the moment, so this was perfect and fell right into that category. 


Sheridan Sweater Hack


The third fabric I chose was this absolutely delicious Mini Cable Sweater Knit (in Rose). I had initially thought I would make another layer to go with the blouse and shorts combo, but once I went the statement sleeve route, it made it a bit more difficult to come up with a cohesive outfit. So instead, I went a completely different route and chose to make up a couple more pieces that satisfy my love of summer sweater wear!

I made a second version of my Sheridan Sweater (pattern by Hey June Handmade) hack (first shown HERE) with just a couple of tweaks from my first version, to get it pretty darn close to perfect! For this version I used View B (again) for the neckline and simply trimmed it down by around 3/4". Then instead of finishing it with a facing, I folded under 1" and hemmed. I'm so pleased with how it turned out! 

The second small change from my first version is that I added 1 1/2" to the cropped length included in the pattern and hemmed 5/8" rather than finishing with a hemband like the pattern instructs.

I adore this summer sweater. The elbow sleeves are such a great shape, and makes me feel so good when I wear it!


Pony Tank (Altered)

The final piece in my little summer collection is this sweater tank! I'm in love with sweater tanks. Just as much, or maybe more (shh, don't tell!) than my warm weather sweaters I've been attached to sewing for the past few years. 

I used the updated Pony Tank pattern by Chalk and Notch for this tank, and it worked so perfectly!!

I made a few changes to the pattern to get the look I was going for. I cut my usual C+N size (8), and chose the cropped view. Then I slimmed the shoulder straps, straightened out the side seams a bit, and straightened out the hem curve. 

To slim the straps, I narrowed the outer shoulder from the shoulder seam down to where the armsyce curves the most and graded back out to my normal size there. The neckline curve stayed the same.

I wanted a less swingy tank than the Pony Tank is drafted for, but still wanted some breathing room in the bodice. To get the fit I was after, I straightened the side seams from a swingy A-line shape, to a very slight A-line shape. On the size 8, I reduced the pattern piece by about 3" at the bottom of the side seam. I did the same to both the front and back pattern pieces.

I wanted the tank to be quite cropped, since my torso is really short above my waist and my Dawn shorts come to my belly button, so I straightened out the hem curve for an even more exaggerated crop. I cut the hem straight across at the point where the hem started to curve, and finished with a 5/8" hem.

To make the 2 sweater tops I sewed just a little bit different from each other, I decided to use the reverse of the fabric for this tank. The texture is absolutely amazing!! Either side can be used as the right side, but if I had to pick a favorite, this one would be it. 😍

I love this Pony Tank so much, I've already ordered another rib knit to make a second!

I'm so, so happy with my little spring/summer capsule! I can't believe just how comfortable the rigid denim shorts turned out to be! This will certainly not be my last pair of Dawn shorts! I'm already dreaming up lots more. 😉


LINKS:

Fabrics:

Patterns:

Necklace:
My new workplace!:
  • Sew Suite Studio (I am helping to manage the social media there, so feel free to give us a follow to see more of what I'm up to! 😉)

Thanks so much for stopping by and checking out my makes! 💕


Hampton Jean Vest & Panama Tee // Sewing For Women

Saturday, November 17, 2018

Hampton Jean Vest & Panama Tee // Sewing For Women

Happy Saturday, friends!!

I don't usually post on a Saturday, but when it's something as fabulous as a D&H Fabrics Blog Tour, anything can happen! :)

Hampton Jean Vest & Panama Tee // Sewing For Women

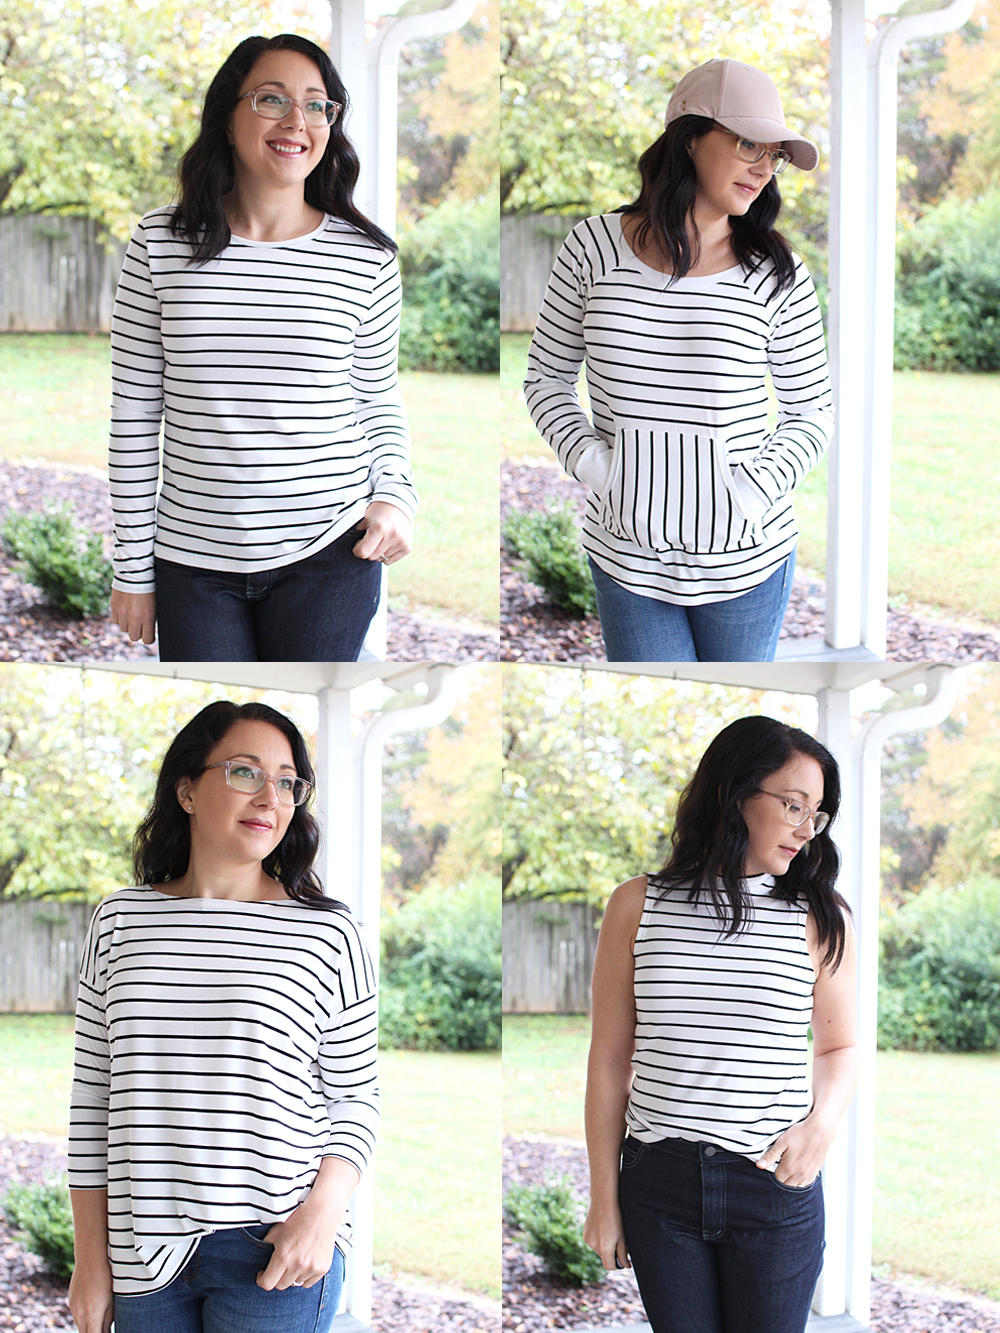
I'm talking ALLLLLL about this amazing stripey fabric over on Tammy's blog, so head HERE to read that post and see all FOUR(!!!!) shirts I made from this fabric! And then come back here to find out more about this all handmade outfit that I'm wearing.

Hampton Jean Vest & Panama Tee // Sewing For Women

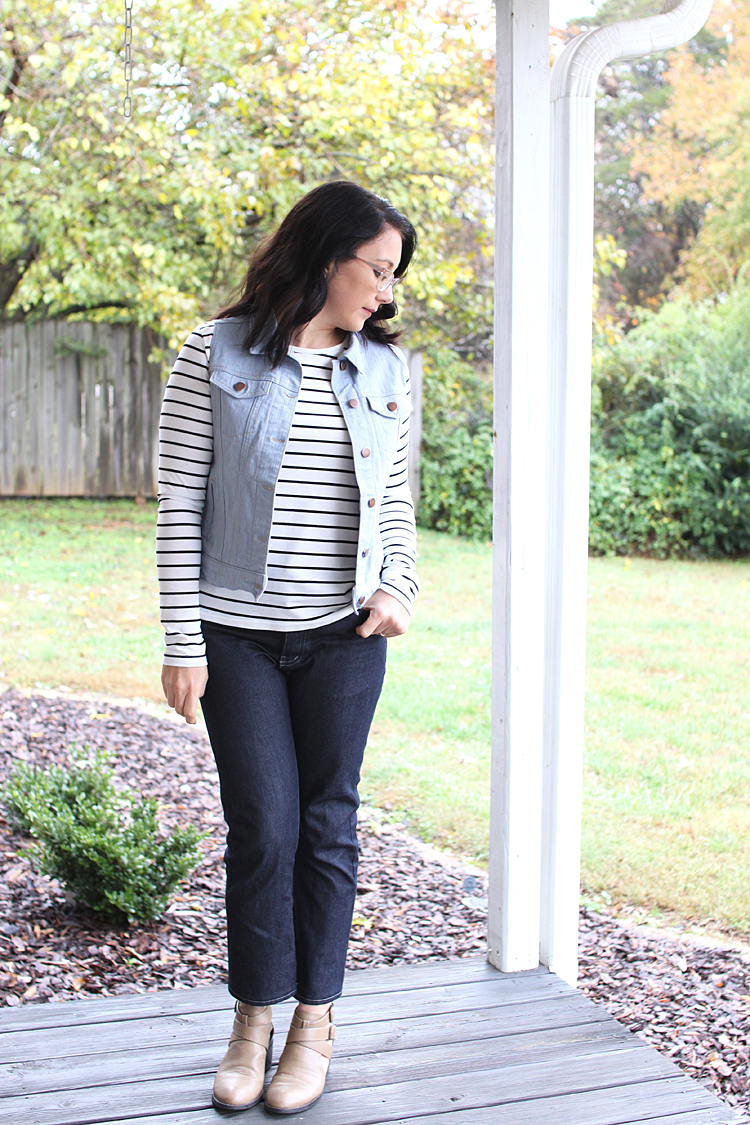
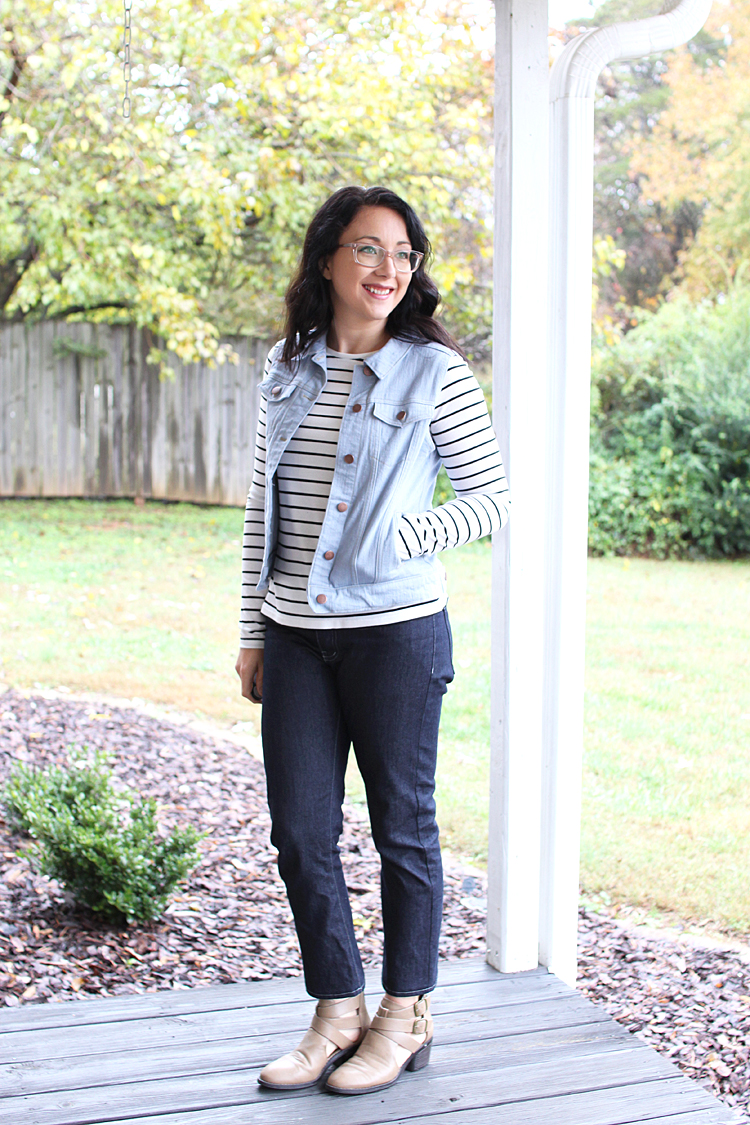
I feel like this outfit has unlocked some sort of sewing level for me. Head to toe denim handmades, and the PERFECT striped tee to accent it all. Yep. That is some good stuff!!

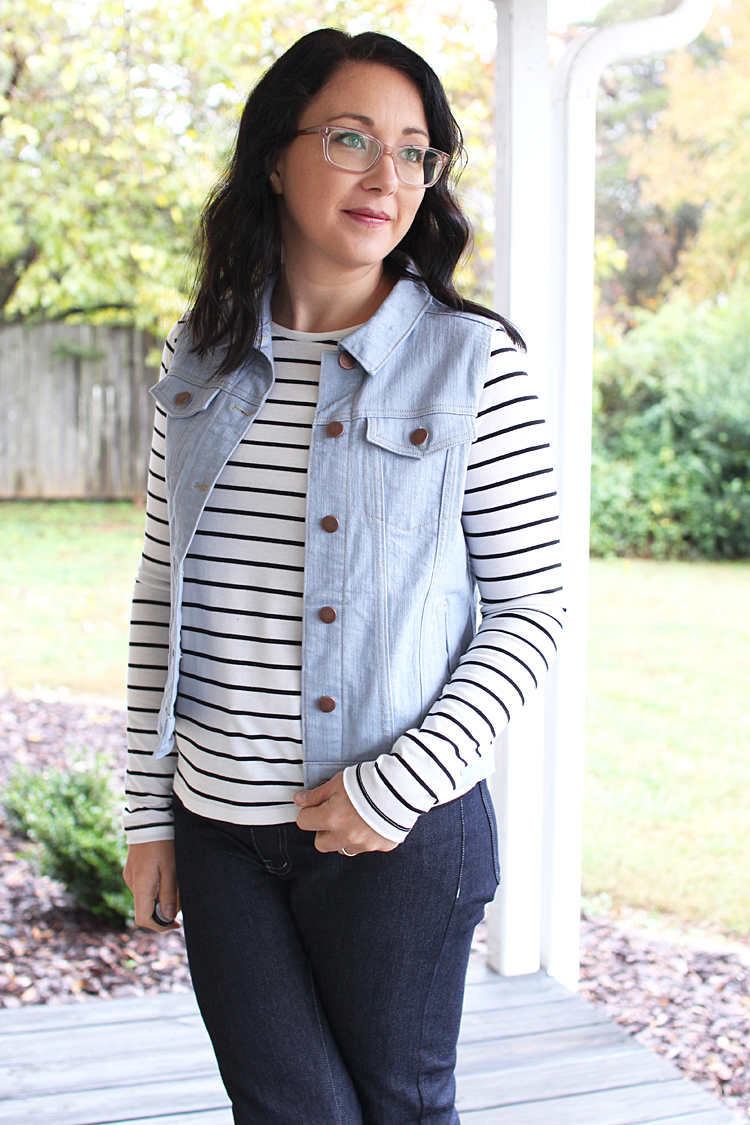
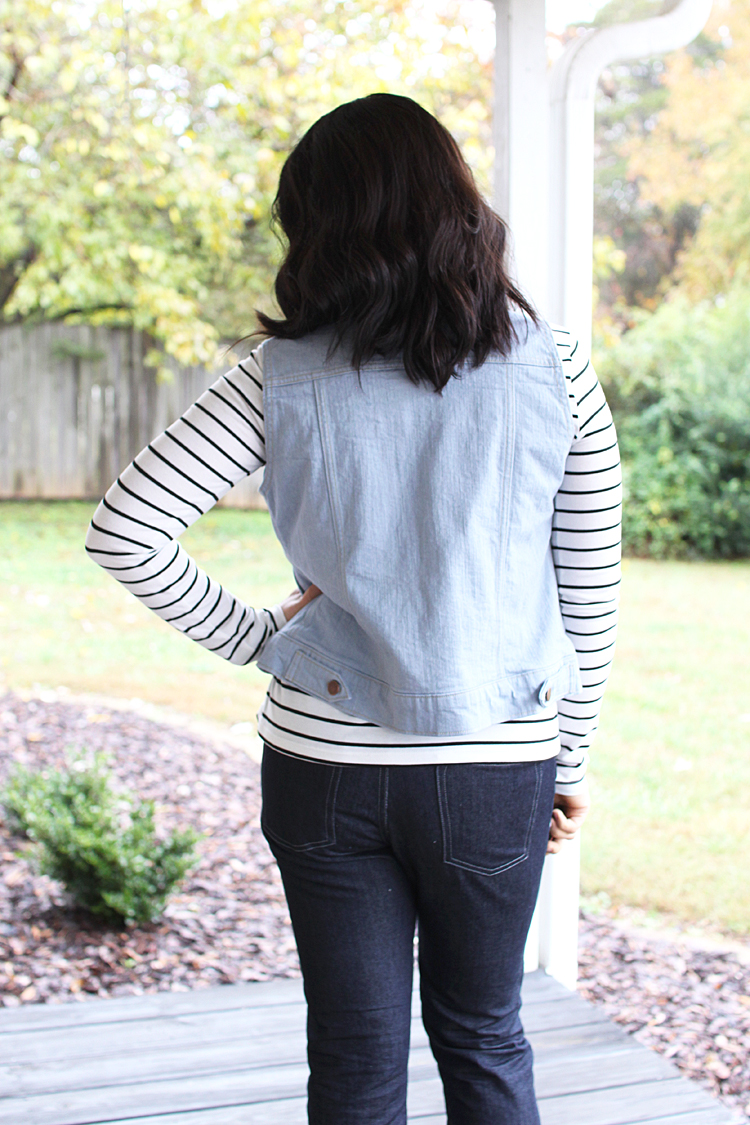
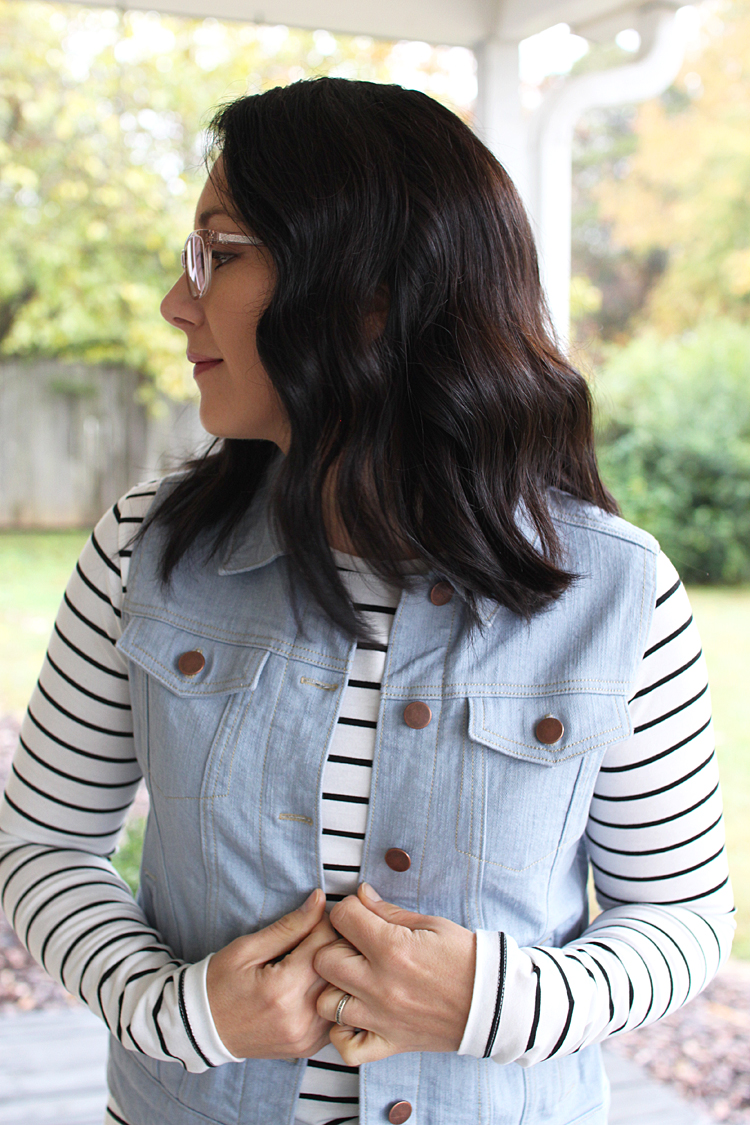
What I especially wanted to highlight today, is my Hampton Jean Vest. You may remember that I've sewn a Hampton Jean Jacket previously (see HERE), and I wear it all the time! Well, I got bit by the bug again and decided to try my hand at hacking the pattern into a vest!!


This summer, I ran across a very similar jean vest from Target, and actually ordered it to be delivered to my house. I was pretty excited about it, because I'd been searching for a vest like it for quite a while. Well, as you can probably guess. It didn't work out!

The fit was all wrong, it was oversized, too long, and just not at all how I had envisioned it. So back to the store it went and I vowed that day that I would make my own!

Hampton Jean Vest & Panama Tee // Sewing For Women

Heather from @heatherandthepugs and The Pug & Needle, replied to my IG stories that day and said she had also been wanting to make a vest. So we made a plan to sew them together to hold each other accountable so we'd actually accomplish it! :)

We both used the Hampton Jean Jacket pattern, and made a few very simple changes to create a vest.

Hampton Jean Vest & Panama Tee // Sewing For Women

The first important bit of info is that I used stretch denim, also from D&H Fabrics. It's the most amazing slub Italian denim, in the perfect light wash color. The weight is great for a vest, jacket, or a pair of jeans. I made sure to buy plenty so I could make a pair of jeans from what's left. And no worries, I won't be wearing them together! Lol.

Hampton Jean Vest & Panama Tee // Sewing For Women

While the denim has plenty of stretch to be perfect for a pair of skinny jeans, it also worked really well for the vest, which is a pattern intended for non-stretch denim.

Since I wanted the vest to be quite a bit more close fitting than my jacket, AND I was using stretch denim, I knew I'd have to do a bit of sizing adjustments. This was very straight-forward. To start with I simply cut 2 sizes smaller than what I had made my jacket. I did think that I could probably get away with going down 3 sizes, since the denim had stretch, but erred on the side of caution and only went down 2 sizes initially.

Hampton Jean Vest & Panama Tee // Sewing For Women

I should also mention that the jacket I made was in a size 8, and I was between a size 6 and 8, but chose to go up. So that meant I knew confidently I should size down at least 2 sizes.

The next bit of adjusting I did was to shorten the pattern 3/4". I think I could have even shortened a bit more for it to pair better with dresses, but I'm still really happy with it as is.

Hampton Jean Vest & Panama Tee // Sewing For Women

After cutting it and pondering it even more as I began to sew (anyone else do this??? Go over the sewing process and fit in their head countless times??), I decided to use 3/4" seam allowances on the front and back panels, which reduced the width at least another size, maybe even slightly more...

Hampton Jean Vest & Panama Tee // Sewing For Women

After sewing the front and back together and the initial baste fitting at the side seams, I took in the side seams by another 1/4", approximately. So all of my tweaking, in my head and while sewing, worked out pretty well! :)

The last step of fitting was to adjust the armhole depth and width. I don't have an exact number here for you. My notes just say the I adjusted A LOT. Hmm. So very helpful. Lol! I will say that since I took in the width of the overall bodice so much, the armhole was definitely high and quite snug at first. But I just trimmed away until it looked the way I wanted it to! And no, I didn't transfer the shape to the pattern pieces, in hind site it may have been helpful, but since each denim is so individual, I think I'll plan to just fit as I go if there is a next time.

Hampton Jean Vest & Panama Tee // Sewing For Women

Hampton Jean Vest & Panama Tee // Sewing For Women

Denim jackets are labor intensive, y'all!! But oh so worth it! I love both of my Hamptons so much.

Denim jacket/vest sewing tips:

Since this was my second sew-through of this pattern, I feel like it went quicker than the first. Muscle memory, or whatever. However, it's like giving birth. You forget how intense it is until you're in the process again. Ha.

The biggest tip I learned this time around was a flat-felled seam trick. The first time I sewed the jacket, I used wonder tape to keep things laying correctly without using pins. This worked pretty well, although I did still have quite a few places where it didn't quite catch, and I felt like I was really using a lot of the tape and was feeling guilty about all the $$.

This time, the idea to use Elmer's glue stick popped into my head! And it worked really, really great! I'd say it worked better than the wonder tape, I only had 2 little places where my topstitching didn't quite catch. It is definitely a bit more messy though. My fingers felt like they had spent the day in kindergarten. :) And the tip of the glue stick was covered in threads by the time I was finished, but I have been using that glue stick for so many things since then. So handy!

I was unsure on how to finish the armholes. I planned to use bias tape because I had inspected the vest from Target to see how it was constructed, they used self fabric for the bias, but I felt like my fabric was a bit too thick to make it through my machines nicely. So I searched my stash for something appropriate and thankfully found a tencel denim in almost the identical color and used that to finish things off! It looks lovely on the inside and unless you look really closely you wouldn't even be able to tell it's not self fabric.

Hampton Jean Vest & Panama Tee // Sewing For Women

I don't have any personally experienced, brilliant, button-hole sewing tips for you, although I really wish I did! Let's just say my Bernina is great at a lot of things, but she likes to act up when I ask her to sew button holes on denim!

Grainline Studio did recently share that there is an attachment available for Bernina's buttonhole foot that makes sewing buttonholes on bulky fabrics a breeze! So I'll be checking into that for sure...

I intended my vest to only be worn open anyway, so I gave the button holes a shot and settled for good enough. Nobody could ever tell they aren't quite all the same size or that the bottom button hole is juuuuust a tad, ok, it just is... too small. Except now you know because I spilled the beans.

Hampton Jean Vest & Panama Tee // Sewing For Women

And I tell you this so that you can hopefully be encouraged to let things go every now and then if you are a perfectionist. I am a perfectionist, but I'm coming to learn that there are certain things that only I will know (unless, ahem, I tell the whole world here on the blog), and some of those things are just okay. I honestly can't even tell that my button holes are wonky, I've forgotten about it, unless I fiddle with the bottom button, which I sometimes do... But then it's just a reminder that I made this thing with my own two hands and I'm stinking proud of it!

Panama Tee:

Hampton Jean Vest & Panama Tee // Sewing For Women

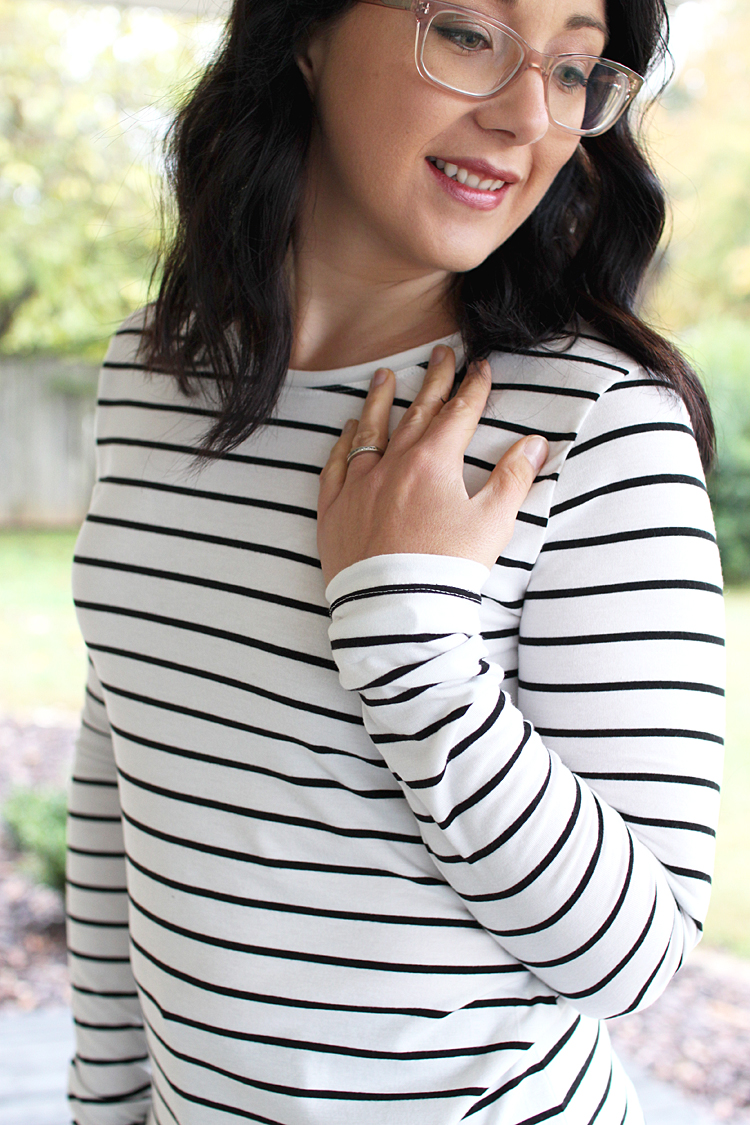
Today on the D&H Fabrics Co blog, I'm writing all about the four tops I made using this lovely striped tri-blend jersey. I've written most of the pertinent information in that post, but I'll be showcasing each pattern in it's own post here on the old blog-o as well.

Hampton Jean Vest & Panama Tee // Sewing For Women

There's not really a whole lot to say about this particular pattern, except that I really truly. love. it. It's a TNT pattern for me in both the dress and the tee version. It fits so, so well. It manages to be fitted and flattering, without clinging to any of my problem areas and accentuates all the good parts at the same time. What's better than that in a basic tee!? Nothing. Nothing at all.

Hampton Jean Vest & Panama Tee // Sewing For Women

For this shirt, I sewed my standard size 6 and shortened the bodice 1/2" inch.

Hampton Jean Vest & Panama Tee // Sewing For Women

Jeans:

Hampton Jean Vest & Panama Tee // Sewing For Women

The jeans I'm wearing are my newest me-made pair, the Dawn Jeans by Megan Nielsen. You can read all about them HERE. I also have more info saved in my IG stories highlights on my profile HERE. I love them so much that I've ordered 2 more cuts of denim for more pairs and *happy dance*, it's supposed to be arriving TODAY!!

Dawn Jeans // Sewing For Women

And now with that, I think I will end this super wordy post!!

If you have made it to the end, you truly are a rock-star and deserve a prize! Especially since I'm drugged up on cold medicine and am feeling super chatty-tired.

I hope you all are having a very wonderful weekend, and am sending you all the relaxing cozy vibes. The holidays are upon us! I hope you find the time to chillax and enjoy the season. 💗

~Heidi

© Handmade Frenzy • Theme by Maira G.