SLIDER

Panama Tee Dress "LBD" // Sewing For Women

Tuesday, March 28, 2017


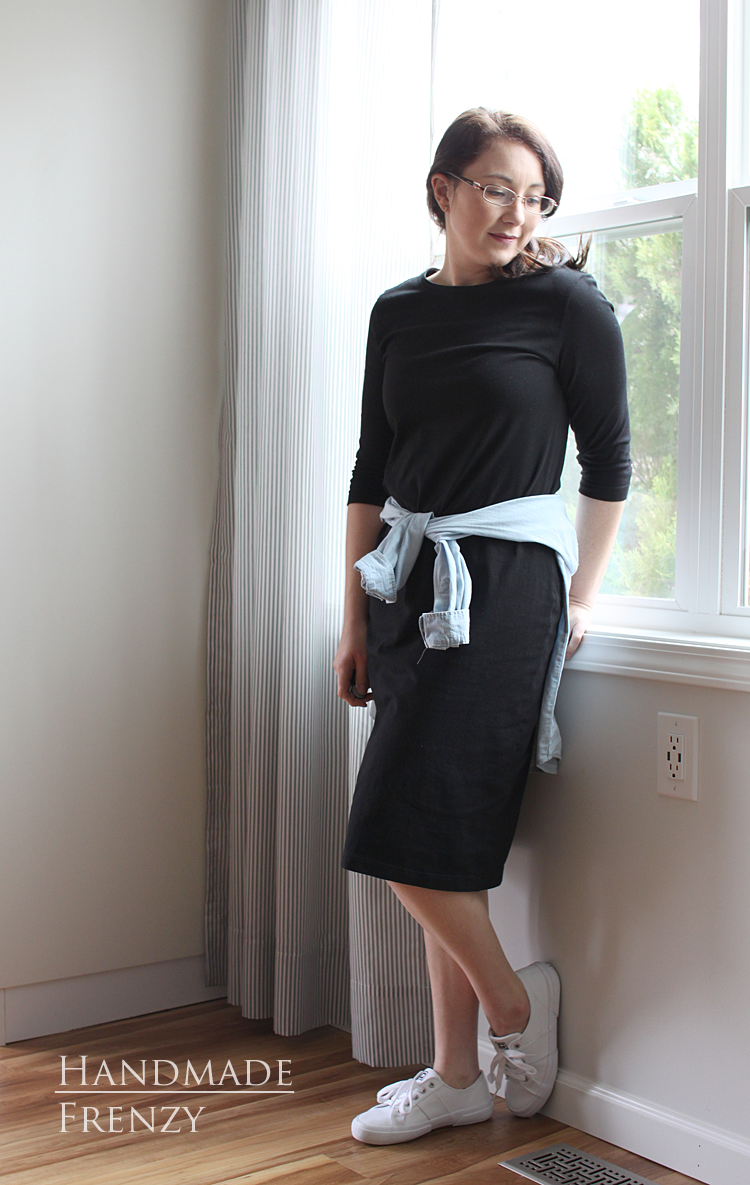
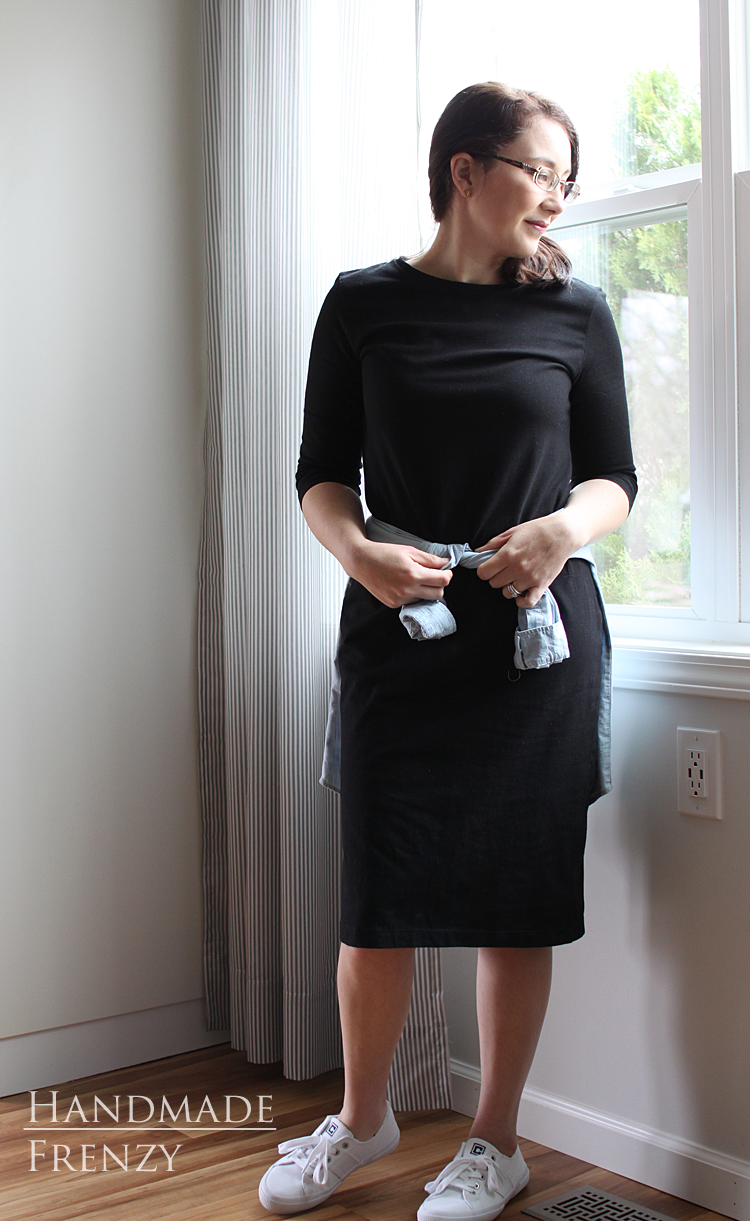
Every girl needs a Little Black Dress hanging in her closet. Enter my favorite, versatile dress pattern. The Panama Tee Dress. This is my third version (I blogged the other two, here), and believe me, I am no where near done with dresses from this pattern!


For this version of the dress, I wanted a midi length. This was as impossibly simple as adding 4 inches to the hem! That's it. I also wanted 3/4 sleeves. I just shortened the long sleeves several inches below the elbow length cut line. 

Panama Tee Dress // Sewing For Women

I feel it's important to mention that fabric choice really makes this dress. I've used three different fabrics on this pattern and each one serves a different function, based on fabric choice. This is a dreamy 14oz stretch cotton spandex jersey from LA Finch Fabrics. When I ordered it for this dress they had only black available, but because they are awesome like that over at Finch, they now have several amazing colors to choose from!

Panama Tee Dress // Sewing For Women

Because the fabric is heavier and has such incredible stretch recovery, it fits pretty close to the body, but is still forgiving. It's basically my dream LBD. Comfy, yet really makes me feel put together.

And check it out below. It can even work for running around doing "momming" duties!

Panama Tee Dress // Sewing For Women

Panama Tee Dress // Sewing For Women

Panama Tee Dress // Sewing For Women

Panama Tee Dress // Sewing For Women

Have you tried this pattern yet? It's definitely one I highly recommend and I'm pretty sure you need it! :)

Outfit details:

Hampton Jean Jacket // Sewing For Women

Tuesday, March 21, 2017

Hampton Jean Jacket // Sewing For Women

Hello everyone!!

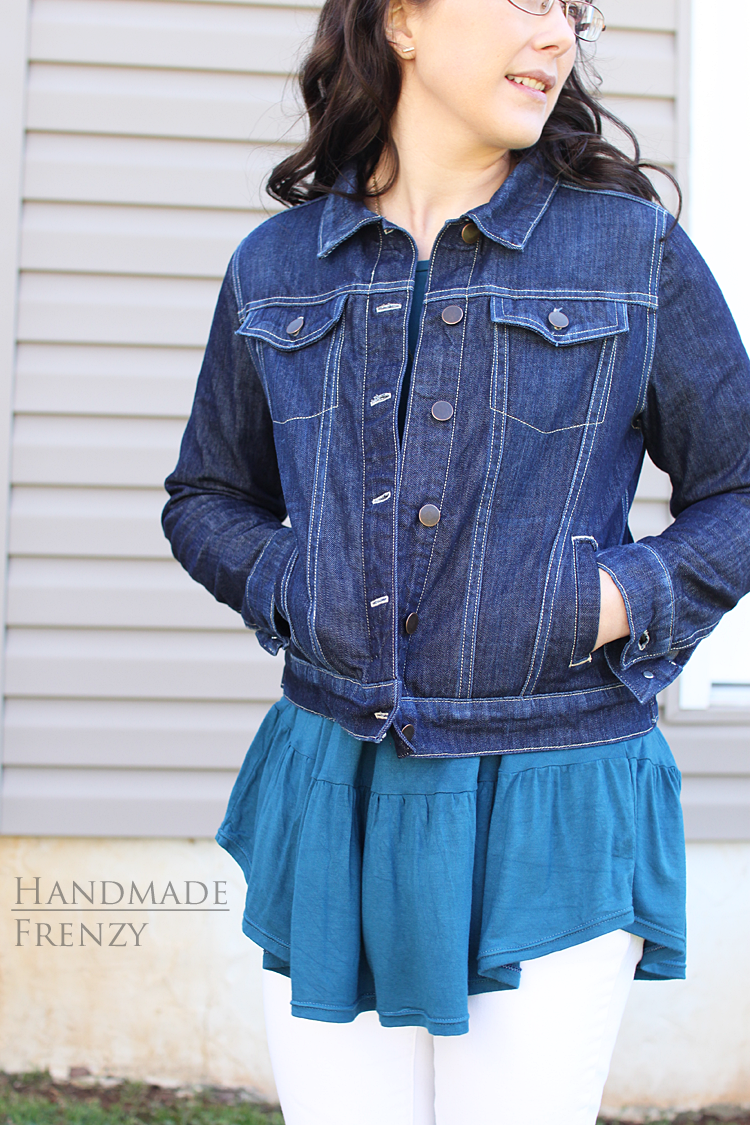
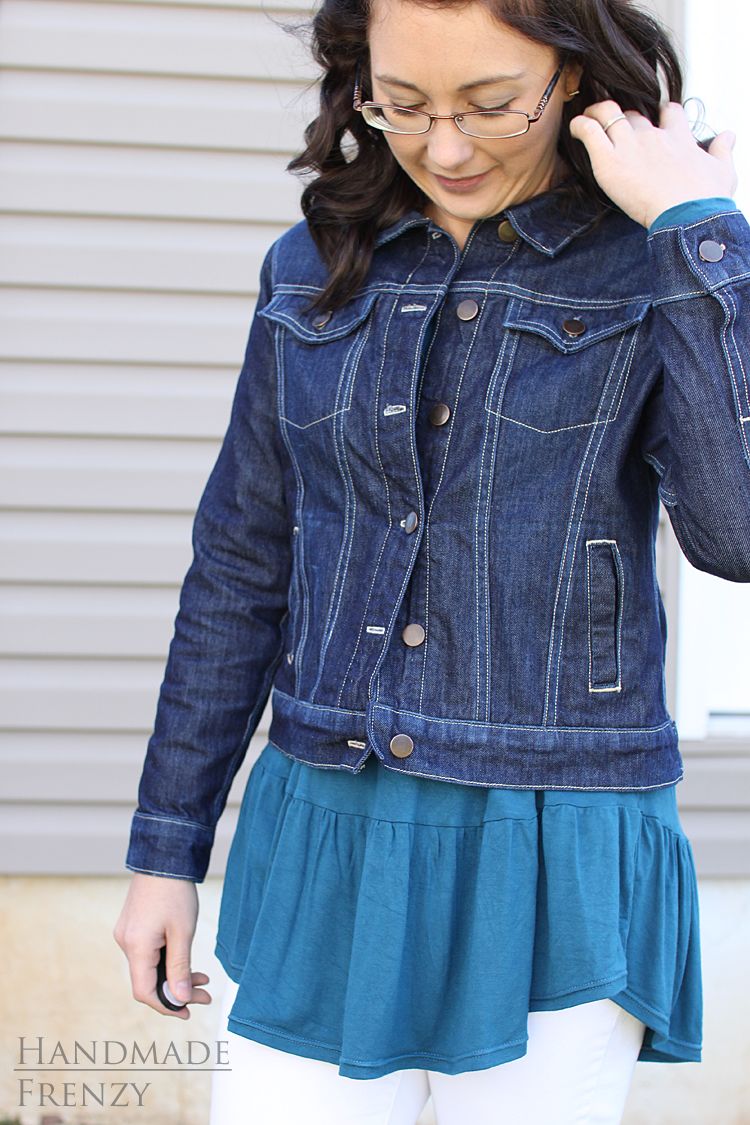
I can't even express how excited I am to share today's post with you! This project is by far the most labor intensive project I have ever tackled, to date. And by far the one that I am most proud of!!!!!

The Hampton Jean Jacket is the newest pattern from one of my (if not the) favorite pattern designers, Alina Sewing + Design Co. Her attention to detail, plus clear instructions and illustrations make her amazing patterns top notch. In this pattern, she walks you through the process step-by-step and it's pure magic to watch this jacket take shape!

Before I dive fully into all the details, I want to make sure I make it clear, that while it is labor intensive, it is not that difficult! I believe an advanced beginner could handle this project with some patience. Keep reading for all the details about what I learned through the process!

Hampton Jean Jacket // Sewing For Women

Oh my goodness, where to even start... Well, I'll just start at the very beginning! 
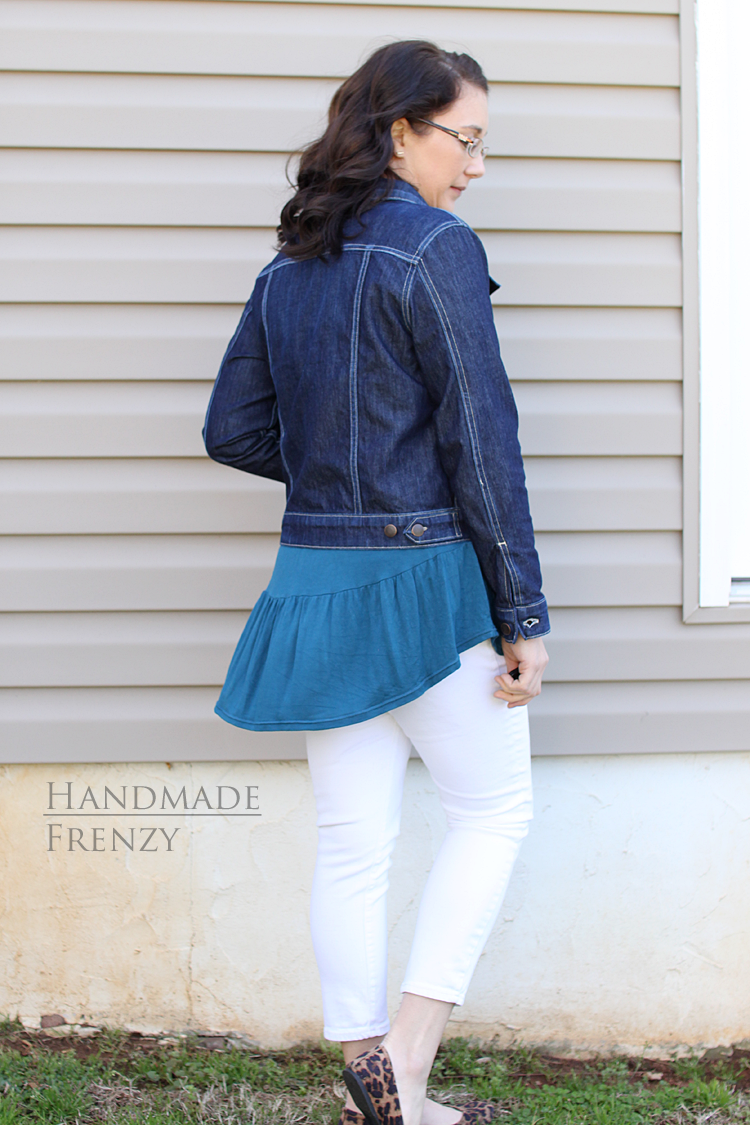
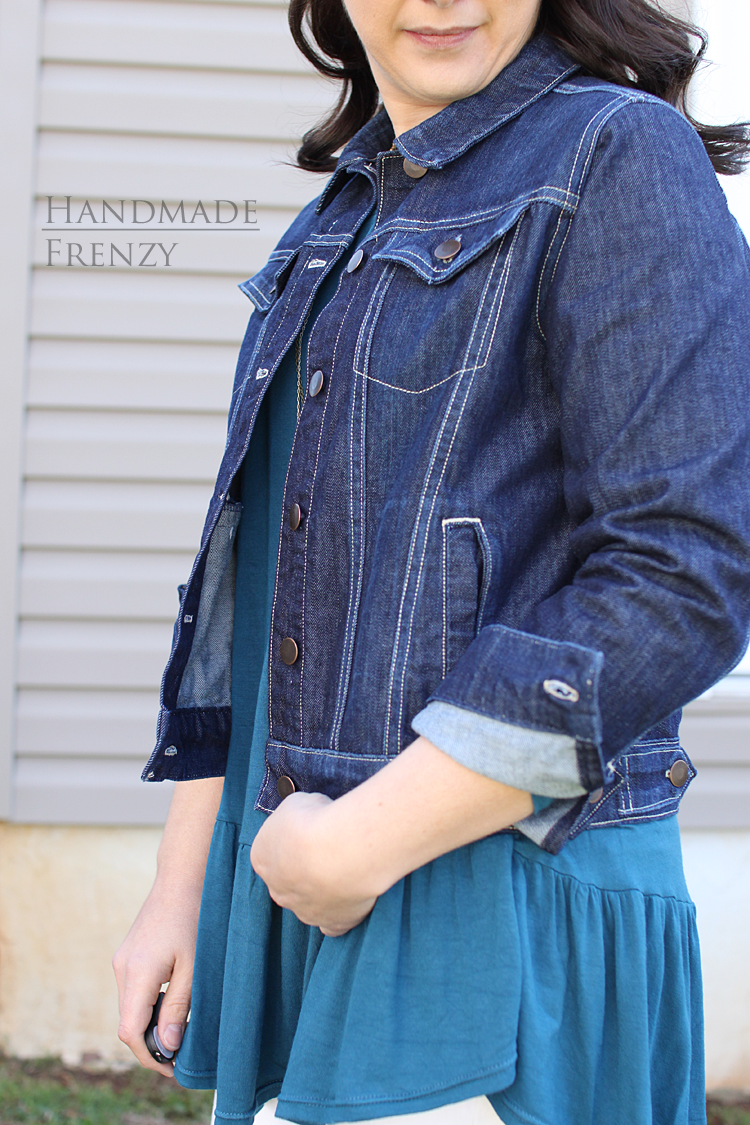
Alina had each of us testers make a muslin. I would recommend this to anyone looking to make this jacket as well. A canvas drop cloth from a hardware store works well, and is an easy on the wallet option, mine was $6. I was between sizes, so this was especially helpful in trying to decide whether to size up or down. For this one, I ended up going with the larger size, because I wanted to make sure I would be able to get the most wear possible out of it! I can throw this on over a couple of lighter layers, I've worn it over a tee and long sleeve cardi and was still comfortable. I've also worn it over just a sleeveless maxi dress, and it still looked fabulous. There are also things to consider like how it fits in the shoulders and elbows when making a muslin and tweaking just a little to get a much more custom fit that you would from a RTW jean jacket.

Just to note a few changes between mine and the final pattern: The bodice and sleeves are both 1" longer, the waistband, collar, and cuffs are interfaced (mine are not), and the welt pockets are a teeny bit longer.

Hampton Jean Jacket // Sewing For Women


Next up, was choosing denim, prewashing (machine wash and dry completely to pre-shrink) and cutting it out! I used 10oz. Cone Mills Denim in Indigo from Thread Bare Fabrics. I have read so much about Cone Mills Denim and was so excited to get some in my hands. I am fan girling just like everyone else about this stuff. It is sooooo nice. I actually found it quite nerve racking to cut into, haha. I was so scared I was going to mess us this precious denim and not give it the life it deserved. I also feel somehow connected to it because it is made right here in NC, not that far from where I live! I had to chuckle about the fact that it was sent to me from California, though. 

Hampton Jean Jacket // Sewing For Women

After I got through the cutting part, the real fun began with construction! Before I started sewing, I sewed a couple of sample seams and practiced some distressing. Funny how I was so scared to mess up the denim when I was cutting it, but had no problem attacking it with sandpaper!! What I found worked best for me, and gave the results that you see, was to use 220 grit sandpaper and distress each seam by hand before topstitching. I paid more attention to the edges of the seams to give them a slightly worn in look. I also sneezed a lot, sanding denim is quite dusty. And blue! :)
Alina has a full post coming on her finding with bleaching and distressing denim. It is definitely a resource worth keeping!

Hampton Jean Jacket // Sewing For Women

Once I had the distressing method figured out, the real process of constructing began. It was magical from the beginning, because each seam was like a little nugget of gold after it was done and was so fun to admire. 

*It's been almost a month since I finished up my jacket, and just talking about the process makes me want to make another, it's just that thrilling!!*

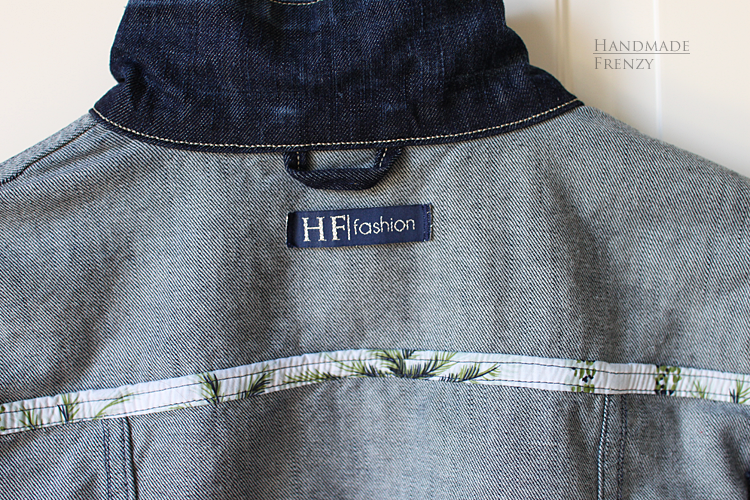
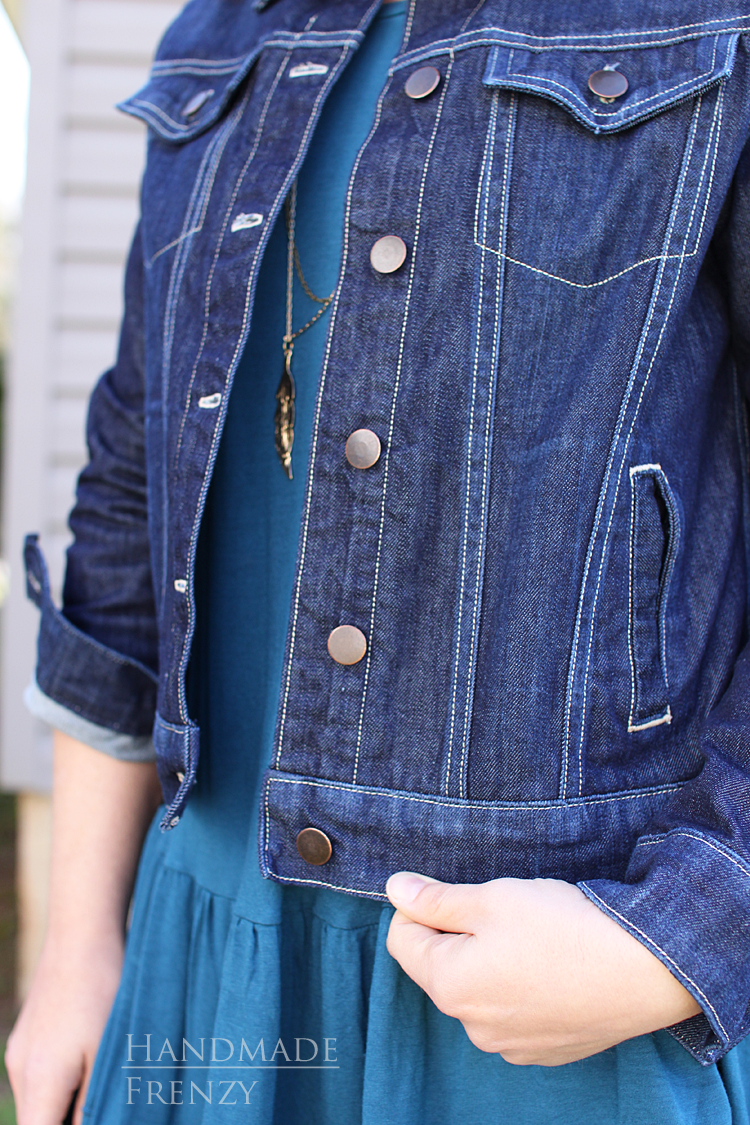
I pulled out my backup machine for constructing the seams and then used my Bernina for the topstitching. If you have the option to set up 2 machines, I highly recommend it, because it helps things go so much faster. Otherwise, you will be sewing a seam or two, then switching to topstitching thread and back again. A serger is useful as well, but really not used very much. As you can see below, most of  the seams are beautifully enclosed with flat felled seams or as I did, you can choose to bind them in a couple of areas. In the final pattern, Alina also gives tips on what types of thread and colors to use. My only regret on this jacket is that I didn't use bobbin thread that matched my topstitching thread. If I were to do it over, I would use beige bobbin thread throughout on the inside, except for the places I used the binding and the pocket linings (I would have used white). It would just have made it look a little cleaner. But regardless, I am still extremely proud of this make and will show you the guts with no regrets. :)
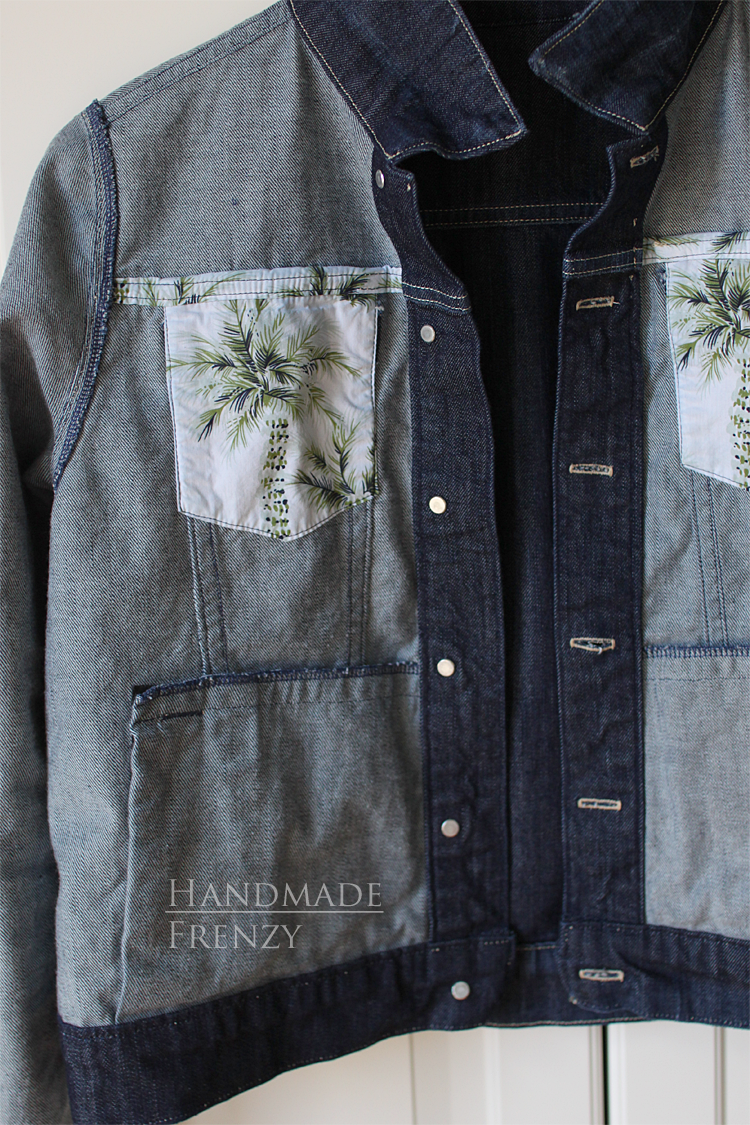
Hampton Jean Jacket // Sewing For Women

Katie from Handmade Threads and Threadbare Fabrics gets full credit for this next tip. She suggested using wonder tape to hold the seams down when flat felling instead of using pins and it was awesome. Be sure to have a full roll or two on hand before starting though, but it is worth it!

Hampton Jean Jacket // Sewing For Women

Probably the most difficult part, but really not even truly difficult, it just required patience, was the sleeves. There's a bit of topstitching that needs to be done after the sleeve is a tube. But it just takes breathing, (I always forget to breathe! Ha.) and taking your time, plus making sure your fabric is moving evenly so the topstitching stays consistent. There are places where mine is not perfectly so, but I don't mind, I'm sure no one will notice except me anyway!

Hampton Jean Jacket // Sewing For Women

 I'm still in a little bit of disbelief that I actually made this. Like I said before, although it is a very time consuming project, it's not that difficult! And seeing it come together is empowering! It has given me the burn to make more difficult things. I have swimsuits, jeans, all the bottoms, really, and slow sewing tops in the pipeline now! Life has been a little difficult and crazy lately, so I haven't been able to start on most or any of it, but I've had time to do fabric shopping! :)

Ok, that was a rabbit-hole... Back to the jacket. I seriously love all the topstitching on this garment. Heart eyes, all the heart eyes.
Hampton Jean Jacket // Sewing For Women

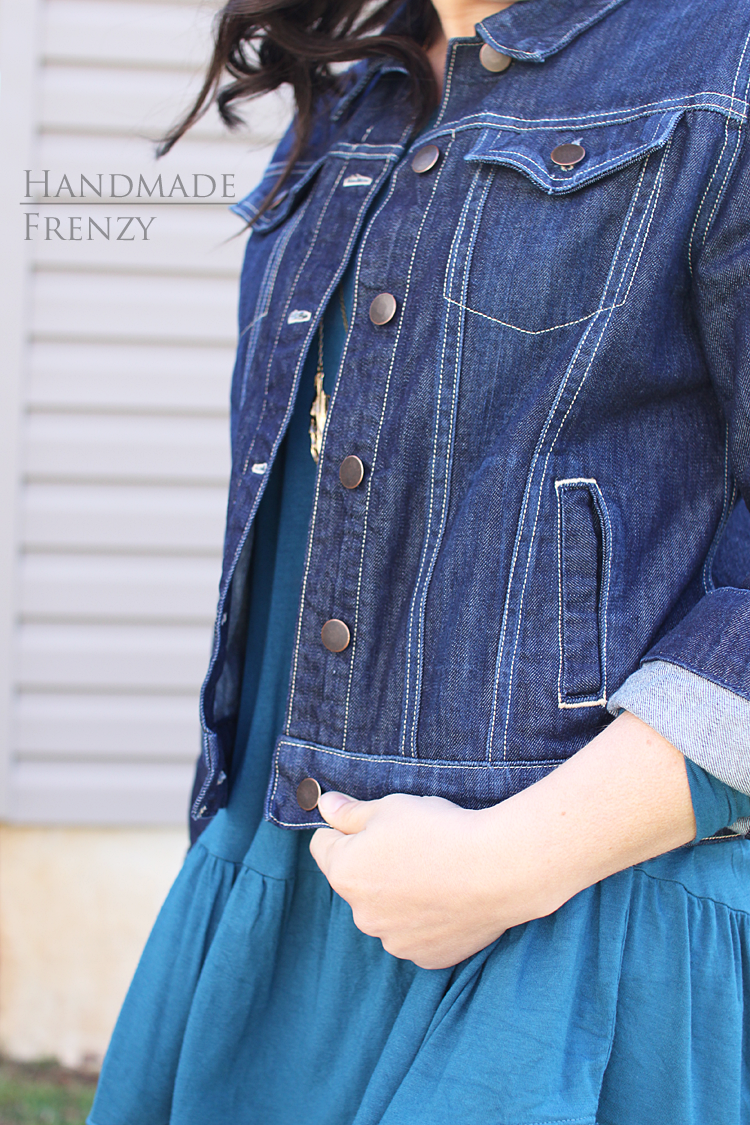
The last steps are to make the button holes and hammer in the buttons. A couple of the others convinced their machines to cooperate in using topstitching thread for the buttonholes, but I didn't quite have that coaxing power. I ended up using regular thread in the same color and doing 2 passes on each button hole. This worked great and unless you really look closely, you can't tell. Also, my plan was to do a keyhole style button hole, but because of the bulk of the intersecting seam at the very top and bottom of the placket, it didn't want to play nice. I was able to do this style with no problems at all on the front pockets and back tabs. So I ended up doing regular button holes on the placket. Now that I'm thinking about it, I realize I didn't try to use my seam jump thingy-ma-bob here. I will have to try that next time, and maybe my keyhole button hole dreams can come true. :)

Hampton Jean Jacket // Sewing For Women

The final step is to throw that freshly made, crisp denim jacket into the washer and dryer at least once, maybe 2-3 times. It will give it an amazing crinkly, worn-in texture, just like what you crave in your favorite jean jacket.

Hampton Jean Jacket // Sewing For Women

Well, there you go guys. My most prized me-made garment, to date. So far my favorite reaction to telling someone I made my jacket was "WHAT!? I thought those were only made in factories!" Empowering I tell you! Also, if you have a chance, search for some videos that show how jeans ARE made in factories. It is extremely fascinating. And might make you wish for some of the crazy machines they get to use. :)

 I hope you've enjoyed reading about it and seeing it. I sure have enjoyed reliving the experience! And I hope I have inspired you to make your own! You can do it!! Alina has a sew-a-long coming as well and it will be super helpful for any little tricky bits!

Hampton Jean Jacket // Sewing For Women

Hampton Jean Jacket // Sewing For Women

Hampton Jean Jacket // Sewing For Women

Hampton Jean Jacket // Sewing For Women

Hampton Jean Jacket // Sewing For Women

Hampton Jean Jacket // Sewing For Women

Hampton Jean Jacket // Sewing For Women

Hampton Jean Jacket // Sewing For Women

Hampton Jean Jacket // Sewing For Women

Be sure to check out the jackets my fellow testers made!!! They are all incredible. Click on the links below to access their social media and/or posts.

Leslie - Threadbear Garments
Teri - Fa Sew La
Heather - The Pug & Needle
Katie - Handmade Threads
Jill - Becoming Bright
Ashley - @littlebitco
Anya - Anna Zoe
Jodi - Back40Life

 Pattern:

Fabric: 
  • Waterfall Raglan
  • Necklace - made by me - supplies from Hobby Lobby
  • White Rockstar Capris - Old Navy
  • Leopard Print Flats - Target


Woven Bryant Dolman // Sewing For Women

Wednesday, March 15, 2017

Bryant Dolman Top // Sewing For Women

Hello again!

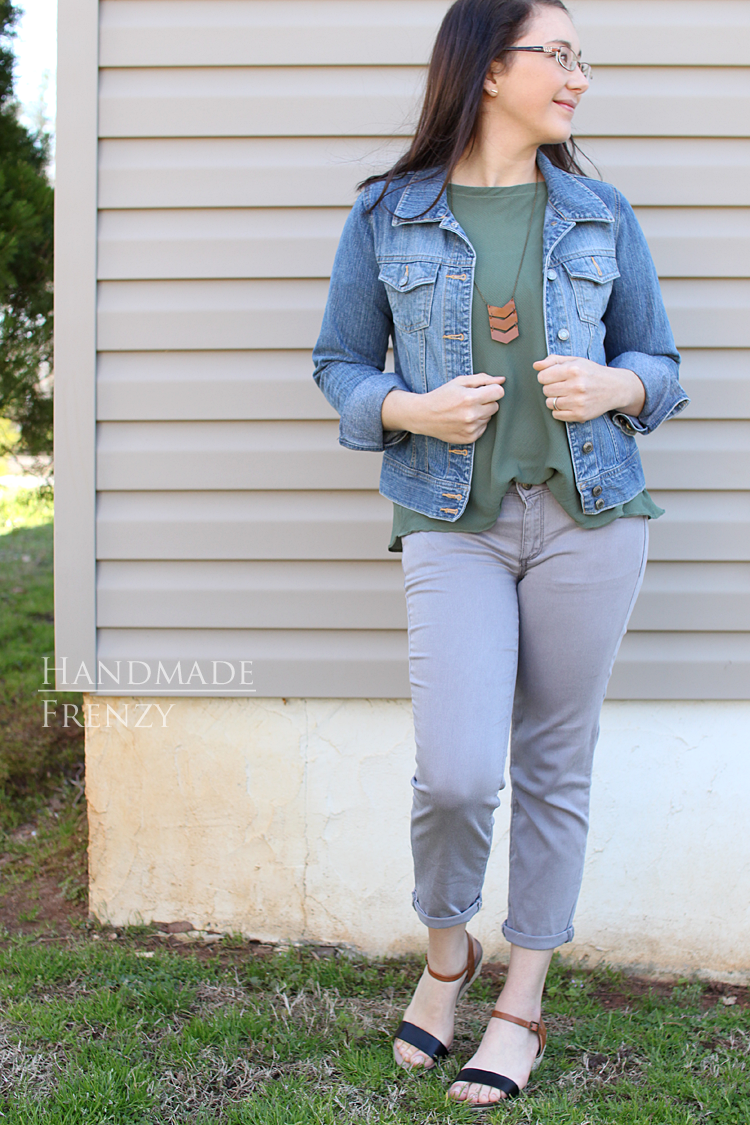
Yesterday I shared my tester version of the newly released Bryant dolman pattern from Straight Stitch Designs. This pattern is designed for knits and for the bodice to be cut on the bias. After making my knit version and loving the incredibly comfortable fit of it, I really started to be curious about how it would work in a woven fabric!

*Let me preface this post with saying that I do like this shirt! There are many things I will change next time, but that is no reflection of the pattern at all. These are my changes, this pattern is intended for knits, not wovens, so the outcome will obviously be different. But I wanted to share my experience in case anyone is wanting to dive into this for themselves! :)

I had this lightweight poly crepe, with a 5% spandex content that I also found at Joann's and decided to use it to give it a try. 

Bryant Dolman Top // Sewing For Women

I made this woven version exactly the same as the knit. No changes to the pattern at all.

The final result is wearable, but there are quite a few things I learned and would do differently next time. 

First of all. I chose an all poly woven fabric. Why don't I learn? I am not a fan. This in particular is so terribly static-y that I have to wipe it down with a dryer sheet in order for it not to cling to my body. Oy. I have not had this problem with poly knits. Also, poly blend wovens haven't been a problem for me. Have any of you experienced this? 

It was very breezy when I was shooting these photos, so I apologize for all the blowing. :) It makes it a little difficult to see the shape and how it hangs.

Bryant Dolman Top // Sewing For Women

The second thing I'm going to talk about is fabric placement when using a woven for this pattern. This fabric has stretch to it. If choosing a woven fabric with stretch, I would for sure place the pattern on grain when cutting out and not on the bias. The drape from the fabric itself, combined with the bias cut and static. It's all just way too clingy! But, if using a woven fabric without any stretch and not much drape, cutting on the bias could give you a better outcome.

Bryant Dolman Top // Sewing For Women

The third change I would make is to add some of that length back in, that I took out when making my knit version. This can also vary, depending on the weight of your fabric. This one is super lightweight and doesn't pull itself down like the heavier knit did. 

Bryant Dolman Top // Sewing For Women

The 4th, possible change I would make when making a woven version is to go up a size or two. I like how this looks in this size, but it feels a little snug across my shoulders.

Whew! Those are all my thoughts on my woven version! I'd like to point out, that despite all the things I would change if I could start over, that I am happy with this shirt! It all adds up to experience and I'll take all these things into consideration when cutting into my next woven version of a knit pattern :)

My favorite things about my new top: The color. I love olive. I love, LOVE, to wear it in the fall and I'm trying to figure out how to incorporate it more into my wardrobe throughout the year. I love the flowiness and how it looks tucked in just a wee bit in the front, and the sleeves just make me happy. I don't have a lot of tops with a sleeve cuff, and I'm really enjoying this feature.

So there you have it! What do you think? Would you try this pattern in a woven fabric?

Bryant Dolman Top // Sewing For Women

Bryant Dolman Top // Sewing For Women

Outfit Details:

Sewing Pattern
Fabric:
  • Poly crepe with 5% spandex - Joann's
Other:
**This post contains affiliate links. I only share products that I truly believe in and love the quality of. Kimberly's patterns are some of my very favorites and I definitely recommend them!**

Bryant Dolman // Pattern Testing // Sewing For Women

Tuesday, March 14, 2017


Bryant Dolman // Sewing For Women

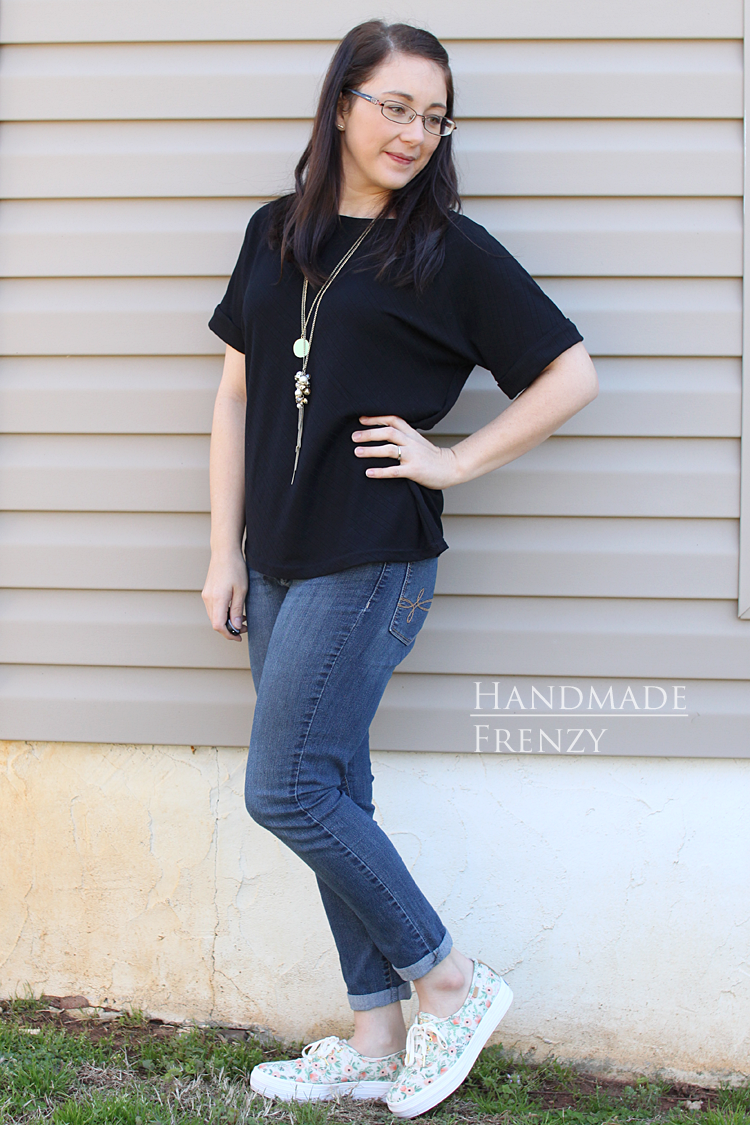
I'm back with another brand new pattern that I got the chance to test last week! This is a goody, the Bryant Dolman from Straight Stitch Designs. I love all of Kimberly's patterns and have made quite a few. This one is no exception! It's an easy, relaxed fit dolman top with a fun twist. The pattern is designed for knits and is cut on the bias. If you love stripes like I do, subtle or not, this adds a fun detail!

Bryant Dolman // Sewing For Women

The pattern includes a boatneck neckline, is intended to be hip length and includes options for short sleeves with a cuff or full sleeves.

All of Kimberly's patterns are drafted for a height of 5'9", being 5'3" myself, I typically shorten her patterns. I've shortened this one 3 inches and I'm loving the result!

 I chose to make mine with the short sleeves and cuff because I *thought* spring was here. Now I'm sitting here shivering in my cozy warm clothes as I write this. 

Regardless, spring WILL come soon, and I'll be prepared for it in my new easy to wear top!

Bryant Dolman // Sewing For Women

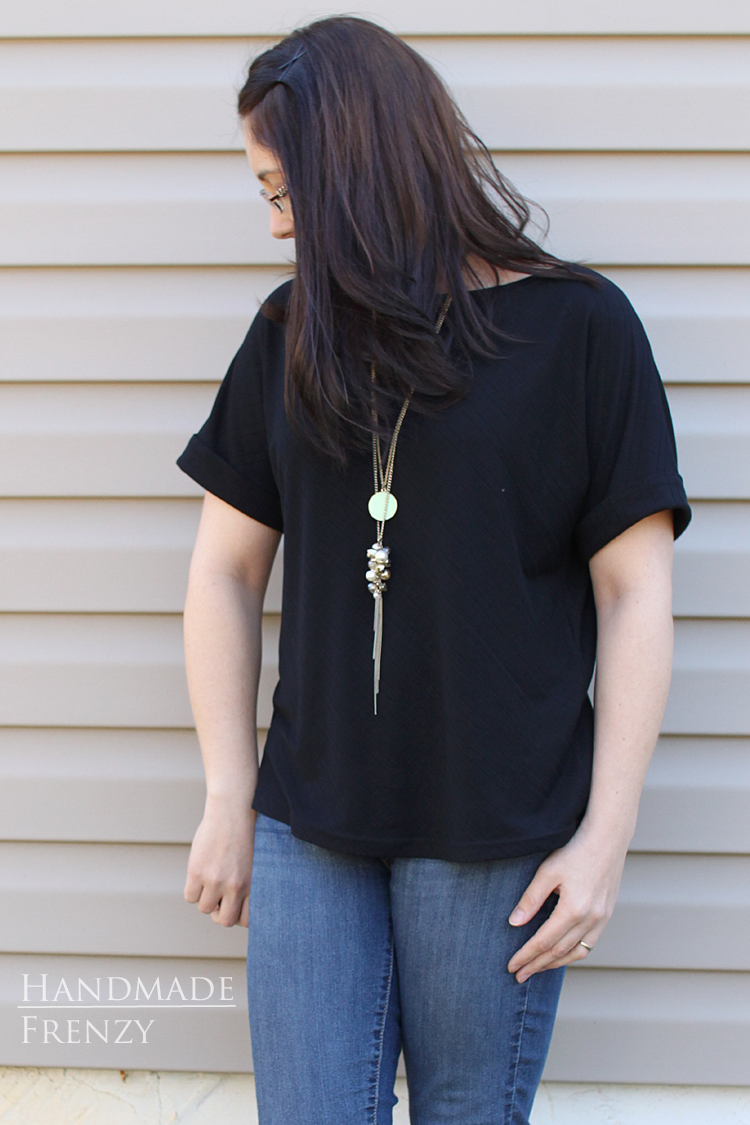
I made this top with a slub ribbed knit from Joann's. I love the subtle stripe detail in this fabric and how cutting it on the bias added another layer of interest. 

Bryant Dolman // Sewing For Women

During testing, this pattern was made up in a huge variety of knits that produced many different looks! It will be fun to play around with and come up with some different looking tops all from the same pattern. My personal favorites are the more structured knits with less stretch. Like this one for example, which is lightweight, but not super stretchy and holds it's shape well. I especially love Kimberly's French Terry versions, I'm sure a few of those will find their way into my closet. There were also a few (myself included) who were curious how this pattern would turn out in a woven fabric! I'll be sharing my version of that one tomorrow. 

But for now, I'll leave you with a few more shots of my new favorite black tee! *After making this top, I realized I had no other solid black tops in my closet. What!??

Bryant Dolman // Sewing For Women

Bryant Dolman // Sewing For Women

Bryant Dolman // Sewing For Women

Bryant Dolman // Sewing For Women

Bryant Dolman // Sewing For Women

Bryant Dolman // Sewing For Women

Bryant Dolman // Sewing For Women

Bryant Dolman // Sewing For Women

Bryant Dolman // Sewing For Women

Bryant Dolman // Sewing For Women

Outfit Details:

Sewing Pattern:
Fabric:
  • Slub Rib Knit - Joann's (unavailable on the website, but my store had several colors)
Shoes - Keds (Rifle Paper Co.)(!!!!!!)


**This post contains affiliate links. I only share products that I truly believe in and love the quality of. Kimberly's patterns are some of my very favorites and I definitely recommend them!**

Tierras Woven Joggers // Pattern Testing // Sewing For Women

Monday, March 6, 2017

Tierras Woven Joggers Pattern // Sewing For Women

Happy Monday everyone! 

I'm excited to be starting off this week with a super fun project (or two)! Last week I had the privilege of testing the brand new Tierras Woven Joggers pattern from Itch to Stitch. These are a super quick sew! I had two pairs whipped up in no time at all.

The joggers are meant to be low-rise, with a slightly tapered leg, optional elastic hem at the ankle. The joggers feature an elastic & drawstring waist and deep side pockets that are just perfection. Both of the versions I made, I chose to do a straight hem and also raised the rise for more of a mid-rise version. My mommy tummy prefers the mid-rise ;) The pattern includes instructions on how to adjust the rise, this is a super easy modification! If you are a beginner at pants sewing, I would definitely recommend this pattern, adjusting the rise on this pattern was the easiest I have done so far.

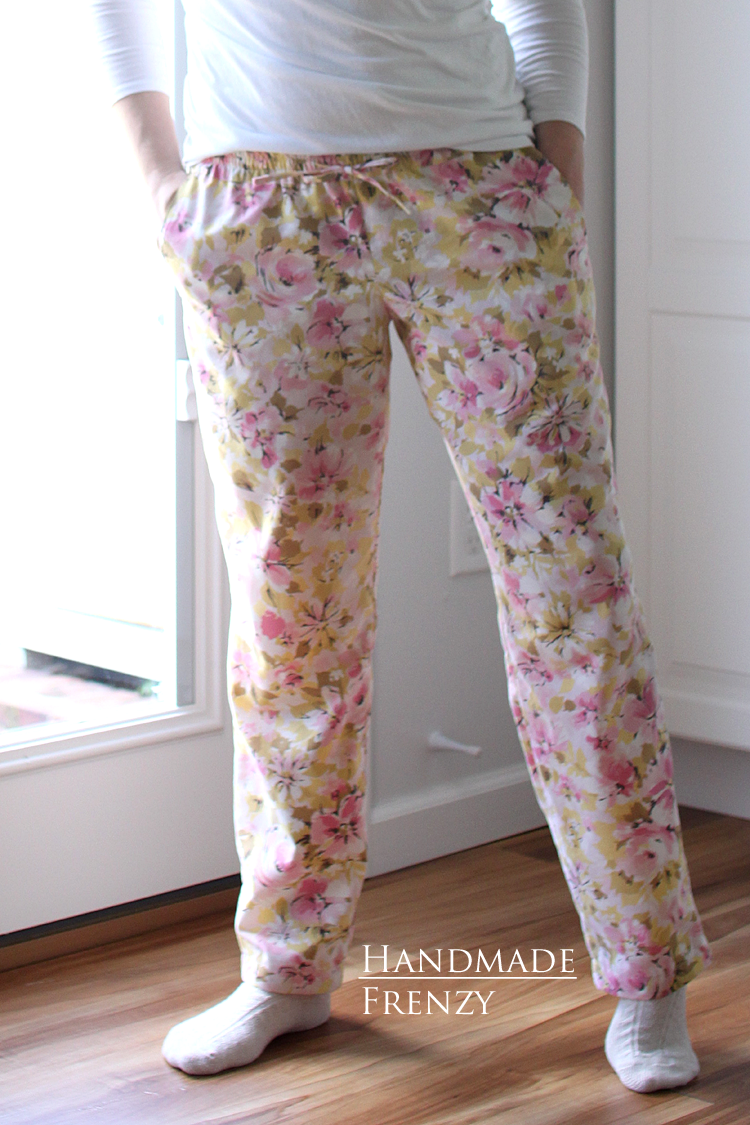
The first pair I made was my "muslin" that I was very hopeful would be wearable, and I was not disappointed! For this pair, I added 1" to both the front and back rise. I did not adjust the leg length for my height on this one and ended up cutting off  2 1/2" before hemming. No other adjustments were made and I am SUPER happy with the fit all around. I used a vintage sheet that has been in my stash for years and am so happy I used it for this project, it is the perfect worn-in-soft that I was going for on this pair. I'll just be lounging in these every Saturday morning and Sunday afternoon from here on out...

Tierras Woven Joggers Pattern // Sewing For Women

Tierras Woven Joggers Pattern // Sewing For Women

The second pair I made, I went for the wear-them-out-of-the-house kind of pants :) I'm going to be honest here and say that this is a little more bold than I would normally wear, but paired with the white shirt and jean jacket, I think I could pull it off comfortably! 

One of my goals this year is to sew a lot more from my stash, and I did just that for this project. I wanted to try this pattern in a more drapey fabric than the sheet I used for the first version and this rayon was the only piece I had that had enough yardage to work with. I am pleased with how it came out and in a drapey fabric, this pattern takes on a whole new look that I am definitely in love with!

Also, if you are like me, sometimes you might be tempted to skip features to save a little time... I was tempted to skip on the drawstring, but I'm so glad I took the extra 10 minutes to insert it! It gives a fabulous adjustable fit and makes them feel so much more secure and like real "pants" instead of just pjs, haha! They are still secret pajamas, but feel a little bit more substantial.

Tierras Woven Joggers Pattern // Sewing For Women

I did order some solid colored fabric for my next pair, just sayin'... ;) 

For this version, I added another 1/2" to the front rise, based on my first version. But now having sewn it up, I don't think I would have needed to do that in such a drapey fabric. This just goes to show how differently a garment can look and feel based on fabric selection! I also shortened the legs on this version the 2 1/2" that I cut off at the hem on the first version. I am 5'3" for reference.

Tierras Woven Joggers Pattern // Sewing For Women

I'm really looking forward to sewing up a few more of this pattern in some solid colors! I'm also thinking of a cropped version, hmmmm, yes!

Tierras Woven Joggers Pattern // Sewing For Women

I'll leave you with an onslaught of photos! I love my new comfy pants! These will be seeing a lot of wear, since much of my time is spent at home! Even though I do stay home a lot of the time, I still like to get dressed and feel put together. This pattern combines put together and pure comfort. A huge win in my book!!

Tierras Woven Joggers Pattern // Sewing For Women

Tierras Woven Joggers Pattern // Sewing For Women

Tierras Woven Joggers Pattern // Sewing For Women

Tierras Woven Joggers Pattern // Sewing For Women

Tierras Woven Joggers Pattern // Sewing For Women

Tierras Woven Joggers Pattern // Sewing For Women

Tierras Woven Joggers Pattern // Sewing For Women

Tierras Woven Joggers Pattern // Sewing For Women

Tierras Woven Joggers Pattern // Sewing For Women

Tierras Woven Joggers Pattern // Sewing For Women

PS. 
This is the first Itch to Stitch pattern that I have sewn and I was very happy with the whole experience! I can't wait to sew more of Kennis' patterns! I love that her tops are drafted with built in cup sizes. It also helps that my measurements exactly fall in line with her size 4. I have the Bonn Shirt pattern and can't wait to sew it up. I'm hoping I can get away with very few adjustments! I also have my eye on the Vienna Tank for this summer. Stay tuned for those!

Details & Links

Pattern:
  • Tierras Woven Joggers // Itch to Stitch
  • Size Sewn: 4; added 1 inch to front and back rise, shortened leg length 2 1/2" 
    • Current measurements: Height; 5'3", Waist: 28.5", Hips 37.25"
Fabric:
**This post contains affiliate links. I only share products that I truly believe in and love the quality of. Kennis' pattern is topnotch and I definitely recommend it!**
© Handmade Frenzy • Theme by Maira G.