SLIDER

Eucalypt Top // Sewing For Women

Wednesday, April 24, 2019


Eucalypt Top // Sewing For Women

Hi friends!!

I'm back today with another make from Megan Nielsen. The Eucalypt pattern recently underwent some updates and I was so excited to have the chance to make my first one ever, but using the new pattern!

Eucalypt Top // Sewing For Women

The pattern includes a tank or dress option and is intended for woven fabrics. True to my style, I decided to switch things up a bit! I had this 100% cotton Island Leaf Print Jersey from Cali Fabrics sitting in my stash for quite a while, and when this pattern popped into my radar, I knew that it would be perfect as a tank! And even better, the timing worked out that it was right before a beach vacation. Even more perfect!

Eucalypt Top // Sewing For Women

To make this pattern in knit, I made absolutely no changes since my fabric has no spandex content and it is quite a stable knit.

Eucalypt Top // Sewing For Women

To finish off the neck and armholes, I just made a typical knit band using self fabric. This worked out really well! The only thing I would do differently is to cinch things in just a leeettle tighter were I to do it over, because the openings are slightly loose. If I were to use a stretchier knit, I would size down one size for sure.

Eucalypt Top // Sewing For Women

It was a really quick sew in knit, and it wouldn't be much more time consuming in a woven. I sewed a size 8, and shortened the length 1 inch.

Eucalypt Top // Sewing For Women

I can't wait to make this pattern again in a woven fabric as well! I think a tank dress will be really fun for a casual summer piece!

Eucalypt Top // Sewing For Women


*Disclosure: A copy of the pattern was provided to me at no-charge in exchange for an honest review. All opinions expressed are my own.

Cottesloe Swimsuit // Sewing For Women

Tuesday, April 23, 2019


Hi friends!!

I'm so excited to be back with another Megan Nielsen make! The team has released 2 new patterns, absolutely perfect for summer sewing today. Psst, look for another post tomorrow! :)

I am absolutely thrilled to have had the push I needed to make my very first me-made swimsuit!! I have made quite a few for my kiddos in the past, but never took the plunge into making my own until now. I'm happy to report, it was no harder to make one for me than it was for them! *You can see some that I've made for my kids, HERE*

The Cottesloe swim pattern includes 4 views, 2 one-piece options, and 2 mix and match bikini options!

It is the PERFECT base pattern to create all sorts of looks! And of course I hacked it to make it all my own. ;)


To start with, I chose View D, which is a high-waisted bikini set with waistbands. I decided to lengthen the top, obviously, and chose to add some detail for a bit of interest. To add the ruffle, I extended the seam allowance of the bikini top waist seam 3/8" to accomodate folding under the elastic. The ruffle is simply a 1 inch strip of fabric, twice as wide as the front of the bikini top.

The bottom of the bikini is a strip of fabric, with the top edge matching the curve of the swim pattern, and extended down 2 inches from the side seams, then a straight line across at the bottom. The bikini back is lengthened in the same way, but all in one piece.

I also fully lined the suit, and actually double lined the front with the bottom corners of the second layer folded up and left open so that I could insert swim cups. To help keep the cups in place I stitched down the center of the two lining pieces before attaching them to the main fabric.

To assemble, I sandwiched the ruffle between the top and bottom pieces with right sides together. I sewed this seam with a straight stretch stitch on my machine. Next, I added a strip of elastic to the bottom edge of the front bikini top, I cut the elastic to be about an inch shorter than the width of the top. Then I serged the seam to finish it, folded the elastic under toward the top and topstitched.

After I had the entire top assembled, but no elastic attached around the arms and neck, I tried it on. There was a not so small amount of panic, because the top was way too small!!

I have gone over and over in my head why this might be, because I sewed the correct size. I think one reason is that my fabric is not overly stretchy. It does stretch to the recommended 50%, but it's pretty stressed to get there. I have other fabrics in my stash that definitely have more stretch than the one I chose.

I didn't even think to check this before I started sewing!! Rookie fail! And also, my lining fabric seems to be the same way. So factor in 3 layers of fabric that are fairly compression type fabrics, well it was pretty small.

I will however, be choosing a size or two up, especially in the width, with my next version of this pattern, because I think it does tend to run snug. I say this because I ended up putting side panel pieces in save the suit, and the panels added an additional 3 inches to the width! Hallelujah it was saved! Haha.


Huge props to my friend Teri for this idea, because I was so bummed that I couldn't even think how to try to save it, lol.

Let's talk about the bottoms now, shall we!?


I sewed the bottoms first, and I'm happy I did, because they were a 100% perfect fit at the beginning! I used a mesh lining for the bottoms, rather than the solid swim lining that I used for the top and they just feel more relaxed. Lining makes a difference, friends!


I did slightly scoop out the back legs, based on a rtw pair of bottoms that I have and love the fit of. I also chose not to add the waist band, and instead just added 1/4" elastic to the top in the exact same method as around the legs.


In the end, I'm so happy with how MY first swim suit turned out! I'm currently on vacation and enjoying every bit of the time I get to spend putting it to work! :)

You can find the Cottesloe swimsuit pattern HERE!


*Disclosure: A copy of the pattern was provided to me at no-charge in exchange for an honest review. All opinions expressed are my own.

Jenny Overalls // Sew Bibs

Thursday, April 11, 2019

Jenny Overalls // Sewing For Women

Hi friends!!

Today's make that I'm sharing with you, is the main reason I wanted #sewbibs to become a real thing.

Jenny Overalls // Sewing For Women

The Jenny Overalls. To be honest, when this pattern first released I thought it was a gorgeous pattern, but that it probably wasn't for me.

Jenny Overalls // Sewing For Women

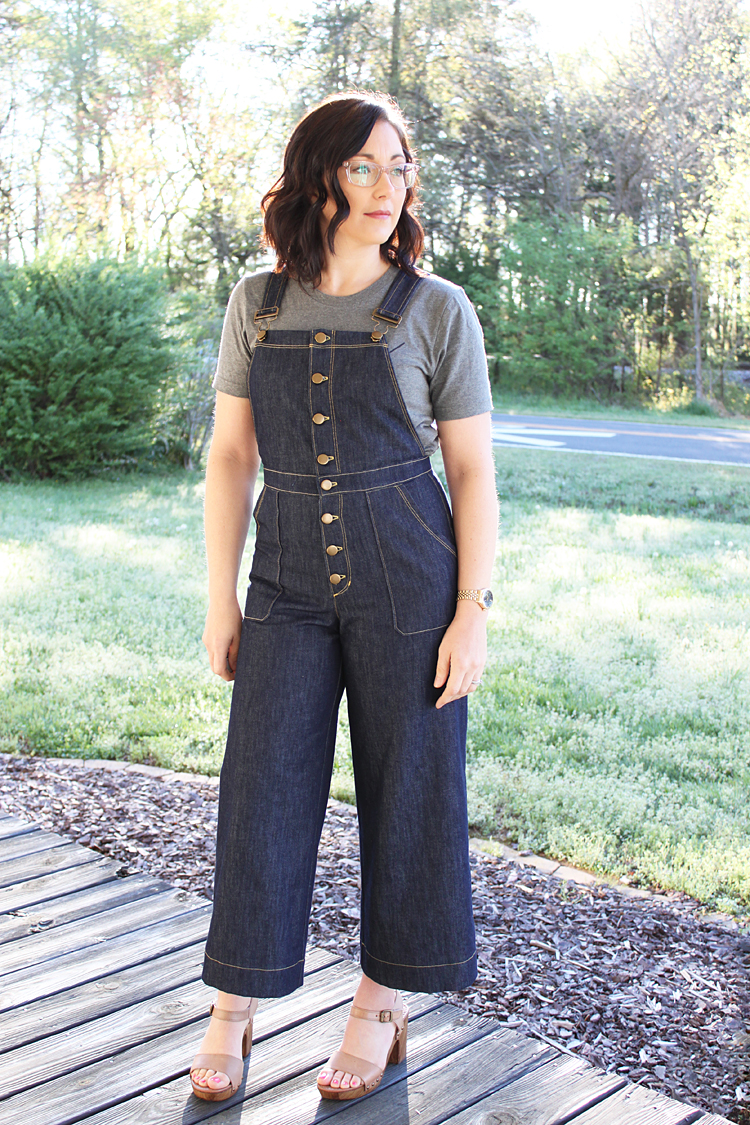
Then Heather slayed me with her button front version. From the very first second I laid eyes on her amazing pair of overalls, I knew that someday, I'd have a pair just like them!!

I'm so so so happy that these finally became reality! I had so much fun sewing these babies!

Jenny Overalls // Sewing For Women

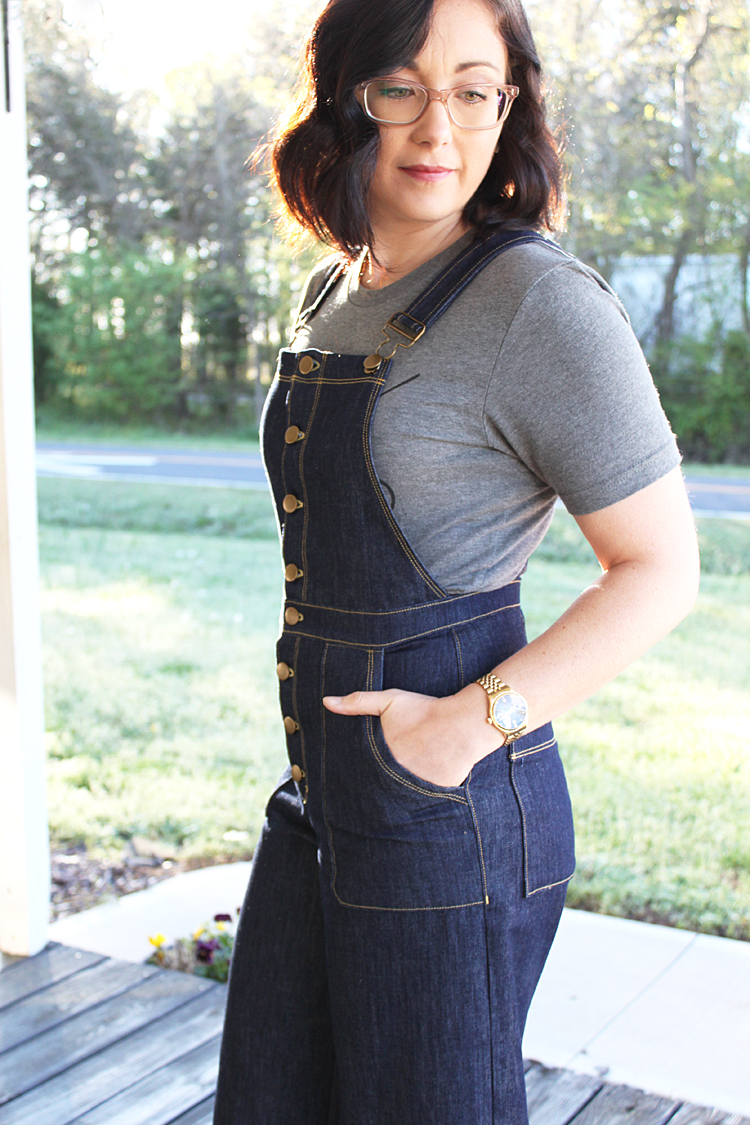
There are bonus pattern pieces available on the Closet Case website for this variation. I am so in love with it! Button front denim makes me swoon, and those patch pockets!! All the heart eyes.

Jenny Overalls // Sewing For Women

Since I hadn't made this pattern before, I knew that a muslin was definitely necessary, so I sewed one up with some preemptive pattern changes made. Since I have a short torso - like I discussed HERE - I took out 1" from the rise. Based on my measurements, I also graded between a 10 in the bust and waist to an 8 in the hips.

Jenny Overalls // Sewing For Women

The muslin turned out pretty good, but revealed that I needed to shorten the rise even more, as well as remove some length from the legs.

So for the final version, I ended up with 1 1/2" taken out of the rise, shortened the bib 1/2" from the top, and shortened the legs 1". Y'all. The fit is perfection!

Jenny Overalls // Sewing For Women

Even though I made a muslin, I still basted the whole thing together in my final denim fabric to assess the fit. This is very important since every fabric behaves differently! I ended up taking in the seam allowances a little bit because, even though this denim is a rigid denim, it was relaxing even as I was sewing. I think it will continue to break in as I wear them, so I kept the fit pretty snug, since I want a fitted look to these.

Jenny Overall // Sewing For Women

I did swap out the back pockets for Lander pockets. I just preferred the square shape to the round version included with the Jenny pattern.

Jenny Overalls // Sewing For Women

The fabric is 10oz Cone Mills non-stretch denim. I purchased it from Imagine Gnats, but it is unfortunately sold out! :( However, there are still quite a few other Cone Mills options available in the Imagine Gnats shop, as well as another favorite of mine, Threadbare Fabrics. And these shops happen to be sponsors of #sewbibs, so check out THIS POST for a coupon code to Imagine Gnats! But hurry, the challenge, and therefore the discount, ends tomorrow!

Jenny Overalls // Sewing For Women

I think that about wraps it up! I hope you enjoyed this post, because I sure enjoyed this project! I told my husband, this was one of those projects at the top of the list in my head. You know, the ones that are lit up by sparkles and unicorns are circling them? No, just me?? Haha. Well either way, it was a dream project that I'm so happy I tackled because it turned out exactly, if not better, than I imagined!!

Jenny Overalls // Sewing For Women

Jenny Overalls // Sewing For Women

Thanks for stopping by and spending a minute of your day with me!!

*Links:

*Disclosure: A copy of the pattern was provided to me at no-charge in sponsorship of the #sewbibs challenge. Hardware and fabric was purchased by me.

Monarch Jacket // Sewing For Women

Monday, April 8, 2019

Monarch Jacket // Sewing For Women

Happy Monday!!

Today is release day for the brand new Monarch Jacket Pattern by Allie Olson! I'm so excited about this because I can finally wear it without trying to hide it on social media like I have been ever since I tested the pattern! Haha.

Monarch Jacket // Sewing For Women

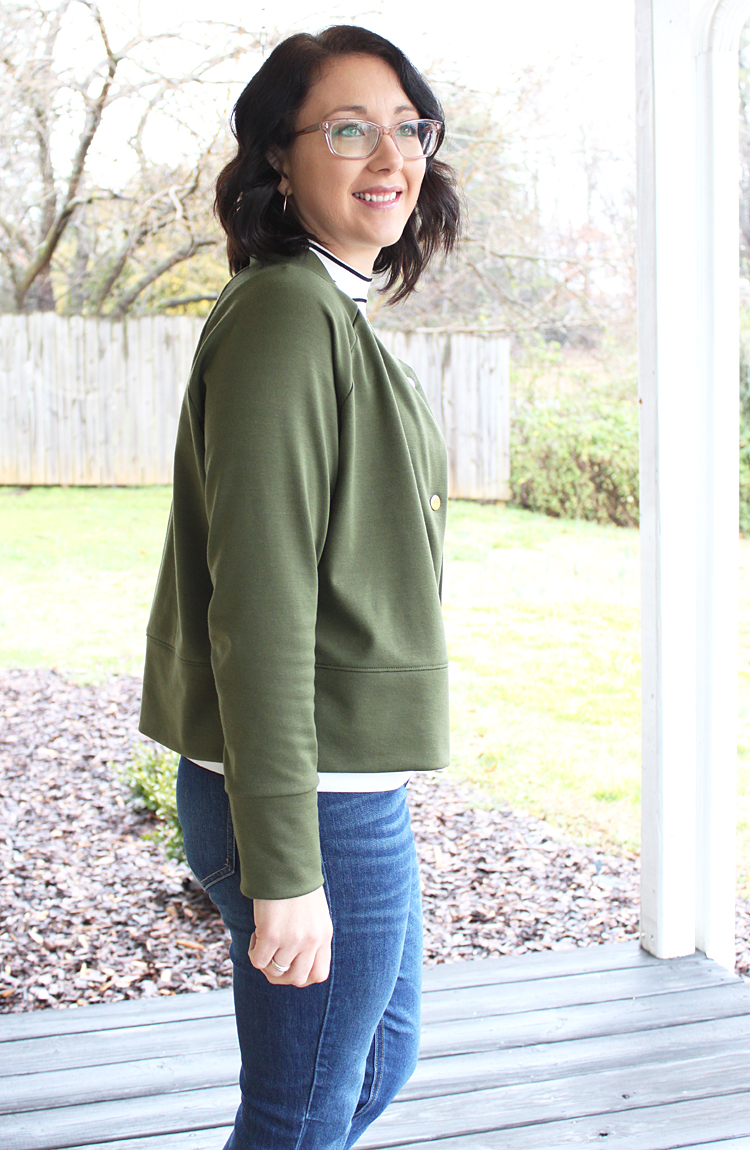
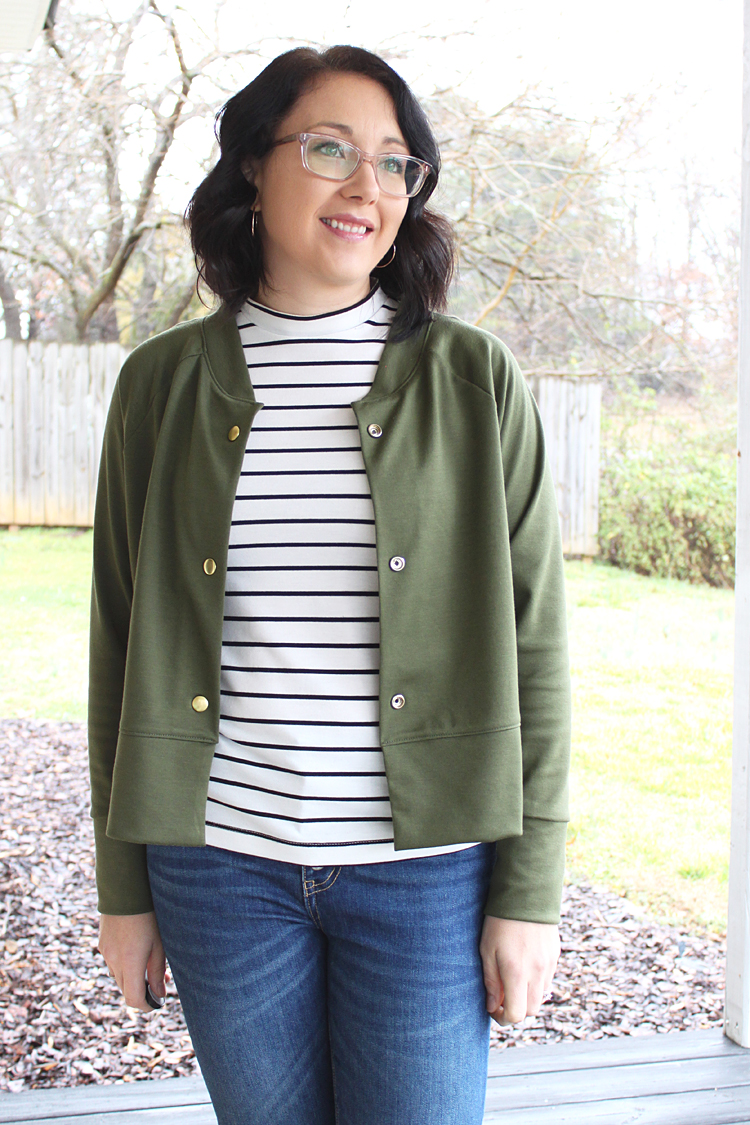
The pattern is a really cute, boxy, slightly cropped, easy to sew jacket with raglan sleeves and snap closures. The recommended fabrics are heavier, structured knits. I used THIS ponte knit for my tester version and it's perfect!

Monarch Jacket // Sewing For Women

Since testing, Allie worked really hard to get things perfect and the collar has undergone some changes. There are now instructions and pattern pieces included for using different lengths depending on how much stretch your fabric has.

If your fabric has less than 40% stretch, it's suggested that you use ribbing. How amazing would a contrast ribbing be like these that La Mercerie carries in her shop!? I think I need one with that detail now...

The sewing is super quick and enjoyable with this make! The hem and sleeves are finished with cuffs, and the closures are snaps, so everything comes together in no time flat.

Monarch Jacket // Sewing For Women

The collar has also been redrafted so that the edge of the collar meets the center front of the jacket. Mine was made during testing, and I decided it really doesn't bother me, so I'm happy to wear it as is!

Monarch Jacket // Sewing For Women

Otherwise no changes were made to the fit, and I love wearing this comfy lightweight layer! It's been perfect for our in-between weather this late winter/spring, I've been wearing it loads!

Monarch Jacket // Sewing For Women

Here are some fit photos with the jacket closed up. I definitely usually wear it open, but it's cute closed up as well!

Monarch Jacket // Sewing For Women

Monarch Jacket // Sewing For Women

Monarch Jacket // Sewing For Women

The sleeves are intended to be slightly cropped to mirror the jacket length, but since I'm on the shorter side, the fit is pretty good as is. Next time I may actually take a bit out of the sleeve length, because it's super cute to have the sleeves scrunched up a little!

Monarch Jacket // Sewing For Women

I love my Monarch Jacket, it's the perfect extra layer for spring! I love some of the colors the other testers used; a pink version is definitely on my radar. I think I will be snapping up some of that fun ribbing to go with it as well. ;)

Head over to IndieSew to grab your own copy today!
© Handmade Frenzy • Theme by Maira G.