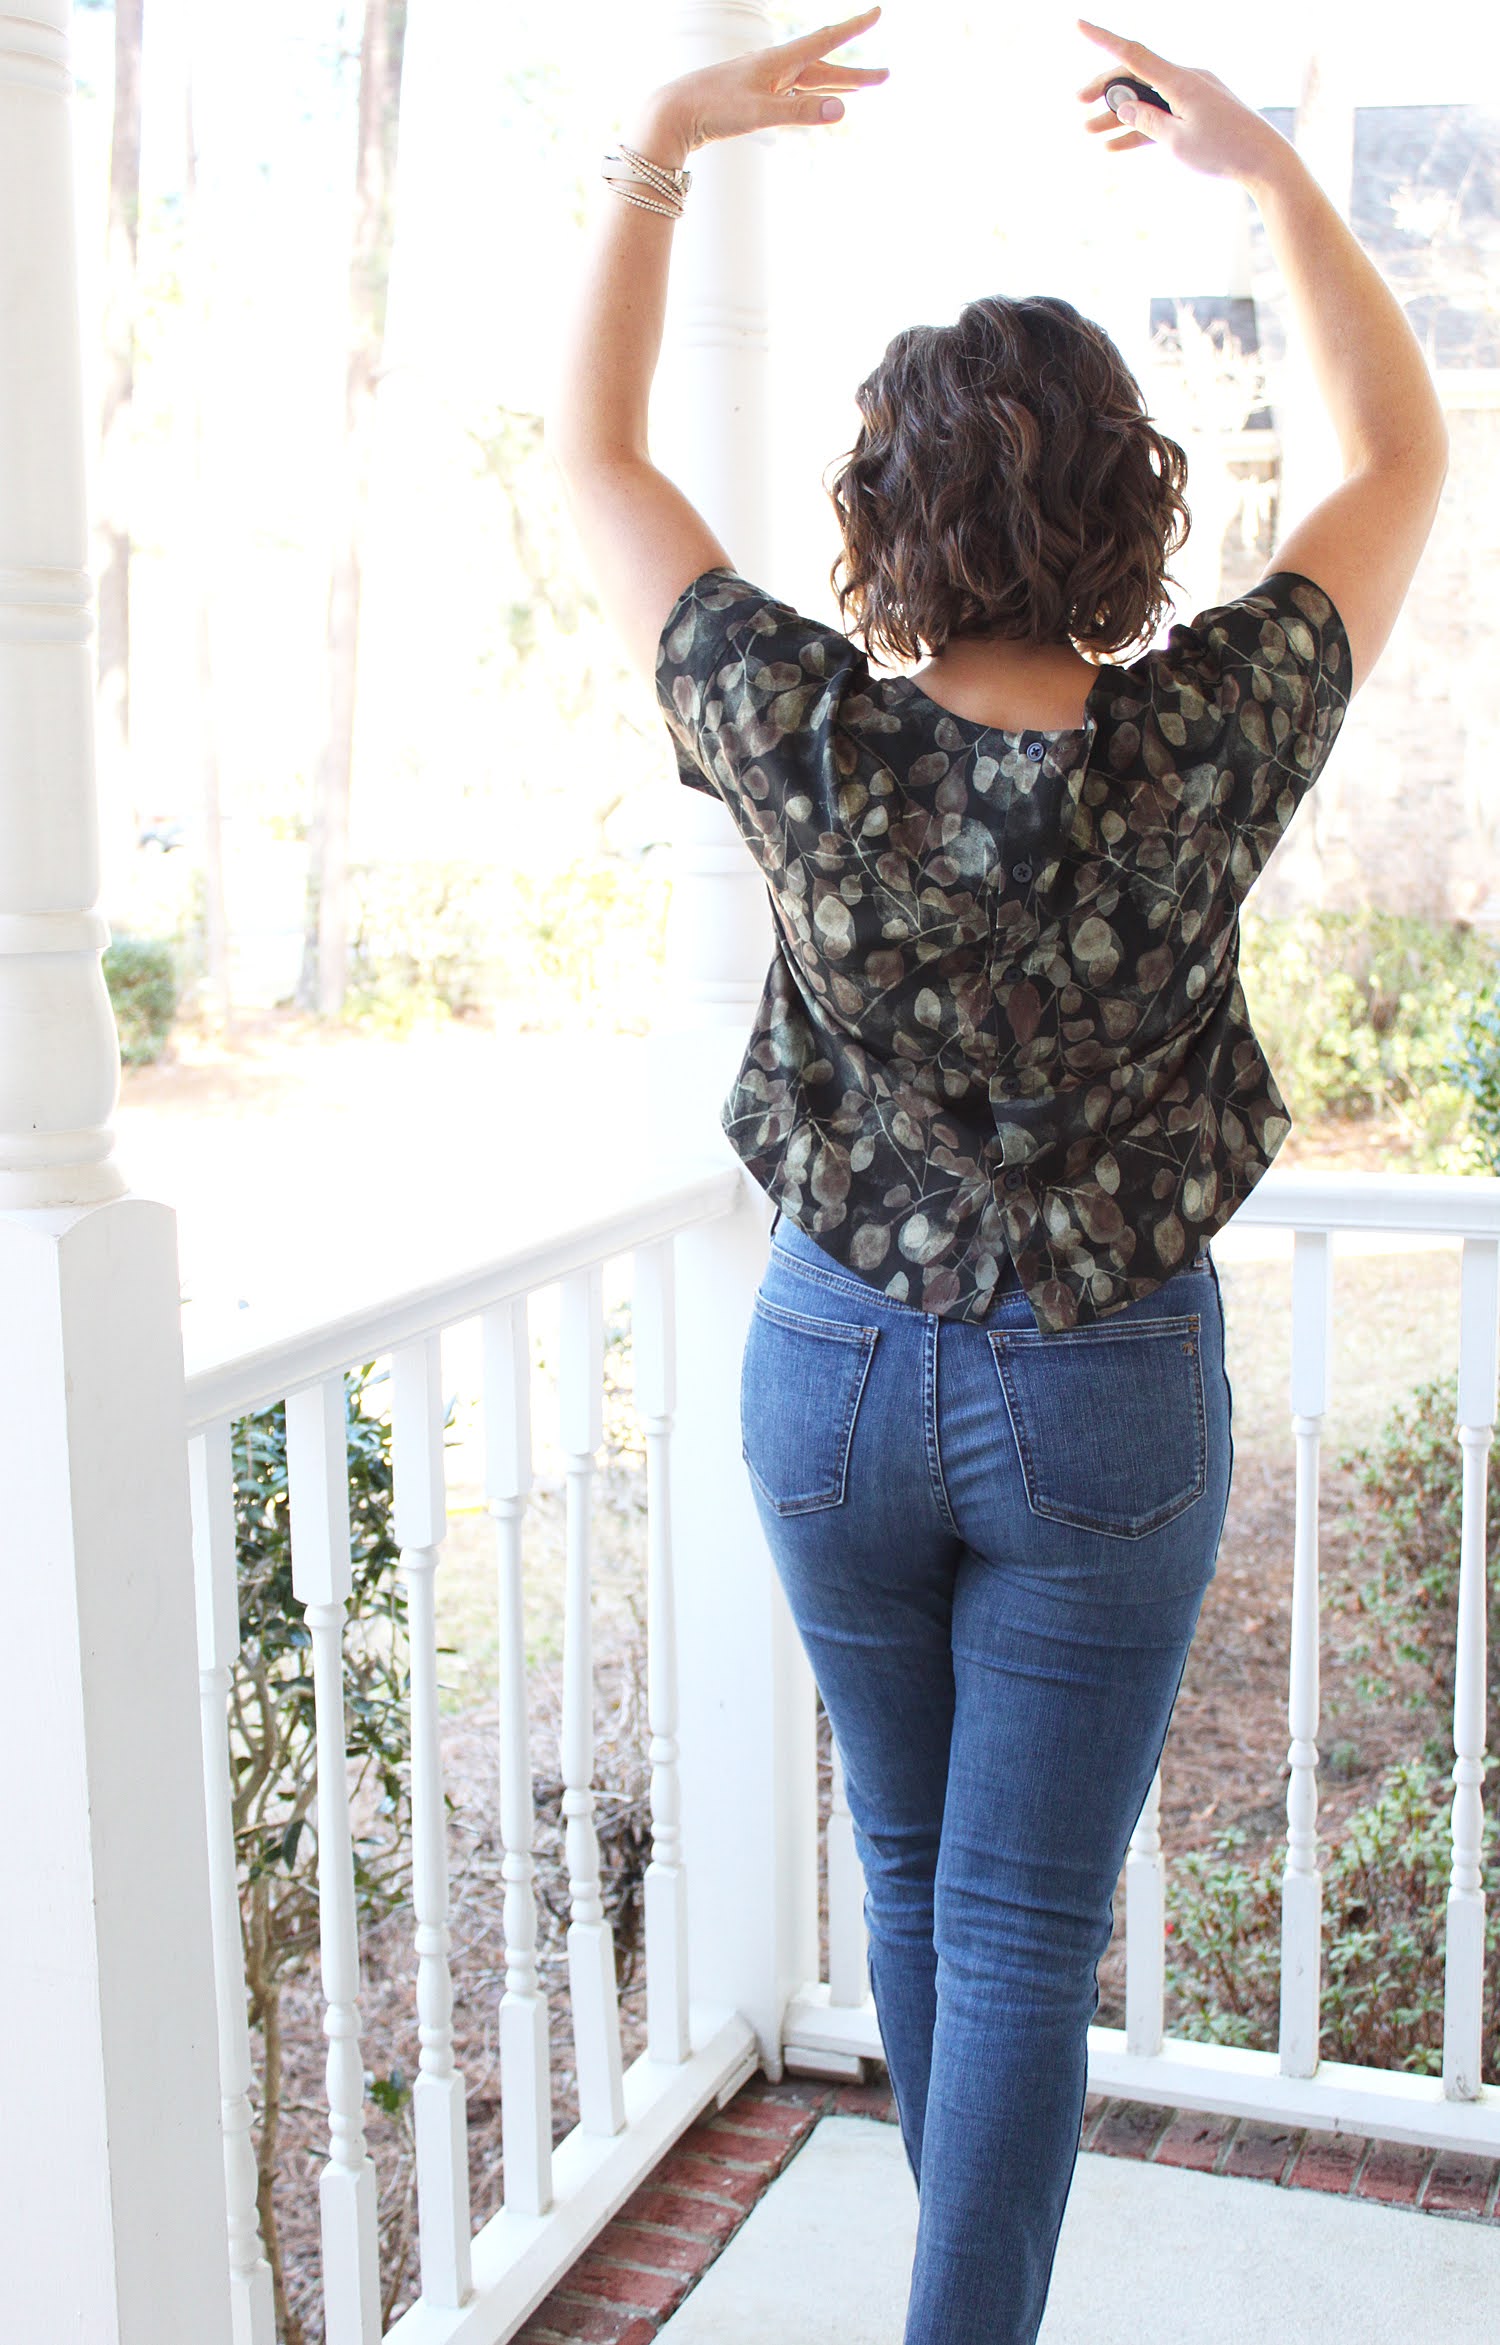
Popping in today to let you know about a post I have on Minerva.com. It is all about the Bowery Top I sewed using a gifted fabric. The fabric is super luxe and feels so fancy as a top!
It is by Mind The MAKER and is a Stretch Viscose Challis. Not at all what I imagined with Challis in the name and description, but you can read all about that in my Minerva post! (Linked below)
This was my first time sewing the Bowery Top as well and you can read all about that over there as well.
I'm so excited to be sharing my Wren Blouse with you today! I had the privilege of being on the testing team, and I'm so thrilled with my blouse!
You can read all about the fabric and sizing details HERE on my Minerva post.
The Wren Blouse and Dress pattern is available on the Chalk and Notch website at a discount through next Wednesday 3/31, no discount code needed!
Also included in the release is a MINI VERSION!! You all know how fun I think it is to have Mommy-and-me looks, and this pattern is an ADORABLE option to have! Both patterns are available at the discounted price and there is even a bundle option! I've linked to all of those below.
Like I've mentioned before, I'm following a new layout for my posts that are "news alerts" for content that I've published other than here or on my Instagram. I will have all the important details for you here at the top, followed by links to everything that you may want to access, then at the bottom, I will have the photos available for you to scroll through. 💕
Thank you so much for being here even though things shift a bit now and then, I appreciate you all so much!!
Today I am over on Minerva, sharing all about making this gorgeous top using Liberty London Tana Cotton Lawn from their (HUGE) collection of Liberty fabrics and prints!
See below for all of the links, and more photos! 😘
This post contains *disclosed* affiliate links. All opinions expressed are honest and my own. If you make a purchase using the links, I make a small commission which helps support this blog. So, thank you!!
Hi friends! Welcome back to the on-going series of "back-logged projects waiting to be blogged"! 😀
I am BEYOND excited about today's project, however, so even though it's totally the wrong time of year here in the US to be blogging about a winter coat, I had to share because I can't wait another 6 months to post about this make!!
A coat has been on my sewing bucket list for ages. I even bought the Grainline Studio Cascade Duffle Coat pattern {aff link} quite a while back during a sale because I thought owning the pattern might give me incentive to sew it. Hmmm... Turns out some gifted fabric with a deadline attached was the motivation I needed, lol.
I bought the pattern here in the US from the now closed, Indie Sew, but it is still available in plenty of other shops, including straight from Grainline's site of course. I'll put that link HERE. You can choose from the pdf version (which is what I used), or the printed.
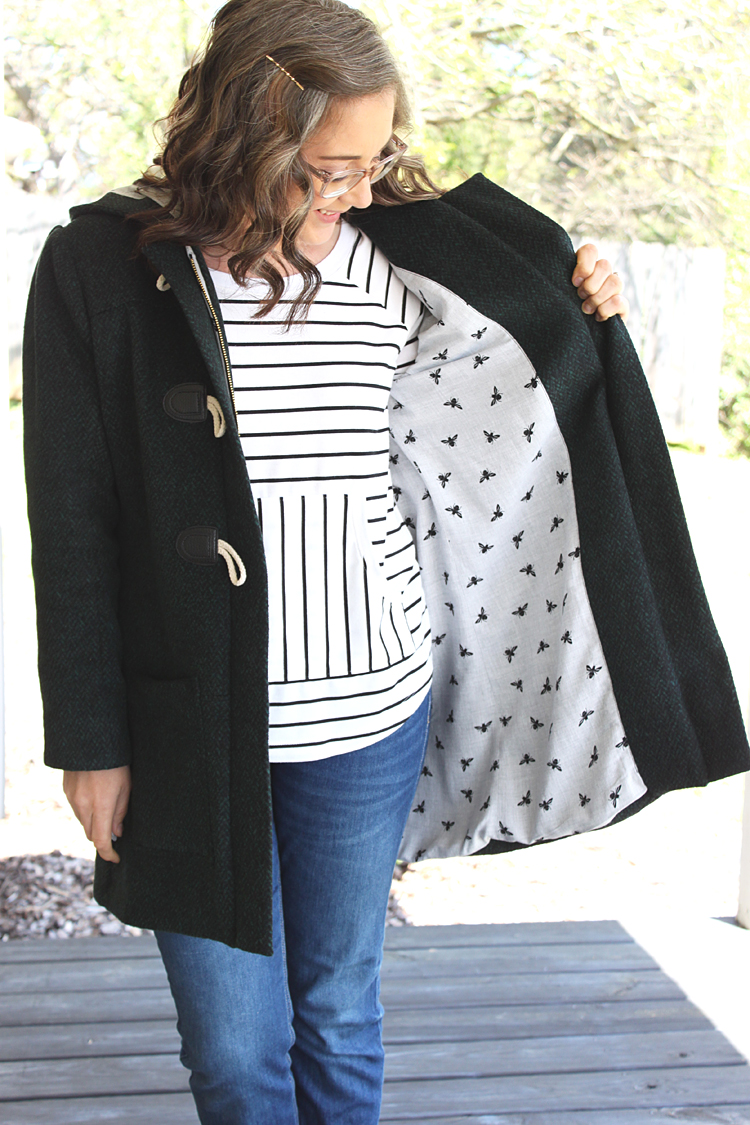
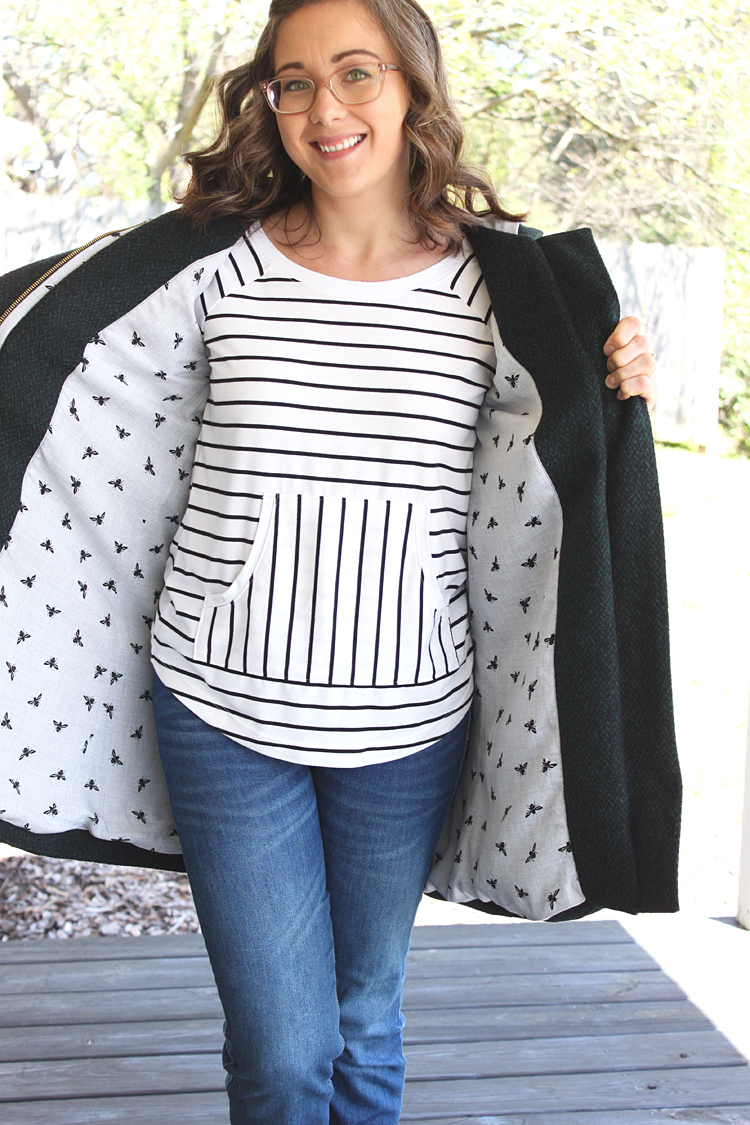
The coating fabric was gifted from Minerva, and is this absolutely gorgeous Herringbone Tweed Coating in Bottle Green & Black. {aff link} I'll talk a lot more about this fabric in the post that will go live on the Minerva blog, soon. Stay tuned to Instagram as I'll let you know when that happens, there!
I decided to forego the traditional lining fabric, and opted instead for this super fun Telio Rayon Twill bee print fabric! I just couldn't get the image of how well these two fabrics would pair together, and I'm so happy I went for it! I purchased the Telio fabric from Amazon, but unfortunately it seems to be sold out everywhere that I've been able to find it.
I found the toggles at this Etsy shop, HERE. I absolutely love the quality of these! I thought the price was quite reasonable, and the shipping was really fast even coming from France! Just an FYI, if you are ordering these for this particular coat, you will only need to order *2*, a quantity of 1 is actually 2 sets of toggles. I found this out the hard way, haha. I should have just messaged the seller to be sure, but I ordered 3, and now I have enough to make another Cascade!
I'm having a hard time remembering where I sourced the zipper, but I believe I just went to Joann for that.
Having never made a coat before, I was also a little unsure as to what interfacing to use, but I trusted Tiahna's experience with coat making, and sourced the interfacing she talked about in her post HERE.
It was surprisingly difficult to find at a reasonable price, I thought, but I ended up ordering it from Walmart.com of all places (link HERE), because it was by far the best bang for my buck! I ordered a whole bolt of it, since it was actually the same price as ordering only a small amount from the other places that I was able to find it at. So, I guess you could say I definitely need to sew a few more coats with my extra supplies I now find myself with!
As for the sewing of the coat, I made a size 8, based on my bust measurement of 36.5". My height is 5'3", and I shortened the bodice 1" at the lower lengthen/shorten line, and shortened the sleeves 1/2".
I am SUPER happy with the length of the coat. I think it is perfect for me! Next time I wouldn't shorten the sleeves since I prefer my sleeves to be a little on the longer side, and these are the "perfect" length, but I wish they were a hair longer.
I also did a swayback adjustment on the coat, the same way Tiahna did on hers. I'm so happy to have had her expertise go before me! 😁 I took out about 1/2" around the center point of the back. It really did improve the fit for me personally, a great deal! It was a super simple adjustment because all that was needed was a center back seam along the upper back bodice and could be adjusted after the main part of the coat was assembled.
All in all, the sewing went really smoothly while making the coat! I ran in to a few hiccups, but it was all 100% my fault and just not "feeling" the sewing process for part of time. I know all (or I *hope* it's all and not just me 😉) of us face this from time to time.
The main fabric I used has a nap, and I was well aware of this and was super careful to cut all of my pieces correctly. But when it came to sewing the zipper in place with the zipper shields, I got a bit ahead of myself and also forgot to pay attention to the direction of the nap. OOF. I ended up sewing, unpicking, sewing, unpicking, sewing, that bit in the front THREE separate times. THREE times, y'all! I could only laugh, because by the time I was on the third round of re-sewing, I was feeling a little loopy, lol.
Other than that tail-chasing experience, it all went pretty smoothly! My machines handled the bulk of the fabric well, I made sure to use the proper needles in my sewing machine, and my walking foot, and it handled it like a champ!
I did reference the sew-along on the Grainline Blog for a few parts, just to help clarify things, and I would recommend that if anything seems a bit fuzzy in the instructions. The only sewing advice I have in addition to the pattern instructions is tacking the hem facing up by hand. Since I used rayon for the lining, I knew there was a possibility that it might grow or sag a bit. But what happened was that the weight of the lining pulled the hem facing down, so that no amount of pressing and understitiching was going to hold it up.
To remedy that I hand-tacked almost the whole length of the hem facing using essentially a blind hem stitch. That did work really well.
I can honestly say that I love this coat far more than I expected to!! I am legit excited to be able to wear it once the weather turns cold again! I mean... It can stay away for 6 months, FOR SURE, but when it does arrive, I'll be ready with my absolutely amazing coat!!
Don't forget, you can read more about the fabric I used in my Minerva post that will be posted soon.
This post contains *disclosed* affiliate links. All opinions expressed are honest and my own. If you make a purchase using the links, I make a small commission which helps support this blog. So, thank you!!
Happy Friday!! I'm comin' at ya with yet another new make! I'm feeling the fire lately, and have been having SO MUCH FUN with sewing lately!
Today's make is a pattern I wanted to try from the Love Notions pattern collection. Which, by the way, Love Notions is running a Mother's Day Sale currently and all patterns are 40% off! That is a huge discount! The sale runs through Monday, May 11, you can check out all of their patterns HERE! {aff link} They have patterns for everyone in the family, not just women! I can't wait to give some of their kids' patterns a try. I'm on the lookout for a dress pattern for my daughter because I have a bit of this fabric left, and she wants us to match. :)
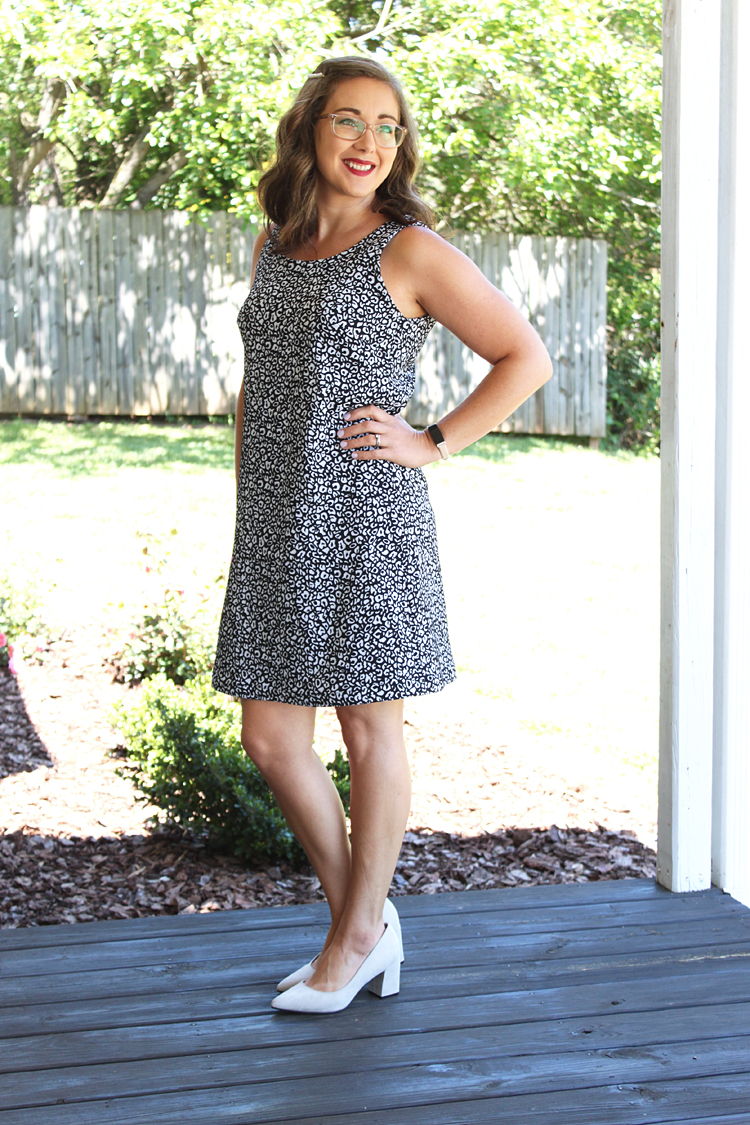
This pattern is the Cadence Dress & Top. {aff link} I chose the simplest possible view, in order to let my fabric shine. The pattern did exactly that, and the shape is super flattering as well as so comfortable!
The fabric is from Minerva. It's a stretch cotton jacquard, I can't find this exact one on the site, but there are lots of other similar options that I've linked to HERE. {aff link} I had never sewn with this type of fabric before and it was interesting! I was very pleased with the outcome. The stretch of the fabric runs parallel to the selvage rather than perpendicular. So I actually cut the fabric against the grain, so that the stretch would be width-wise across my body. It worked very well, and the dress is super comfortable!
Because my fabric had stretch, I sized down a whole size from where my measurements placed me. I made a straight size small, with no adjustments. I didn't make a muslin, but I made sure to hold the paper pattern up to myself before cutting anything to make sure things looked good. The dart appeared to be in the right place, and the waist and hip lines were hitting me in the right spot, so I went for it.
The fit is spectacular. The armhole coverage is so good, and the darts are in the right place. And YES, there are darts! :) I had that question asked already since it's such a simple shape, and it's hard to see them in this print. But yes, there are bust darts which helps get a great fit, especially for someone who is a bit more blessed in that area than I am. :)
Another great fitting feature is the center back seam. This makes it super easy to adjust fit in the back if necessary. I didn't do any adjustments there and I'm really pleased with the outcome. I do sometimes need to do a small swayback adjustment, but I was happy with the fit as is.
The only slight change I made to the fit was to hem it just a little higher than the hem allowance that was included. The pattern directs to hem 1", but I hemmed by about 1 3/4". I first folded up 1/2" then another generous 1". For reference, I am 5'3" tall.
The dress has no closures, it just slips on over your head, making for a really speedy sew! There really are only 5 seams to the main dress! The facing adds a little bit of time to the construction, but it's still a very fast sew.
I am very pleased with this pattern, it's a great simple shift to allow a special fabric to shine. I think it was the perfect pairing for this fun statement fabric! I will have another post on the Minerva blog soon talking all about the fabric, so stay tuned for that. I'll be sure to let you know on Instagram when that goes live!
If you need a great shift dress pattern, and one that includes many variations and sleeve options, be sure to check out the Cadence Dress & Top Pattern! It's a great staple to have!
Thanks so much for stopping by today!! Happy sewing!