New Rhapsody Blouse // Love Notions Sewing Patterns
Friday, April 24, 2020

This post contains *disclosed* affiliate links. All opinions expressed are honest and my own. If you make a purchase using the links, I make a small commission which helps support this blog. So, thank you!!
Happy Friday, friends!!
I am SO excited about today's post! I had the privilege of testing the brand new, completely redone, Love Notions Rhapsody Blouse {aff link}! And not only is it being newly re-released today, it's also the $5 Feature Friday pattern!!
That means, for today only, you can grab the pattern, with a new extended size range and new, additional, pattern options for only $5!! After today, the price will go up to the release sale price for the rest of release week.
The pattern now includes sizes XS - 5X, a blouse option, as well as a FAB new dress option, and nine different sleeve options!! This pattern is flattering on everyone, all of the testers looked so great in their Rhapsody's.

For my tester version, I chose to make the sleeveless option, because I knew it was a version that I would reach for over and over this summer!!

The first version I made was a straight size Med with no mods at all. I made it in a poly crepe from my stash, that I purchased a couple of years ago from fabric.com.

The pattern went through a few changes from what you see here, but I felt it was a good size representation so I wanted to show it to you! The most notable change was made to the v-neck line, it was raised quite a bit from this version. The back hem length was also brought up a bit and the armsyces raised a touch. All of the other changes were made to the sleeves, so I don't have a lot to show you there. 😉

My body measurements are: High Bust: 35, B: 36, W: 29.5, H: 37.5. Based on the pattern recommendation I should have chosen a size medium based on my high-bust measurement, so that's what I made and was assigned to test.

This is where sewing experience and knowing your body also comes in to play. I know that typically (I'm not going to say always, because I think it depends on the type/style of garment) choosing a size based on my FULL bust gives me a better fit than when I choose a size based on my HIGH bust. So I really wasn't surprised when this first blouse felt just a bit too big all over, but especially up top, over my bust.
I do not consider myself a fitting "expert" by any means, so it may be that choosing a size based on my high bust and doing an SBA may yield better fit on some garments. Especially on ones that are very fitted. For the types of garments I tend to wear and sew, choosing my size based on my full bust seems to be the way to go.

So for my second version of the pattern, which ended up being the final pattern that is now released, I decided to size down to a size Small. Taking into consideration the finished garment measurements, I felt I would have no problem doing so, and also the fact that my measurements aside from my high bust put me just under the Med size chart. I also shortened the bodice by 1 inch. Aside from that, I made no changes and I think it's pretty amazing!!

I am absolutely smitten with the details of this pattern! The shoulder gathers create such a feminine look and is super flattering, especially on the sleeveless version I think! I also love, love, love, the ties!

I omitted them from my first version, because I was able to gift it to my sister (whom it fits perfectly!! YAY!) and she preferred no ties at the neck.

The back yoke is a fun detail as well, and I loved the accents and color-blocking I've seen done with that! It also provides a gorgeous clean finish on the inside. I just realized I failed to mention that the side seams are finished with french seams. This top is just as pretty on the inside as the outside!
Lastly, the inverted pleat in the back and the shirt tail hem is just so lovely, too.

I know there will be more Rhapsody's made in the future and I can't wait to play with those fun details! I'm swooning over the dress version. I NEED one of those in my life, for sure!! I'm just trying to pin down the right fabric for it.
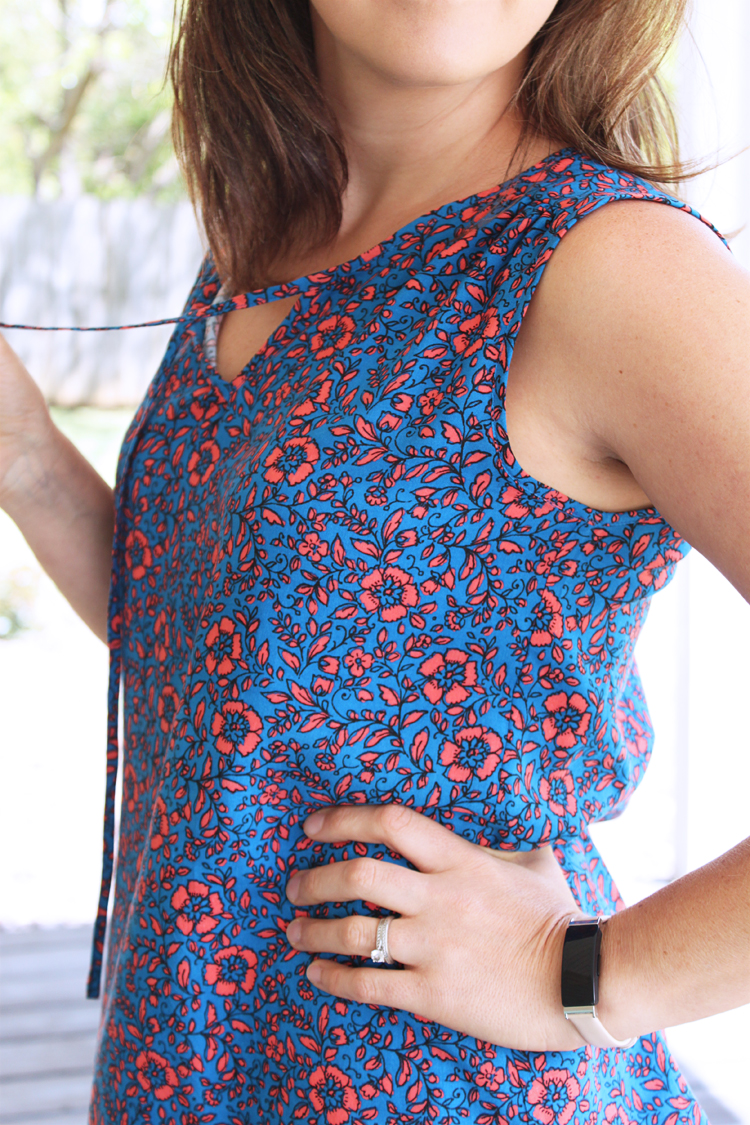
The most time consuming aspect of the sewing was the binding. I love me a good binding sesh though, and really took my time to get it right with these two tops! I'm definitely feeling a bit proud of the outcome! 😄

I followed the instructions for cutting the self-fabric bias strips in the pattern, but for applying, I use a method that requires no pre-pressing and folding, so you spend less time at the iron, and less time possibly burning your fingers! 😆

If anyone is interested, let me know, and I'll try to make an IGTV of the way I do it! You can also find a similar method described in a tutorial on the Grainline Studio blog.

The fabric I used for this second version is a rayon challis from LA Finch Fabrics. It was a remnant piece and after cutting out my top, I had juuuuust enough to eek out a top for Miss O, too! I can't wait to show you her top, it is beyond adorable on her! And how fun will the twinning opportunities be. I didn't get photos of us together, unfortunately, but if we ever get to go out in public again, we'll be sure to grab some pics when we wear them at the same time. 😀

This colorway is no longer available, but there is a blue and white version that is so nice, listed HERE!
I think I've rambled on long enough now, but I definitely think the new Rhapsody Blouse pattern {aff link} is worth having in your pattern arsenal!
Happy Sewing!
*Shop my outfit links via the photos below.
