SLIDER

skirt
Showing posts with label skirt. Show all posts

Mave Skirt - New Pattern from True Bias

Friday, April 16, 2021


I've been a True Bias fan girl since way back when I discovered the Southport Dress. The Southport Dress was one of the very first patterns I sewed for myself, 6 years ago! I've loved so many of Kelli's patterns since the beginning and every time I get news that a new True Bias pattern is releasing, I get so excited!


The Mave Skirt is another absolute winner that is sure to be an absolute staple in my wardrobe! The pattern includes so many options! Included are 3 lengths, with a total combination of 8 skirt options ranging from no tiers to 3 tiers. The pattern is available in two size ranges as well and covers a span of size 0-30.


My favorite feature of the pattern is the genius cut chart which shows all of the views and a detailed checklist of which pattern pieces to cut for each specific skirt option.


The skirt is a very simple construction, but is elevated by the details! Included are optional side seam pockets, a wide 2-inch elastic waistband, and an optional drawstring in the waistband. You can also choose to sew a lining with the included instructions.


The pattern included markings for exact stitching on the waistband. The stitching on the waistband is another favorite feature of mine! I absolutely love, love, love it! That statement really is true for the whole skirt, lol. I love how it all comes together.


For my skirt, I chose a rayon challis that has been hanging out in my stash for quite a few years. It was a Joann find that caught my eye on the bolt and I had to have it! I've always really loved it but was never quite sure what to make with it. I'm so happy that this skirt brought it to life, I think it is a really great match! 


I definitely need a few solids in my wardrobe as well. Kelli's samples really have me swooning!!


The pattern is on sale for release until April 23rd, use code MAVESKIRT for the discount! 🎉


LINKS:

Paperbag Waist Allegro Skirt Hack // Sewing For Women

Friday, July 31, 2020


Paperbag Waist Allegro Skirt Hack // Sewing For Women

This post contains *disclosed* affiliate links. All opinions expressed are honest and my own. If you make a purchase using the links, I make a small commission which helps support this blog. So, thank you!!

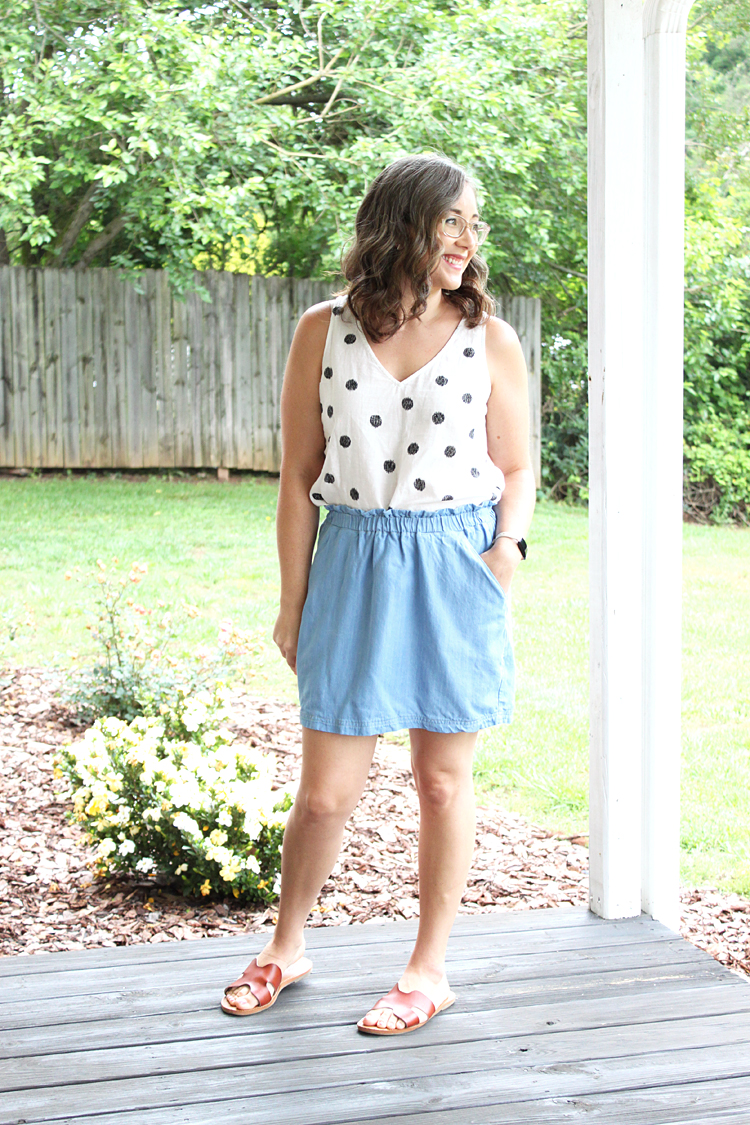
Hello, friends!! Happy Friday, again!! I have a super fun little tutorial for you today on how to hack the Allegro Skirt pattern {aff link} by Love Notions into this super cute paper-bag waist mini skirt! **Scroll to the bottom for some amazing sale news!!**

Paperbag Waist Allegro Skirt Hack // Sewing For Women

For the skirt, I used a straight size 8 (my W:29.5, H:38), and only made a couple of small, very simple adjustments to get a very different look!

The first thing was to straighten out the side seam from the pocket down to the hem.

Paperbag Waist Allegro Skirt Hack // Sewing For Women

Next, you will want to do the same thing to the pocket so that it still lays nice and flat inside the skirt.

Paperbag Waist Allegro Skirt Hack // Sewing For Women

I shortened the skirt by cutting straight across at the lengthen/shorten line. Now, cut all of the pieces out, including the waistband; making no changes to the waistband. 

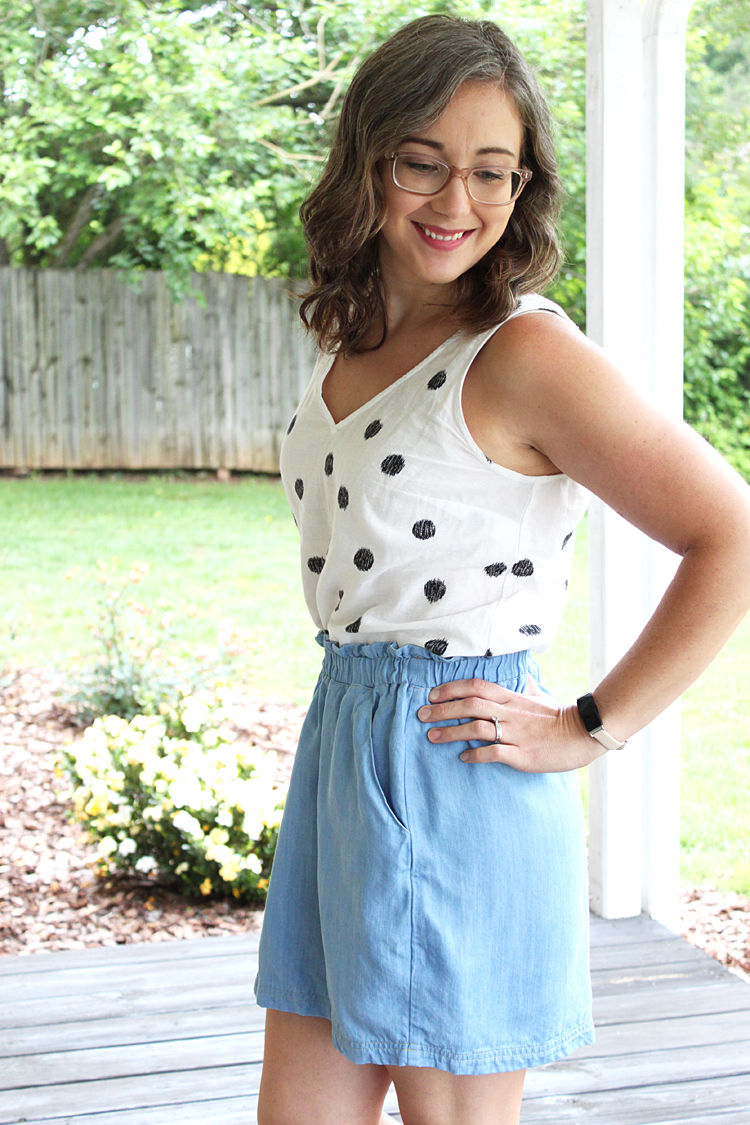
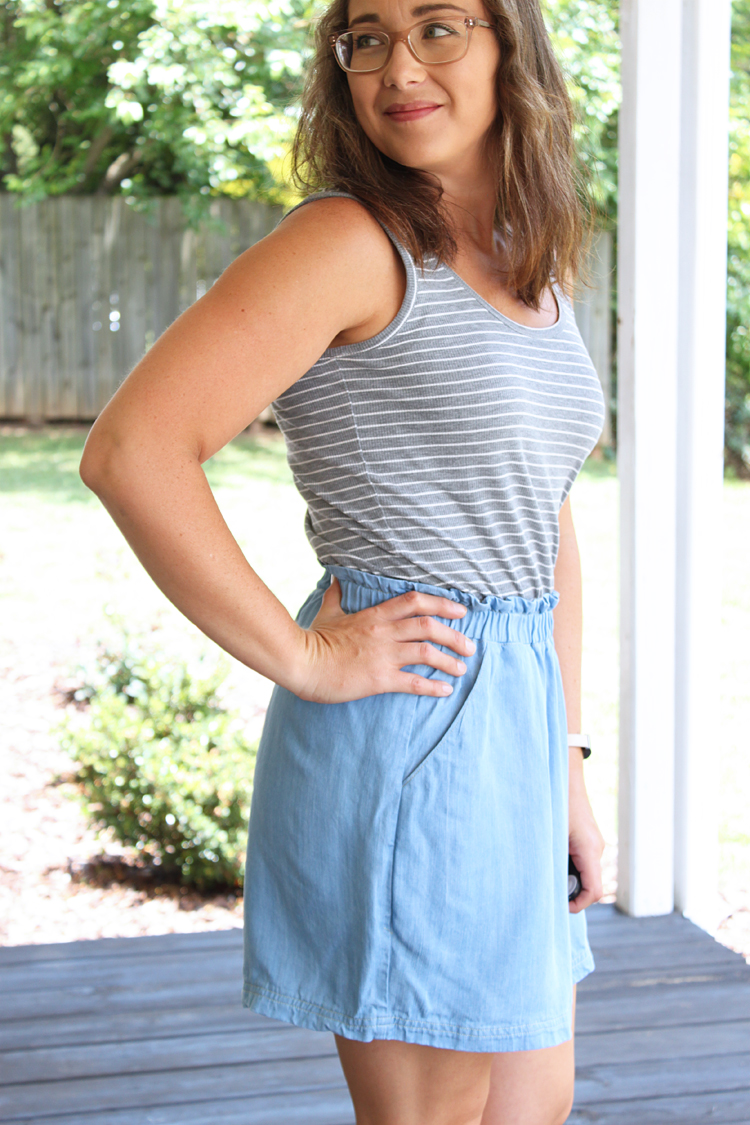
At this point, I assembled the skirt as usual. When I came to the waistband, I attached it as per usual, and then sewed a channel for 1 1/2" elastic, rather than 2" like the pattern calls for. This super simple change gave me the paper-bag waist look I was after!

Paperbag Waist Allegro Skirt Hack // Sewing For Women

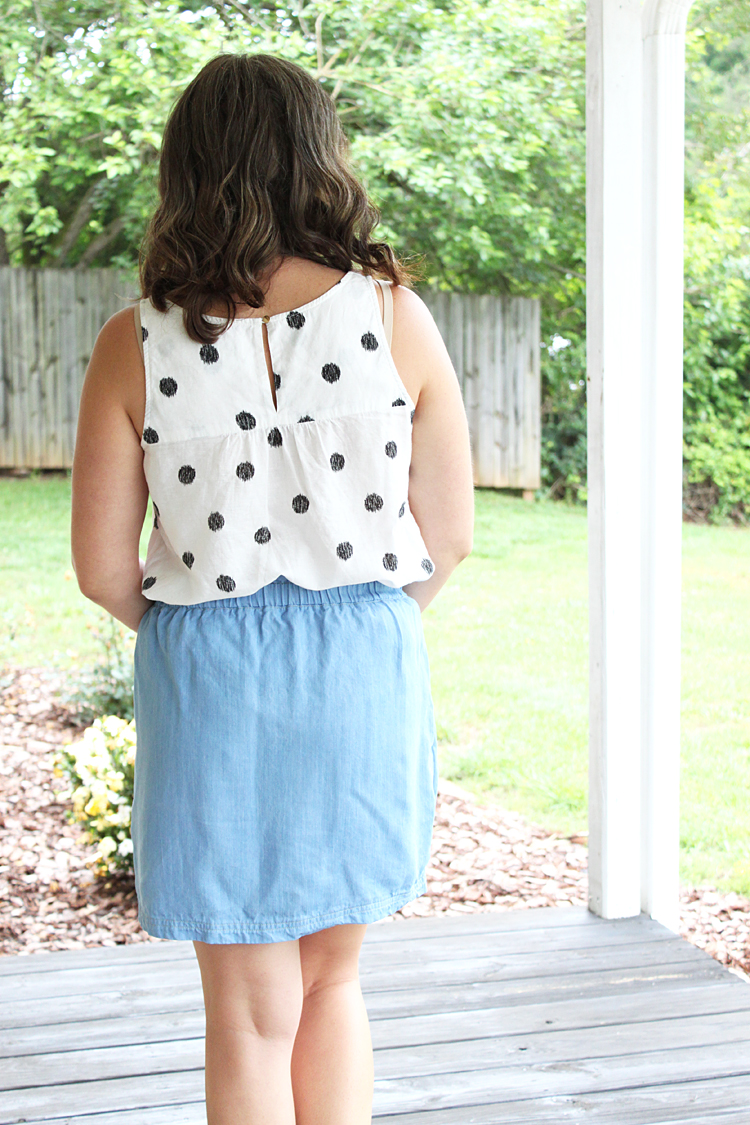
After I had the waistband attached and the elastic inserted, I tried the skirt on. The hem still flared out a bit more than I wanted, so I curved in the side seam a bit to create more of a pencil skirt shape. The ruler below reflects the type of curve I sewed to get the end result. I'm in looove!!

Paperbag Waist Allegro Skirt Hack // Sewing For Women

After trying it on, I also determined the hem length I wanted and hemmed accordingly. This is highly individual and will be different for everyone. For mine, I did a fairly deep hem and hemmed another two inches from the length I had originally cut.

Paperbag Waist Allegro Skirt Hack // Sewing For Women

I used the tencel denim from Joann for this skirt. Tencel denim was the perfect choice!! It drapes beautifully and wears so nicely as well. I also used traditional jean top-stitching thread for a classic denim look. 

At the hem, I sewed two straight lines, 1/4" apart for a more casual look as well.

Paperbag Waist Allegro Skirt Hack // Sewing For Women

I was 100% inspired to make this skirt by a skirt I tried on about 2 years ago at Target! I'm so glad I didn't purchase it back then and finally made it myself! I did buy the tank top though. 😉

Paperbag Waist Allegro Skirt Hack // Sewing For Women

The Allegro Skirt was the PERFECT base to work from. I couldn't be happier with how it turned out!

Paperbag Waist Allegro Skirt Hack // Sewing For Women

Let me know if you try this hack or something similar, I'd love to see it! 

Paperbag Waist Allegro Skirt Hack // Sewing For Women

Paperbag Waist Allegro Skirt Hack // Sewing For Women

Paperbag Waist Allegro Skirt Hack // Sewing For Women

Happy Sewing!!

**In celebration of Love Notions moving into a new space, they are running a FLASH SALE where ALL patterns (excluding LBD) are FIFTY PERCENT off!! (No code needed) That is an amazing deal, y'all! And likely one that won't be repeated! So if you have had your eye on any patterns, now is the time to grab them! I've linked to the Allegro Pattern as well as the entire pattern catalog below. Happy Shopping!**

LINKS:
 

Summer Basics Tank // Sewing For Women

Friday, June 12, 2020

Summer Basics Tank // Sewing For Women

The Summer Basics Tank has been revised! This essential Love Notions pattern now has sizes from XS-5X, and has a brand new shelf-bra feature!

Summer Basics Tank // Sewing For Women

In addition to all that, it is the Feature Friday pattern and is $5 for today only! You can grab your copy of the pattern HERE. {aff link} After today, the re-release sale will continue until Thursday, June 18th at $9.

Summer Basics Tank // Sewing For Women

This was my first time sewing the Summer Basics and oh my goodness, I'm going to fill my drawers with these!! The fit is so spot on!

Summer Basics Tank // Sewing For Women

I made a medium, based on my measurements of UB:35.5, B:36.5, W:29.5, H:38. I used the scraps from my Sunday Romper, so I had to shorten 4 inches and piece the bands!

Summer Basics Tank // Sewing For Women

Shortening the tank worked just fine, especially since I'm not very tall (5'3"), but I decided to leave it unhemmed for just a bit more length. I serged the hem, and I think it looks good!

Summer Basics Tank // Sewing For Women

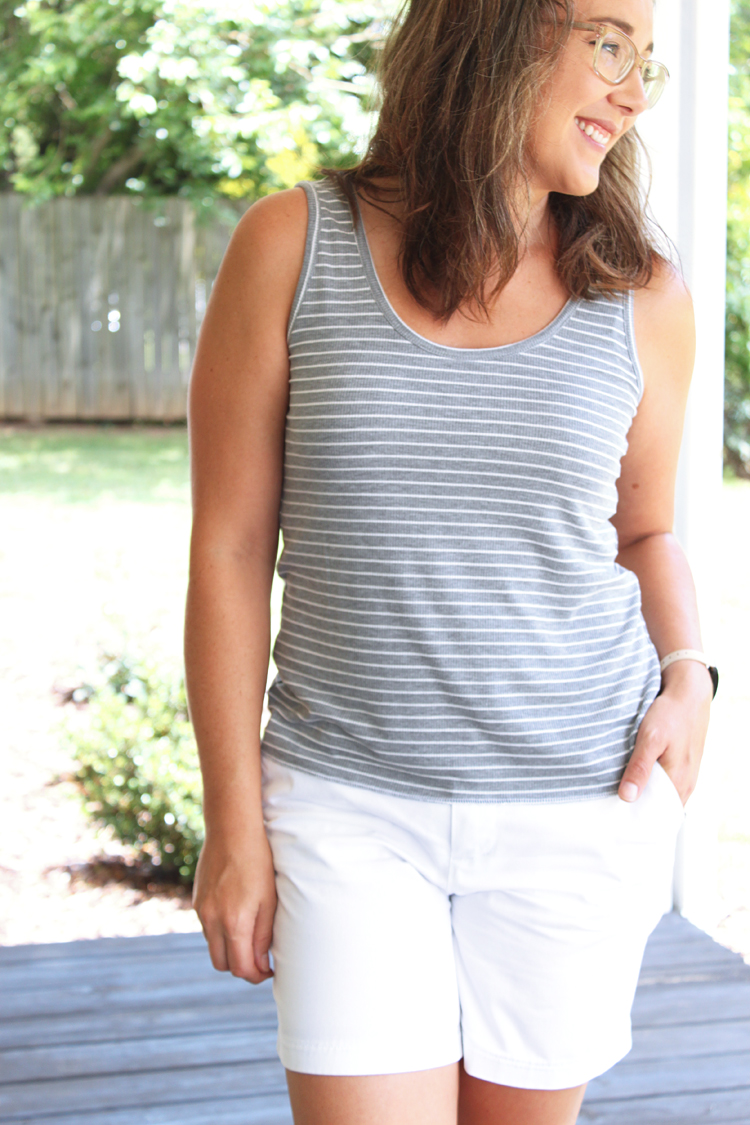
I will likely be wearing it tucked in to things anyway, but I think it looks great paired with my shorts, unhemmed.

Summer Basics Tank // Sewing For Women

I love the scooped back, it's low enough to be cool and flattering, but doesn't show a bit of a regular bra. The straps are perfectly placed as well for complete bra coverage!

Summer Basics Tank // Sewing For Women

I didn't use the shelf bra for this tank, but I'd like to try it in an athletic fabric for sure! I think it would make a fabulous hiking tank, and in our summer heat, I think a shelf bra might just be ideal.

Summer Basics Tank // Sewing For Women

Other than shortening at the hem, I didn't make any changes to the fit at all! I absolutely love how this tank turned out. I think the bindings look very polished. As soon as I tried it on, I knew I would LOVE it with this Allegro skirt {aff link} hack I made a couple of weeks ago!

Summer Basics Tank // Sewing For Women

I promise I'll have a post about that skirt soon! It's one of my very favorite things I've made recently!

I hope you are all having a wonderful Friday! Happy Sewing!


Mommy + Me Holiday Outfits // Cleo Skirt + Caroline Party Dress

Wednesday, December 4, 2019

Mommy + Me Holiday Outfits // Cleo Skirt + Caroline Party Dress

This post contains affiliate links. All opinions expressed are honest and my own. If you make a purchase using the links, I make a small commission which helps support this blog. So, thank you!!


Welcome back friends!

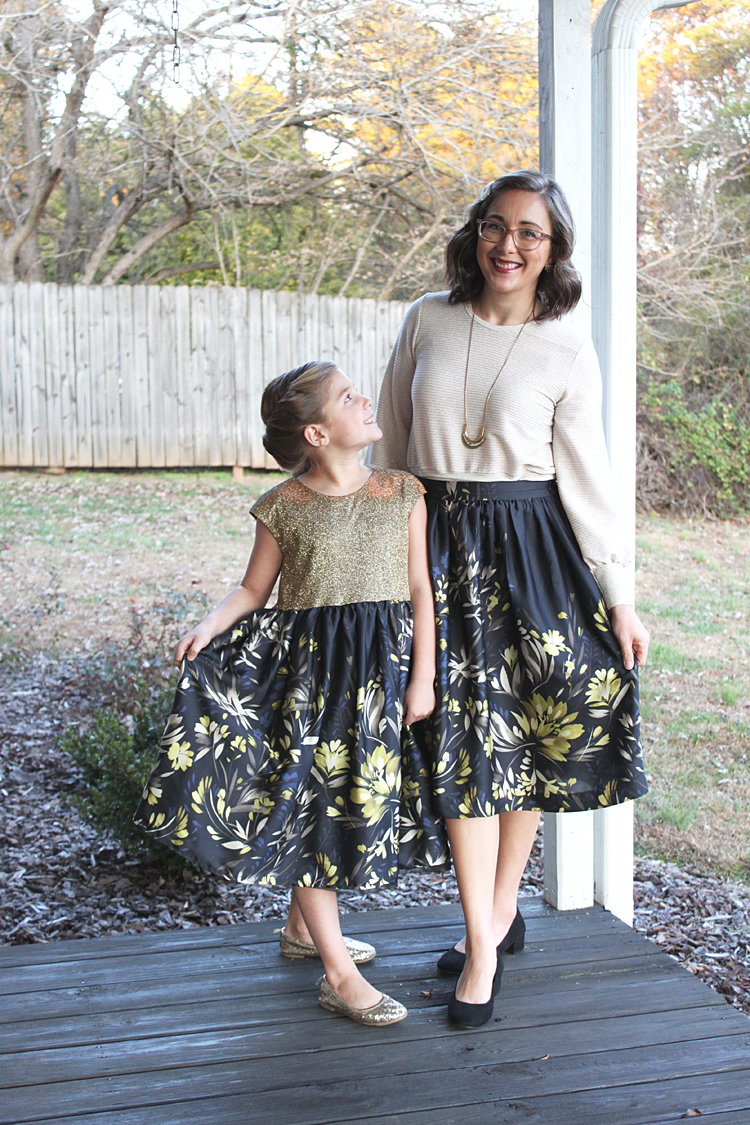
I'm really excited to share with you the holiday outfits I made for my daughter and myself this year! We will be wearing these every chance we get, but especially to the Christmas service at our church!

Mommy + Me Holiday Outfits // Cleo Skirt + Caroline Party Dress

I LOVE that my 8 year old thinks it's cool to match with me. I'll ride that train for as long as I can. 😊

Mommy + Me Holiday Outfits // Cleo Skirt + Caroline Party Dress

The matching fabric I used for our skirts is from Minerva, John Kaldor Floral Print Slinky Satin Dress Fabric. This is a really gorgeous print, and I'm so happy with how our outfits turned out!

When I finally got this fabric in my hands, my original idea went out the door because it wasn't quite what I was expecting. I ended up pondering long and hard about what to make before settling on this outcome! I've shared the whole story in the Minerva post, so you'll have to stay tuned for that in the new year! 😊

Mommy + Me Holiday Outfits // Cleo Skirt + Caroline Party Dress

The fabric is really lightweight and is perfect for gathers, like on both of our skirts! It's also pretty sheer to wear on the bottom, so I lined both Olivia's dress and my skirt with Posh Lining Fabric in Black from JOANN.

The patterns I used are the Caroline Party Dress for Olivia; the Sheridan Sweater by Hey June Handmade for my top, and the Cleo Skirt for my skirt.

I made this Sheridan Sweater before the pattern was completely done testing, so the "hacks" that I did to it are actually now pattern options. YAY!!!! for having all the work already done for you!

Mommy + Me Holiday Outfits // Cleo Skirt + Caroline Party Dress

For this version, I sized down one from my original tester version and since the fabric I used doesn't have as much stretch, the fit it a lot more slim and for this outfit it's perfect!

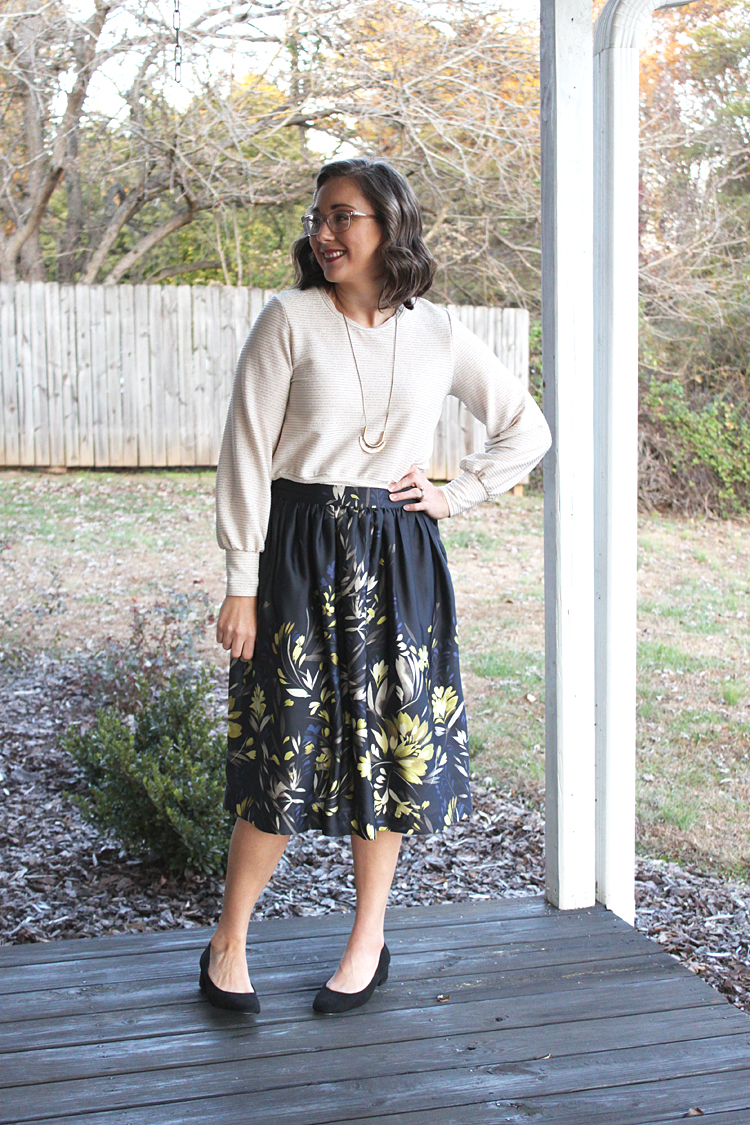
I decided to crop the sweater so that I could tuck the band into my skirt waistband and I just love how it all turned out!

Mommy + Me Holiday Outfits // Cleo Skirt + Caroline Party Dress

The fabric for my Sheridan Sweater was rescued from my stash, but originally came from JOANN as well. I held onto it for several years just waiting for the right holiday make to come along, and I'm so glad it finally did!

I love the bit of sparkle in the fabric, and the base color couldn't have been more perfect to pair with my Cleo Skirt!

Mommy + Me Holiday Outfits // Cleo Skirt + Caroline Party Dress

I made a size small in the Cleo Skirt with no alterations at all. I chose the midi-length and inseam pockets. To line the skirt, I simply made a second skirt using the skirt panel pattern pieces, shortening at the bottom a few inches, then gathered and attached both the main and the lining skirt pieces to the waistband and hemmed both skirts individually.

Mommy + Me Holiday Outfits // Cleo Skirt + Caroline Party Dress

The fabric for the bodice of Olivia's dress is from JOANN, Casa Collection Super Shine Metallic Fabric in Gold. It was such a good match to bring just the right amount of sparkle to her Christmas dress!

Mommy + Me Holiday Outfits // Cleo Skirt + Caroline Party Dress

This is the second Caroline Party Dress I've made for her and we both love the pattern so much! The full lining makes it feel very luxurious, both to look at and according to her, to wear!

Mommy + Me Holiday Outfits // Cleo Skirt + Caroline Party Dress

Her measurements put her exactly in a size 8, but I sized up to a 10 for longer wear. I made a size 8 for her last year Christmas and it fits like a glove this year, so I wanted her to be able to wear it for more than just a month out of this year!

Mommy + Me Holiday Outfits // Cleo Skirt + Caroline Party Dress

LINKS:

Caroline Party Dress
Cleo Skirt
Sheridan Sweater - Hey June Handmade

Floral skirt fabric - MINERVA
Sweater fabric - JOANN (no longer available)
Dress bodice fabric - JOANN
Lining fabric - JOANN

Mommy + Me Holiday Outfits // Cleo Skirt + Caroline Party Dress

Shop the pics below for similar shoes, necklace and hair accessories!


Danube Skirt Hack // Sewing For Women

Wednesday, October 2, 2019

Danube Skirt Hack // Sewing For Women

Happy Hump Day friends!

We've made it to the middle of the week! If you're like me you're gasping a little and thinking "already!?!" 😉

Today I wanted to share some details of my Danube Skirt I made recently using denim from Minerva. This fabric was gifted to me, and my style post will be live later on on the Minerva blog, so I'll be sure to share that as well!

I wanted to detail how I hacked the Danube Skirt pattern {aff link} by Itch To Stitch today, since the outcome is quite different than the original pattern. The steps are pretty simple, and I've included pictures I took along the way, but please be sure to reach out via email if you have any questions!

Danube Skirt Hack // Sewing For Women

Let's dive in to the tutorial!

I cut the pattern to exactly the size my measurements placed me in on the size chart (a straight size 6), but then made a few alterations to the pattern before cutting out my fabric.

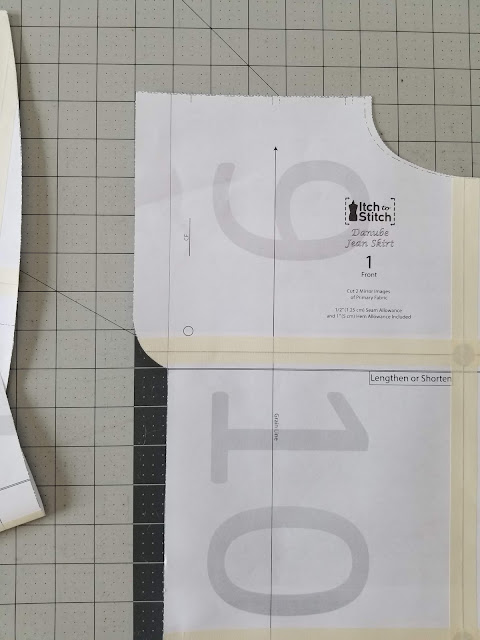
Since the pattern is meant to be quite fitted with side vents, and I was eliminating the side vents, I added a little bit of width to the skirt so that I would still be able to move around with ease.

I did this by simply adjusting the hip curve starting at about the base of the hip, adding width to meet the original seam allowance for the hem vent. It looks like this; notice the extra piece of fabric taped to the right side between the lengthen/shorten line and the hem vent.

Danube Skirt Hack // Sewing For Women

I did the same thing for the back pattern pieces, adding in the extra paper, then laying the front piece on top of the back and traced out the new curve. Adding the width was as easy as that!

Danube Skirt Hack // Sewing For Women

Danube Skirt Hack // Sewing For Women

The next thing to do was to create the front button placket. Disclaimer: I miss-calculated the width I need to add, my center front was off by 1/4", and therefore made my skirt a bit more snug in the front! In the end it all worked out just fine, but as a reference point, I only added 1 1/2" to the center front of the pattern piece and I should have added 1 3/4"!

Since I wanted to keep my original pattern pieces intact as much as possible, I simply folded the fly flush with the center front seam, rather than cutting if off. Then I taped my button placket extension piece to the existing pattern with just a few small pieces of tape to hold it in place.

Danube Skirt Hack // Sewing For Women

Danube Skirt Hack // Sewing For Women

Danube Skirt Hack // Sewing For Women

Danube Skirt Hack // Sewing For Women

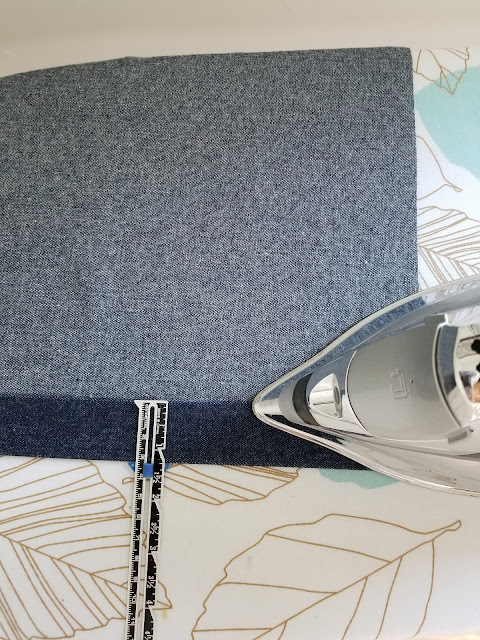
To create the button placket, *FIRST: INTERFACE the button placket area!!* I forgot to do this before the next step, so I had to press the placket twice, haha. Then fold the raw edge of center front in by 1/4" and press. Next fold it in by 1 1/4" and press. Edge stitch the outer edge and top-stitch at 1 1/8" to catch the edge of the placket.

Danube Skirt Hack // Sewing For Women

Danube Skirt Hack // Sewing For Women

Now you are done with altering the front pieces! From here, I just assembled as per the pattern.

Danube Skirt Hack // Sewing For Women

The other two changes I made to the pattern was to shorten the skirt, and I made a construction change to the waistband.

Danube Skirt Hack // Sewing For Women

For the length I determined how long I wanted the skirt to be and cut my front and back panels to that length (taking into consideration the height of the waistband), plus 1" for hem allowance.

The waistband adjustment was a personal preference. The pattern includes a one-piece waistband that is attached to the right side and then folded over and stitched to the wrong side. I do not like one-piece waistband constructions, so I simply cut it in two pieces, adding seam allowances and attached it the way I normally do my waistbands. I follow the method described HERE.

Danube Skirt Hack // Sewing For Women

The waistband included in the Danube Skirt is also straight, not curved, which is not usually as much of a problem in high-waisted garments. But for my shape I do prefer a curved waistband, so for my next one, I'll be swapping in a curved two-piece waistband.

I had one little fitting issue while constructing this skirt. I had some strange pulling and excess fabric in the back. I didn't muslin (don't be like me), so I had already top-stitched the yoke and center back seam when I discovered the issue. While the fit is not "perfect", it is good enough for this one with the adjustment I made!

Danube Skirt Hack // Sewing For Women

I essentially made the back skirt piece a size smaller from about mid-hip to about 4 inches above the hem. I will reflect this change to the pattern pieces before cutting out another one!

Danube Skirt Hack // Sewing For Women

I also scooted the back pockets 1/4" toward the center instead of attaching at the distance suggested by the pattern. This is individual to each person, but that is what worked for me!

I am so pleased with my final skirt! I can't wait to style this so many ways this fall and into the holiday season!

Danube Skirt Hack // Sewing For Women


Links: {Affiliate - thank you for supporting me and this blog!💕}

Skirt:


Sweater: Target (unfortunately this color is sold out, dark colors available) (similar) (similar)
Necklace: Target (similar)
Mules: Target (Color: Blush)
© Handmade Frenzy • Theme by Maira G.