Paloma Pants + Monroe Turtleneck // Sewing For Women
Thursday, November 21, 2019

Hi friends!! I have missed this space!
Life is a little crazy busy, in a good way, lately. I haven't had as much time to work on blog posts, but the sewing hasn't stopped. There is a backlog waiting to be shared!

But first in the queue, and one that I'm excited to share with you, is this new pattern by a new-to-me pattern designer! Coralie Bijasson is a French pattern designer and also translates her instructions into English. She reached out to see if I'd like to sew the new pattern, the Paloma Pants, that released in October and I definitely said yes!
I have been on a wide-leg pants kick lately, if you remember these Crew Trousers I made a couple of months ago...

This pattern is pretty similar in a lot of ways, but ends up looking quite different!
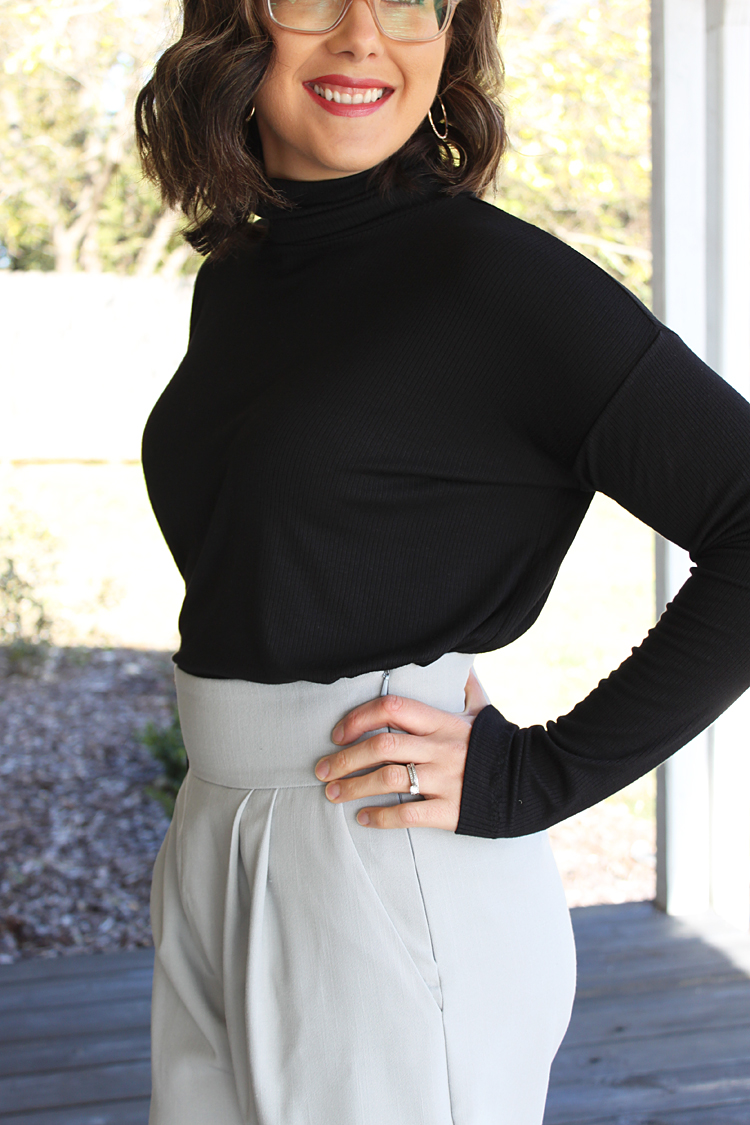
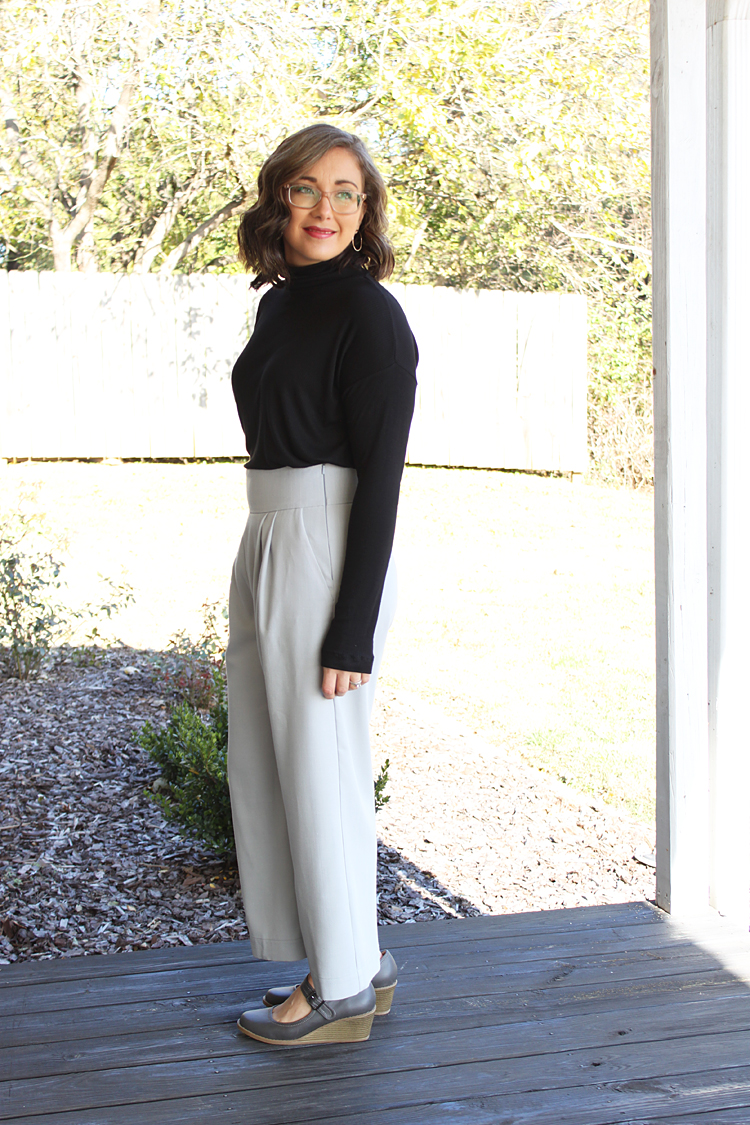
Since I was working with a brand new-to-me designer, I decided to first sew up a muslin, but to use a fabric that I could finish if things turned out well. Things definitely turned out well!! So I present to you, my muslin, turned completely wearable garment!
Since the sizing is in centimeters, I had to do some google conversions to choose which size to make. I ended up making a straight size 40, based on my measurements of W:29", H:38".

Before cutting into any fabric, I made a quick muslin of the waistband, since this is typically the place I have the most trouble fitting since my waist is normally a size larger than my hips. The waistband fit pretty well! I ended up taking just a slightly smaller seam allowance on my final version and the fit is absolutely perfect.

As with most pants patterns, I made some adjustments to these to fit my body. I preemptively shortened the rise 1/2" on the front only. It is very common for me to have to shorten the front rise and not the back. Secondly, I adjusted the length of the pants to be between the full length version and the cropped version. Since the pants are straight below the knee this is super easy to make them whatever length you'd like!

I sewed everything together with those few changes and tried them on! I had to baste the waistband on and sew in the zipper to assess the rise properly. After trying them on it was obvious I definitely needed to take out quite a bit more in the rise.

Since my pants were already cut and assembled, and everything else fit really well, I simply made this adjustment by removing length from the top of the pants and reattaching it to the waistband.
However, the changes I made to the pattern for the next time are: Removed 3/8" of length through the back rise and side seams, gradually increasing to remove a total of 3/4" from the center front rise.
Other than that, there were no changes made and I'm super pleased with my swishy pants!

The fabric is from Joann's and is from their linen-look selection. I believe the contents are majority polyester blended with some rayon.
My top is a Monroe Turtleneck (a FREE pattern!!). It was another first time sew for me, and it will definitely not be the last!! I could seriously fill up my closet with these for winter!

The fabric for my Monroe is the most delicious and drapey modal rib knit from Imagine Gnats Shop. It's so dreamy to wear! I did struggle with hemming it though! It was my own fault, because I was trying really hard to maintain it's extreme stretch for my sleeve hems since I like to pull my sleeves up on my arms a lot.
I decided to try to forgo any stabilizer and I definitely do not recommend that idea. ;) I did end up using HeatnBond SoftStretch Lite {aff link} and it worked really well, and did keep most of the stretch intact!
I have a full post about hemming knits HERE, and I followed the same steps, but altered a bit for my fabric. Since serging the raw edges tends to restrict the stretch, I actually lightly stretched out my fabric as I serged. It did ripple a lot while doing this, but I was able to steam it back into shape. Then I applied the stabilizer and hemmed using a triple zig-zag stitch with stretch thread in the bobbin.
I'm loving my new outfit so much!!

