Leather Belt Bag // Kelly Waist Bag Sewing Pattern Review

Hello friends!!
Today I'm sharing a super fun project with you that is making my heart sing!! Belt bags, aka; a fancy new version of the fanny pack, are all the rage at the moment!

At first I was really unsure about them, but they've definitely grown on me and for the last few months I was really feeling a burning desire to have one of my own!
My favorite versions have been by Madewell, but Target also came out with a cute, and more affordable option which I happened to try on in the store. After trying it on, it was a done deal. I NEEDED one!

Enter in the Kelly Waist Bag pattern by Cristy of Love You Sew blog and Boutique. And best of all, my friends; it's a FREE PATTERN!!!
How generous of her, right!? Once I had my head spinning in the direction of fall sewing (see more about that HERE in my stories highlights), I made some hard and fast plans to make my own version of the Madewell belt bags, using this pattern, some leather from my stash, and just a few additional supplies.

If you want a real life play-by-play on the making of this bag, you can check out the Belt Bag highlight in my saved stories on Instagram, HERE. There was some sweat, I don't cry about my sewing, but if I did, there may have been some tears, lol. And thankfully no blood.
The bag instructions are really great, and the sewing is truly a straightforward process, but working with leather can be a little tricky. Especially a heavier, thicker leather like I used here.

The leather is from The Leather Hide Store. I snagged a remnant piece from there many years ago (at least 5), after having been lucky enough to win a gift card that covered part of the cost. I will absolutely vouch for the quality of this leather (I've used it on quite a few projects over the years), and am considering purchasing another remnant piece soon!
When I bought my Bernina 350, also about 5 years ago, I had heard of a magical roller foot that was a must when sewing leather. So when I made my machine purchase, I also purchased this additional foot with the discount they offered.

The first step to making the belt bag is to assemble the inside pocket. So I diligently clipped the two pieces together with wonder clips as one does, and placed it under the #51 roller foot and started sewing. I was totally dismayed when I got halfway through the sewing and realized that the pieces had shifted terribly and my pocket was unacceptably crooked!
I'll just jump ahead in my story here and say that between the walking foot and the roller foot, the roller foot is indeed the better option, you just need to make sure the leather is well secured before trying to sew the pieces together.
Enter in this leathercraft cement. I picked this up because Cristy mentioned in the instructions that I would need a drop of leather glue at some point so I went ahead and bought this before I began my project.

This stuff was a true lifesaver! I found that when I ran a drop of glue along each seamline and then sewed on top, there was no shifting, and my stitching became a dream when paired with the roller foot!
I found this particular bottle at Hobby Lobby, it's also available on Amazon (HERE ~ affiliate), but if you can go to the store, and use a coupon, HL is your better deal!
Backing up a bit, I unfortunately decided that I would power through this project practically to the end using my walking foot, the glue, and top stitching thread. I made it work, as I pride myself in doing, ha! But there are places where the stitching skipped and it was just extremely difficult to get things to work out as they should have!

Am I disappointed in my work? No. I believe with this project I learned an incredible amount about what my machine can do, how to best work with thick leather, and the best tools that I need to accomplish it!

I have plans to make more Kelly Waist Bags in the future, and I anticipate the sewing to go much more smoothly the next time. I'm actually really, really excited to give it another go!

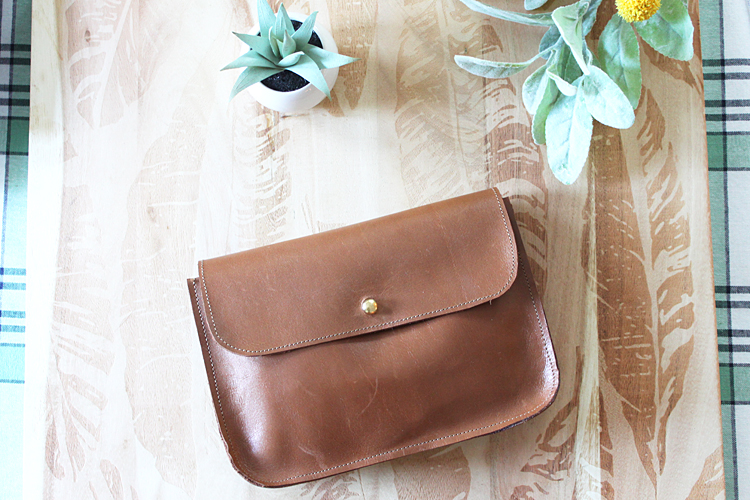
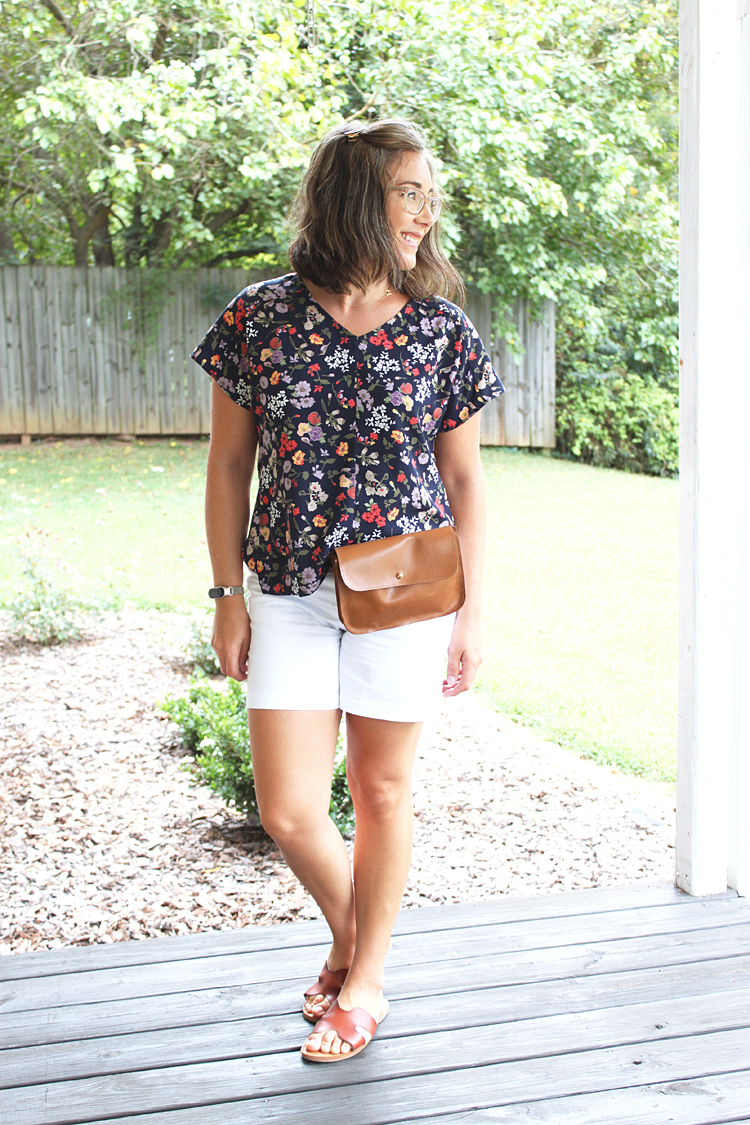
I took a few design liberties with my own belt bag. Probably most obviously, I sewed the bag with the raw edges of the seams on the outside of the bag rather than the inside. This was partly because I had a feeling my leather was too thick to handle turning right side out, but mainly because it's the look I was after.

I also stitched two small loops to the back rather than a long sleeve for a belt to pass through. Just some super simple changes, but that's the beauty of sewing for yourself. You can customize all you want!

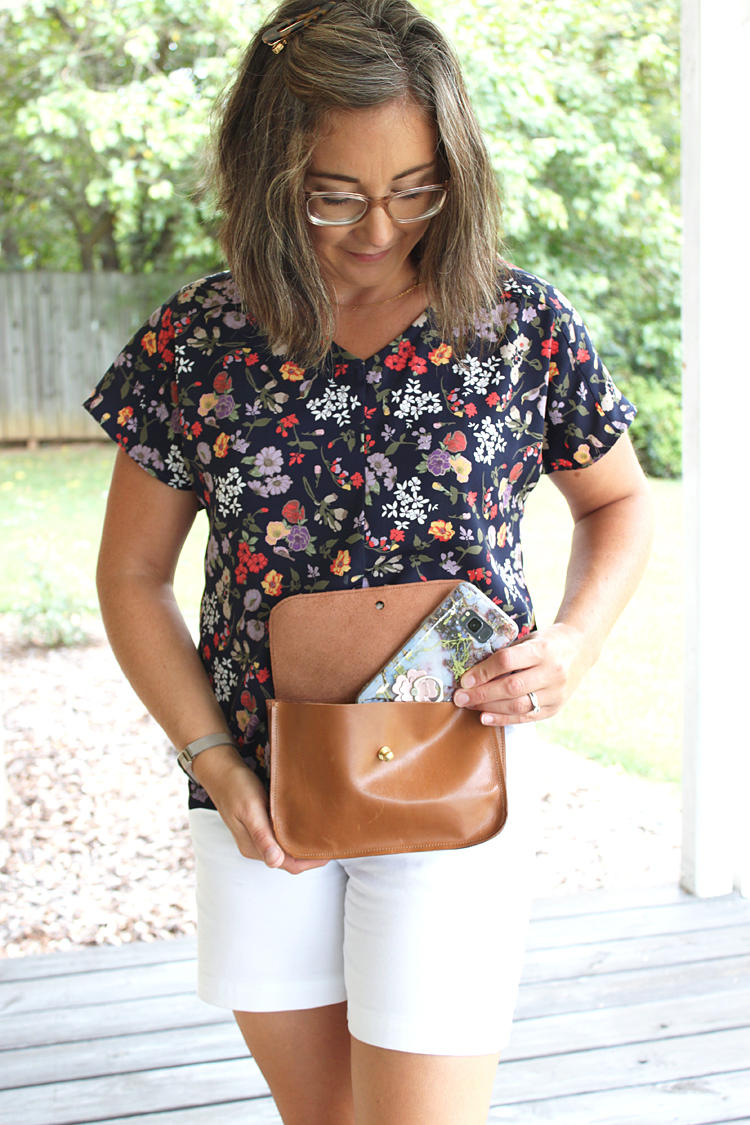
I absolutely love this belt bag! It functions really well for my needs. I'm really surprised at how much it holds! I can easily fit my sun glasses, a pack of wipes (because; kids), my small card wallet (actually more than one will fit really well), and my phone! There's even enough space for a pack of fruit snacks, because; kids. 😉

The inside pocket is such a great detail. I looooove me some pockets!!
I used a 10mm button post (bought on Amazon HERE -affiliate), which I think is slightly larger than the ones Cristy recommended. I couldn't find a leather hole punch that big, but I did find an 8mm one at Hobby Lobby. I tested it out on a scrap first to make sure the button would fit through the hole and it's perfect. I wouldn't change a thing!

There is a slight resistance, but the leather stretches over it nicely. I like that it doesn't slide over the button too easily, as I think it could potentially flop open on it's own if the hole were bigger.

Here is a final look at the inside of the pouch. I'll be sharing a post all about the small card wallet you see in the background as well, so stay tuned! It's another one of Cristy's patterns, and it's such a goodie!!

In summary, I made my bag using thick leather, topstitching thread in the top, regular thread in the bobbin, a leather needle, changing it about halfway through because I felt is was starting to dull, a walking foot (okay for 2 flat layers - such as the interior pocket, but not great over any more than that!), a roller foot, leathercraft cement (leather glue), leather hole punch, and a button stud.

I think that covers it all!! Please don't hesitate to reach out if you have any more questions! Feel free to shoot me an email, or reach out on Instagram. I'm always hanging out over there!
Outfit Details:
- Top: Sutton Blouse
- Fabric: LA Finch Fabrics (sold out) - similar options
- Shorts: Chi-Town Chinos (blogged HERE)
- Fabric: Imagine Gnats - stretch twill
- Sandals: Target

Gorgeous! I want one! I'm still scared of leather though.
ReplyDeleteThis bag is wonderful !! Fits almost every stylization and for every occasion.
ReplyDeleteExcellent and helpful post! I want to make one!
ReplyDelete