Cone Mills Lander Shorts // Sewing For Women

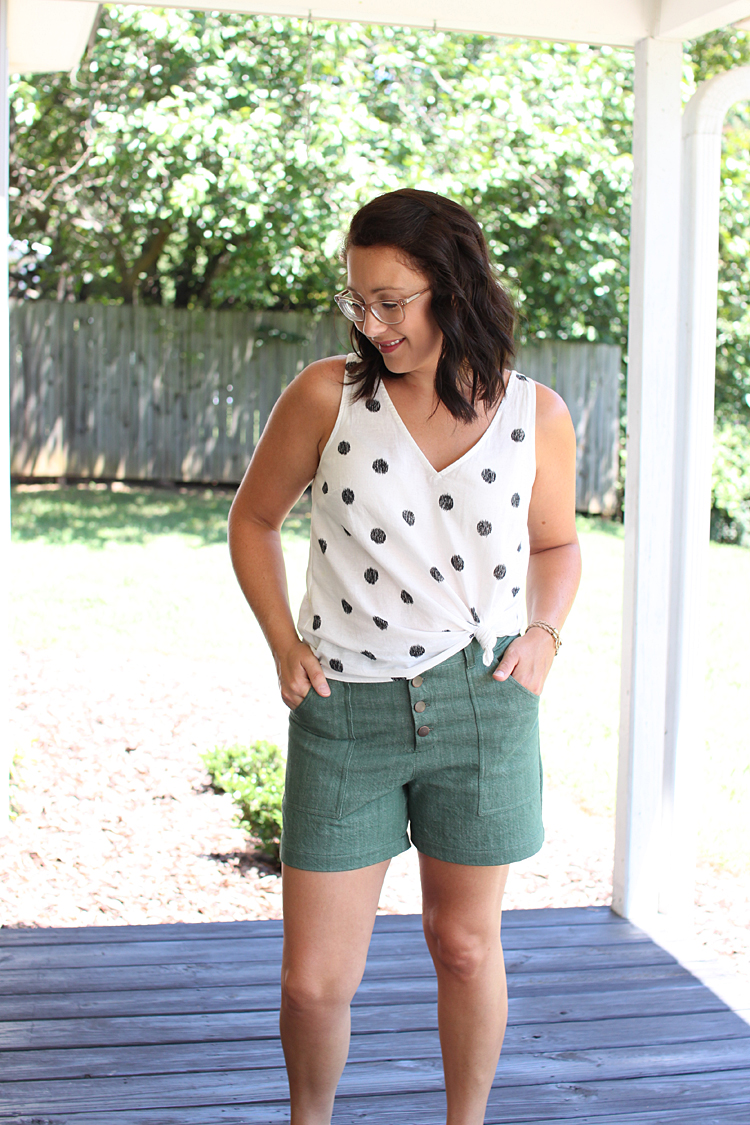
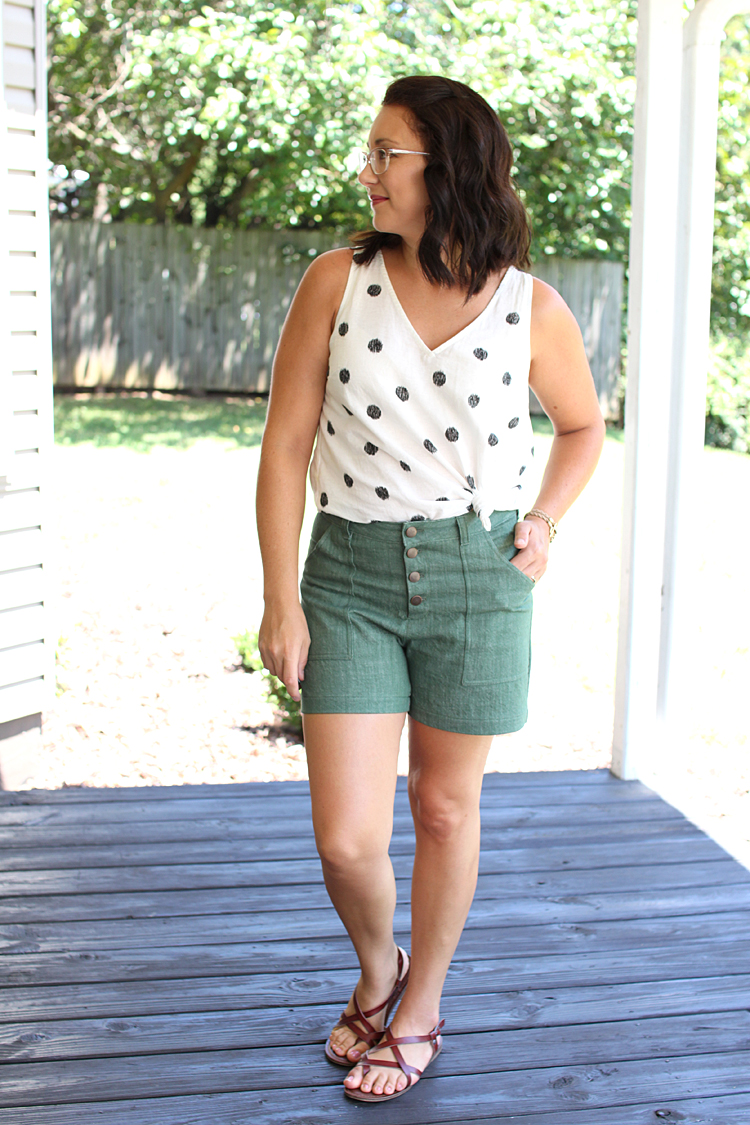
Hello friends!! I am dying with excitement to share these new Lander Shorts with you! I sewed them up from start to finish on Monday (in the middle of a chaotic day), and hammered in the buttons yesterday morning. I wore them most of the day yesterday and am wearing them again today. I'm completely obsessed.

This is the fourth time I have used the Lander Pant & Short pattern, but the first time I sewed the shorts version.
Each time I sewed them, I was working on tweaking the fit to get it perfect for my personal preferences. YOU GUYS. I NAILED IT. Fourth time is the charm, because these shorts may never leave my body!
As I mentioned above, I sewed these from start to finish in several hours. I had all the pieces cut, but not "prepped", it was just a pile of fabric and interfacing when I started. My sewing machine wasn't even threaded and I didn't have my top-stitching thread picked out yet, ha! I didn't time it exactly, but I would estimate active sewing time was 4-5 hours. As far as pants go, this pattern is a quick sew! And I am not a fast sewist!

The Landers fit me pretty decently from the start, I was able to test them (the original version is blogged here)and found them to be a very good starting point. I also made them in a stretch twill (blogged here), and a zipper expansion version in rayon/linen (HERE).

FITTING
The problem I ran into and made me not want to wear them on a regular basis is that the front "C" area was only comfortable when standing. I was told yesterday this is called a vedgie... Lol.
So to fix this problem; in the past, I tried scooping the front and back curve, but that didn't really do much for comfort and only made what appears to be excess fabric at the front more pronounced. The third time around, I lengthened the front and back curves a bit and scooped the front slightly. This was so much better!
In addition to those changes, for the second and third pair, I also shortened the rise from the top by about 3/4".
As you can see, I've been trying hard to get these to fit comfortably, because my love for this design runs deep!
So, now I'll outline exactly what I did to this pair to perfect the fit and finally yield super comfy shorts that I never want to stop wearing!
Starting from the top:
- I shortened the rise all around by about 1/2". My method of doing this was to simply cut a size 6 (my size), and cut at the size 2 at the top of the pants. This dropped the waistband overall.
- I shortened the front rise an additional 5/8" by taking a wedge out of the center of the fly area. I then had to true up the center front seam.
- The final change I made to the waistband was to swap out the included waistband pattern piece for a curved one. I used the Ash Jeans waistband in this case
- The changes to the crotch curve were relatively simple. I just lengthened both the front and the back by 3/8". I also scooped out the front curve by about 1/4"
- Added 1 inch in length to the inseam.
Shortening the rise helped these fit my body so much more comfortably. Although they don't hit at my true waist, I just find this fit to be much more wearable and I think even more flattering for me personally because my true waist is pretty high on my torso. Well above my belly button.
I also find the curved waist band to be super comfortable.
I took in the hips ever so slightly, and let the seam at the waistband out just a bit. This is a standard adjustment for me. I think I could take the whole thing in just a smidge, but I'm actually really enjoying the looser fit. Apparently I am all about comfort these days! :)
I've definitely tweaked a bit, but I absolutely love this latest version and I plan to sew up another pair of shorts ASAP with the exact same altered pattern pieces. I will be living in these for the remainder of the summer!
FABRIC
The final "change" I made to the pattern was to choose a very different fabric than my previous versions. I really believe that the reason I love this pair of shorts so much is split 50/50 between the fabric I used and the fit tweaks I made!

The fabric is 9oz Cone Mills Denim in Olive. I purchased it from Imagine Gnats, and it's still in stock. So run and get you some!!!

I cannot believe how much I loved working with and now wearing this fabric! I never thought I would really love wearing a rigid denim, but this stuff is incredible. While it doesn't have any spandex in it at all, it has the tiniest bit of give and with wearing, it relaxes into the most comfortable fit possible.

And that color!!!! It's the perfect shade of olive. I'm also surprised at how much I have in my wardrobe that pairs perfectly with it!
The buttons I used are jeans buttons in antique copper. I used THESE from Wawak.


So that is all the info on my new fave shorts! I'll also pop in all the links again, down below. And if you have any more questions, leave me a comment, shoot me an email, or DM me on Instagram HERE! I love chatting with you all!
Pattern: Lander Pant & Short
Pattern: Lander Pant & Short
Fabric: 9oz Cone Mills Denim in Olive
Jeans Buttons: Antique Copper
Tank: Target
Sandals: American Eagle

Oh god, a vedgie, I'm dying!! I actually have this fabric already for a (as-yet unmade) pair of Morgan jeans! It's beautiful! I love it as shorts, too...I can feel my resistance to the Landers weakening.
ReplyDelete