Mustard Yellow Camp Shirt // Willamette Wednesday // Sewing For Women

Have you heard of #heyjunejune19? It is a super fun sewing month in honor of Hey June Handmade. This fun event is hosted this year by our beloved #letssewthistogether hosts, Loni of @Havinsewmuchfun and Jen of @Makerheart.
This month's fun includes giveaways every single day!! So many patterns and so much fabric!! Make sure to check out the hashtags and links above to follow along in the fun. And make sure to check out my Instagram today for a giveaway there too!
Not only are the DAILY giveaways, there are also TWO grand prizes that you could win!! Check out all the details and pertinent info in this post HERE.

When Loni and Jen put out the call for Hey June Super Fans who would want to share their love of Hey June patterns, I immediately applied because, y'all... My love of the Willamette Shirt runs DEEP. This pattern has my heart, and my latest iteration of it had me melting in a puddle from the moment I first put it on. I could barely peel it off of myself to add the buttons!

But boy am I glad I managed to part with it for that long, because those buttons. OH MY HEART.
So let's talk first about allll the Willamette's that are collecting in my closet. I have made four versions of View A so far, and this is my first version of View C.
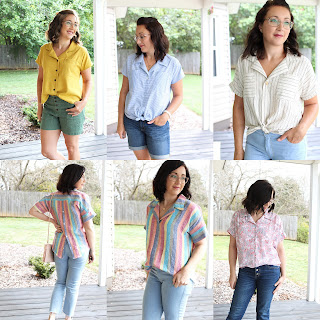
I didn't think it was possible, but I maaaayyybeee, just maybe, might love View C even a smidge better than I love my View A's??? That feels like cheating. It's like trying to choose a favorite among your children. Lol!
The first 2 versions of View A were made at the same time. My blue striped version was my "wearable muslin", you can see a bit more about that one HERE.
Next up is the cream striped version, blogged HERE.
The third version is the happiest of all the versions and helped to inspire #sewrtwstyle! You can read all about this version HERE.
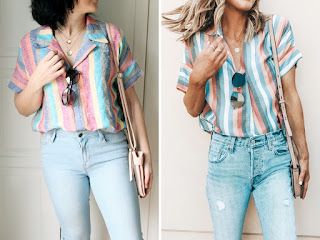
If you've noticed... Each of the View A's has had some sort of hack done to them, this pattern is so extremely easy to customize into so many different shirts! A tutorial of this gathered shoulder version can be found HERE.
And NOW, we can finally chat about the one that makes my heart sing right now! :)
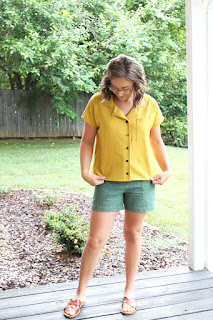
This was one of those projects that just "happened". There was no overthinking (which I tend to do alot, yikes), the idea popped into my head, I printed another view of the pattern, grabbed my fabric and went to work! Come to think of it, I don't think I grabbed my seam ripper once during this whole make!

This fabric is one that I've had in my stash for at least five years. Yes. FIVE. I remember loving it so much when I saw it on the shelf at Joann's. It was during the time that I was starting to explore using different substrates for the clothes I was making for my children. I remember loving the color so much, but I've honestly been scared of mustard and yellow tones until very recently! I always thought that it looked terrible on my skin tone, and since my kids have similar coloring to me, I guess I projected that onto them as well...??
And are you at all surprised to hear that it is rayon/linen?? My love for this blend started a long time ago. :)

For whatever reason, I fell in love and bought the fabric. I even bought it twice! I initially purchased a yard to use for a garment for my kids, and then after a while thought I might be brave enough to try making a skirt for myself with it and purchased another yard later. And there it sat. In a sad little fabric drawer for all these years. Haha. What a story!
When the idea for this shirt popped into my head, this fabric was the first thing to accompany it! I honestly don't know where the inspiration came from. It wasn't a Pinterest image or an ad, or anything like that, it just floated into my brain out of nowhere and I had to make it happen.
This is straight View C, size 6. No fit mods, no changes to the sizing at all. It is sized down one from where the size chart puts me, as are all the Willamettes I've made. I made two slight modifications to the design. I gathered the back instead of creating a pleat. I simply started and stopped my gathering stitches 2 inches on either side of the pleat notches and gathered it in to fit the yoke.

The second modification was simply to create a full button placket by sewing on buttonholes and buttons instead of sewing down the front placket as per the pattern instructions. I also opted not to topstich the facings since the button and buttonholes keep things in place. I'm still pondering this decision and may go back and edgestitch because I'm not sure how it will handle a wash? In the meantime I am LOVING the clean look of no topstitching!

The buttons were also just meant to be... I got to that stage and didn't really have anything in mind, but knew that I had plenty of options in my stash. I pulled out about 6 different buttons and mulled it over for a few minutes, but the stark contrast of the shiny black buttons quickly won me over.

I think it looks like a shirt straight out of a Madewell catalog and paired with my Lander Shorts, it has me singing all the camp songs! And now I need to re-watch the original Parent Trap. Because the remake... Nope. My kids are at "Camp Grandma" this week, but I feel like I need to run to the library and watch it all by myself. :)

I think this post is wordy enough at this point, but I'll leave you with some more images, because I hope to convey the awesomeness of this shirt, the fabric, and the whole vibe. I'm seriously going to have to go find me a summer camp. 😄

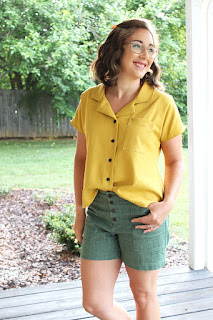
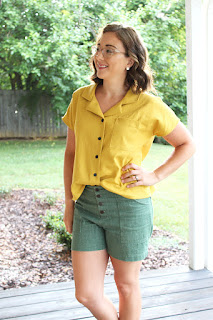

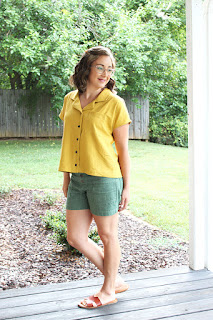

*Shorts are Lander Shorts: Blogged HERE.
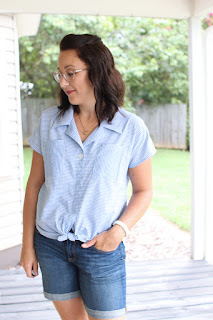


GORGEOUS! Or to quote the Hayley Mills Parent Trap (which I also love, obviously) - "Simply divine!"
ReplyDeleteLove this so much! I never noticed this sleeve option before. 😳
ReplyDelete