Danube Skirt Hack // Sewing For Women

Happy Hump Day friends!
We've made it to the middle of the week! If you're like me you're gasping a little and thinking "already!?!" 😉
Today I wanted to share some details of my Danube Skirt I made recently using denim from Minerva. This fabric was gifted to me, and my style post will be live later on on the Minerva blog, so I'll be sure to share that as well!
I wanted to detail how I hacked the Danube Skirt pattern {aff link} by Itch To Stitch today, since the outcome is quite different than the original pattern. The steps are pretty simple, and I've included pictures I took along the way, but please be sure to reach out via email if you have any questions!

Let's dive in to the tutorial!
I cut the pattern to exactly the size my measurements placed me in on the size chart (a straight size 6), but then made a few alterations to the pattern before cutting out my fabric.
Since the pattern is meant to be quite fitted with side vents, and I was eliminating the side vents, I added a little bit of width to the skirt so that I would still be able to move around with ease.
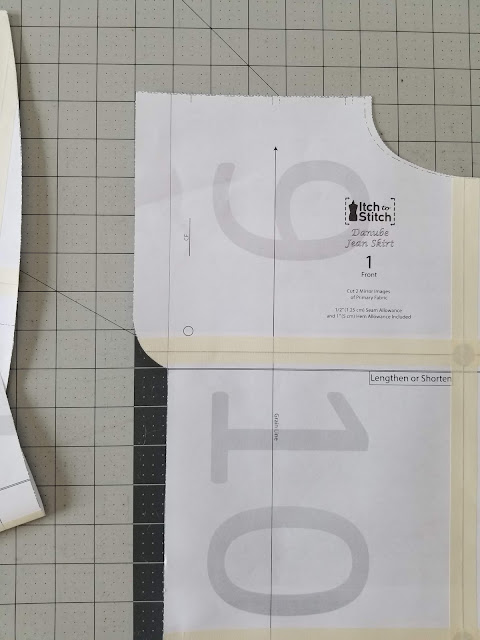
I did this by simply adjusting the hip curve starting at about the base of the hip, adding width to meet the original seam allowance for the hem vent. It looks like this; notice the extra piece of fabric taped to the right side between the lengthen/shorten line and the hem vent.

I did the same thing for the back pattern pieces, adding in the extra paper, then laying the front piece on top of the back and traced out the new curve. Adding the width was as easy as that!


The next thing to do was to create the front button placket. Disclaimer: I miss-calculated the width I need to add, my center front was off by 1/4", and therefore made my skirt a bit more snug in the front! In the end it all worked out just fine, but as a reference point, I only added 1 1/2" to the center front of the pattern piece and I should have added 1 3/4"!
Since I wanted to keep my original pattern pieces intact as much as possible, I simply folded the fly flush with the center front seam, rather than cutting if off. Then I taped my button placket extension piece to the existing pattern with just a few small pieces of tape to hold it in place.


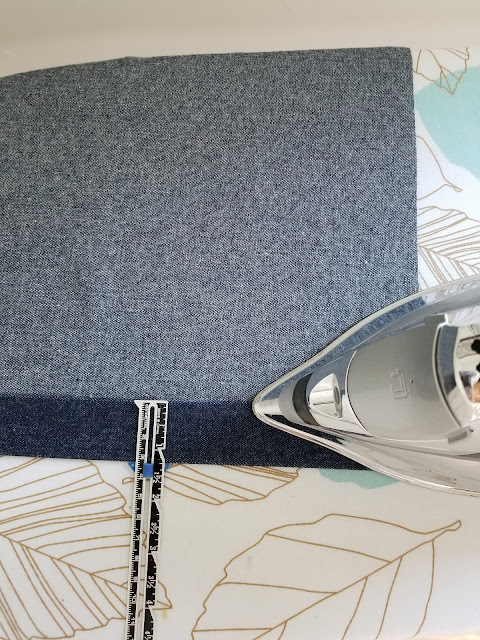
To create the button placket, *FIRST: INTERFACE the button placket area!!* I forgot to do this before the next step, so I had to press the placket twice, haha. Then fold the raw edge of center front in by 1/4" and press. Next fold it in by 1 1/4" and press. Edge stitch the outer edge and top-stitch at 1 1/8" to catch the edge of the placket.


Now you are done with altering the front pieces! From here, I just assembled as per the pattern.

The other two changes I made to the pattern was to shorten the skirt, and I made a construction change to the waistband.
For the length I determined how long I wanted the skirt to be and cut my front and back panels to that length (taking into consideration the height of the waistband), plus 1" for hem allowance.
The waistband adjustment was a personal preference. The pattern includes a one-piece waistband that is attached to the right side and then folded over and stitched to the wrong side. I do not like one-piece waistband constructions, so I simply cut it in two pieces, adding seam allowances and attached it the way I normally do my waistbands. I follow the method described HERE.

The waistband included in the Danube Skirt is also straight, not curved, which is not usually as much of a problem in high-waisted garments. But for my shape I do prefer a curved waistband, so for my next one, I'll be swapping in a curved two-piece waistband.
I had one little fitting issue while constructing this skirt. I had some strange pulling and excess fabric in the back. I didn't muslin (don't be like me), so I had already top-stitched the yoke and center back seam when I discovered the issue. While the fit is not "perfect", it is good enough for this one with the adjustment I made!

I essentially made the back skirt piece a size smaller from about mid-hip to about 4 inches above the hem. I will reflect this change to the pattern pieces before cutting out another one!

I also scooted the back pockets 1/4" toward the center instead of attaching at the distance suggested by the pattern. This is individual to each person, but that is what worked for me!
I am so pleased with my final skirt! I can't wait to style this so many ways this fall and into the holiday season!

Links: {Affiliate - thank you for supporting me and this blog!💕}
Skirt:
- Danube Skirt Pattern: Itch to Stitch
- Denim: Minerva (color: Indigo)
- Buttons: Amazon
Sweater: Target (unfortunately this color is sold out, dark colors available) (similar) (similar)
Necklace: Target (similar)
Mules: Target (Color: Blush)


No comments
Post a Comment
Jump in the conversation! Leave some comment love...