SLIDER

Crew Trousers // Sewing For Women

Thursday, October 10, 2019

Crew Trousers // Sewing For Women // Sewing Pattern Review

Happy Thursday, friends!

I'm so excited to share with you my brand new Crew Trousers!! This is the latest pattern by Chalk & Notch, just released this week. The pattern is on sale through Tuesday, 10/15, no code needed!

Crew Trousers // Sewing For Women // Sewing Pattern Review

The pattern comes in two variations, a tapered trouser length, and a loose fitting short.

Features of the pattern include:

  • Front pleats
  • Back Darts
  • Optional belt-loops and waist tie
  • Front Slant Pockets
  • Side Lapped Zipper with waistband closure; choose between hook & eye and buttons
  • Lengthen and Shorten lines included on the pattern in several places
Crew Trousers // Sewing For Women // Sewing Pattern Review

The instructions for this pattern are exceptional, like we know from all of Gabriela's patterns. Her interactive pdf is great for jumping from section to section if you need to find something specific in the instructions. She has also created a few very helpful videos for some of the trickier steps in the construction, such as the lapped zipper, but I have to say, the written instructions and illustrations are wonderful as well! 

Crew Trousers // Sewing For Women // Sewing Pattern Review

She also has a very helpful fitting post on her blog HERE.

Crew Trousers // Sewing For Women // Sewing Pattern Review

I was privileged to be one of the testers for this pattern, but even if I wasn't testing I would have taken the time to muslin a pattern like this. I'm so, SO glad I muslined it first. 

According to the size chart I am a size 6 hip, and 8 waist. So for my muslin, I graded between the two sizes, and kept the length as is so I could determine exactly how much length I needed to remove.

Crew Trousers // Sewing For Women // Sewing Pattern Review

The muslin fit very well from the beginning. The hips fit well, and the waist fit well, but I discovered I needed a little bit more room in the high hip area just below my waist. I also needed to remove 1/2" of length from the front rise, but not the back. This is typical for me.

Crew Trousers // Sewing For Women // Sewing Pattern Review

I also needed to remove 1 1/2" in length from the legs to get the hem to hit me at the intended length, which is cropped just above the ankle.

I'm so glad I have this data from my muslin, because when I made it up in my fashion fabric, it ended a completely different size! 

Crew Trousers // Sewing For Women // Sewing Pattern Review

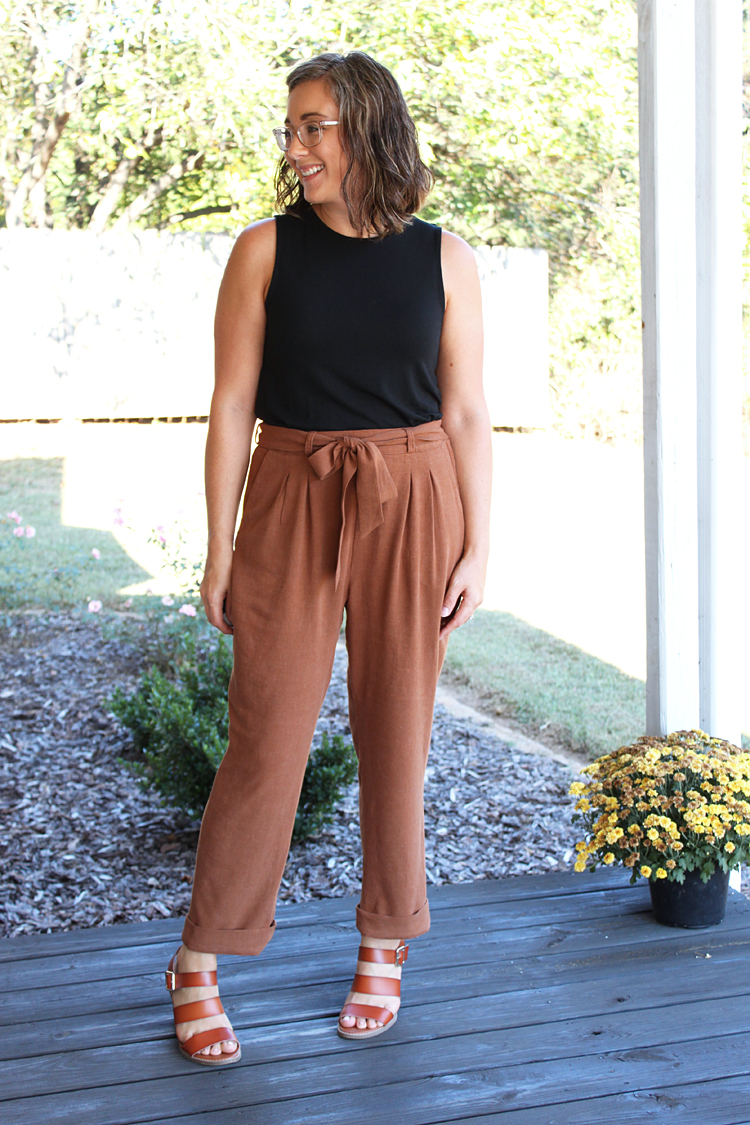
I used the most delicious Caramel Silky Viscose/Linen Noil from Imagine Gnats. I purchased this fabric with this exact style of pants in mind, and in the end it is exactly what I was hoping for!

Crew Trousers // Sewing For Women // Sewing Pattern Review

However, this fabric grows exponentially when sewing it into a pair of pants! Even with all of my adjustments to my pattern before cutting, I ended up taking in the hips, and removing a HUGE amount of length from the crotch. It was so low, it was comical. For some reason I didn't take any pictures at that stage, but I really wish I would have!

Crew Trousers // Sewing For Women // Sewing Pattern Review

After these photos, I actually decided to remove another 1/2" from the crotch and I also took in each leg 1/2" through the inseam all the way down to the hem. Like I said, this fabric grew and grew! I even washed them in the washer and dryer just to make sure it wouldn't shrink and that I wasn't removing too much.

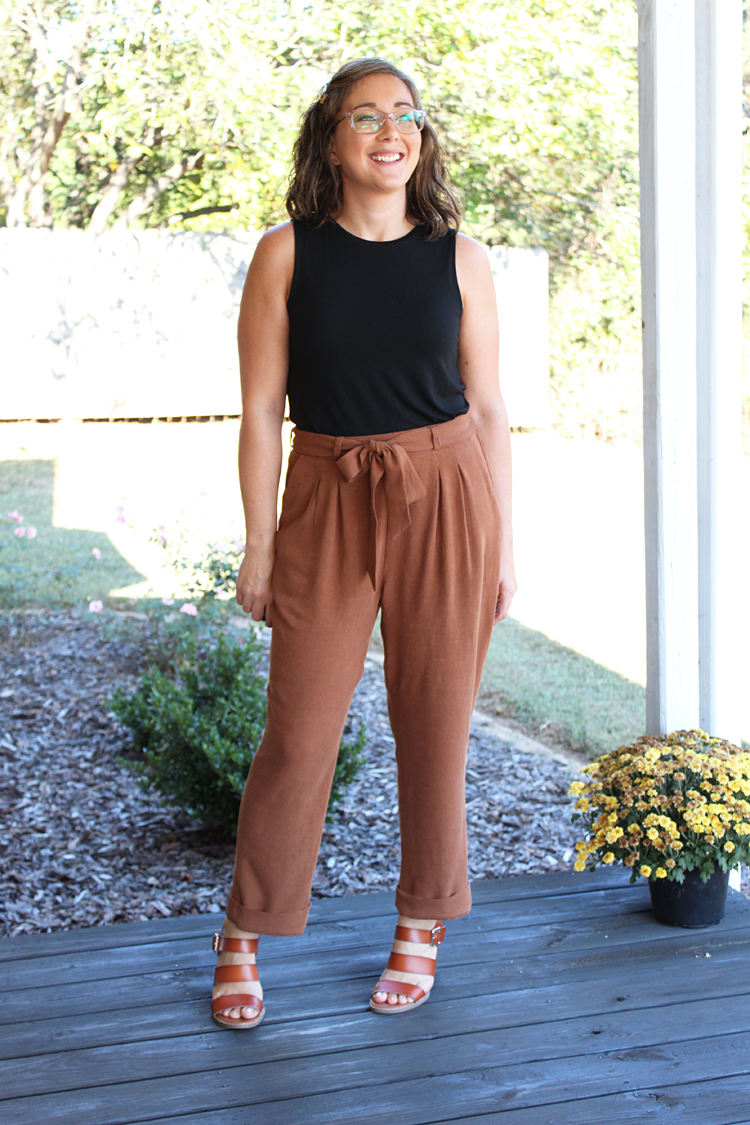
Even after removing all of that length from the crotch, the hem still ended up being too long. So rather than cutting off from the bottom of the pant, I decided to hem and then cuff.
Crew Trousers // Sewing For Women // Sewing Pattern Review

Y'all. This is a hack I was planning to make on a future version, but I've gotta say. I'm so happy it worked out with this pair, because it's one of my favorite details!! Next time I will construct it a bit differently, but this is the overall look I was after, and I love it.

But I've gotta say, all of the details on this pair of pants are pretty great!! I mean, just look at that lapped zipper and tiny buttons on the waistband! Swoon.

Crew Trousers // Sewing For Women // Sewing Pattern Review

So as I'm sure you can tell. I'm over the moon about my Crew Trousers. This style of pants is new to me, but I can't wait to wear them all fall! I've got so many ideas of ways I want to style them. And you can't beat the comfort.

Crew Trousers // Sewing For Women // Sewing Pattern Review

You may be asking based on my thoughts above, would you make them again in this fabric? The answer is YES. I'm absolutely thrilled with the outcome. That COLOR. 😍 Next time though, I would definitely size down my pattern before cutting into it. The waistband even turned out a little large, even though I had block fused my interfacing to it before cutting. It just grew. The waist tie helps with keeping it in place, but I would size down at least one size for the whole pattern if I used this fabric again.

Crew Trousers // Sewing For Women // Sewing Pattern Review

I hope these tips are all helpful, and be sure to check out the Chalk & Notch blog for more fitting tips and inspiration!

Pattern & Fabric:

Crew Trousers // Sewing For Women // Sewing Pattern Review


DIY Anthropologie Inspired Ciao Tee // Sewing For Women

Friday, October 4, 2019

DIY Anthropologie Inspired Ciao Tee // Tutorial // Sewing For Women

Happy Friday, friends!!

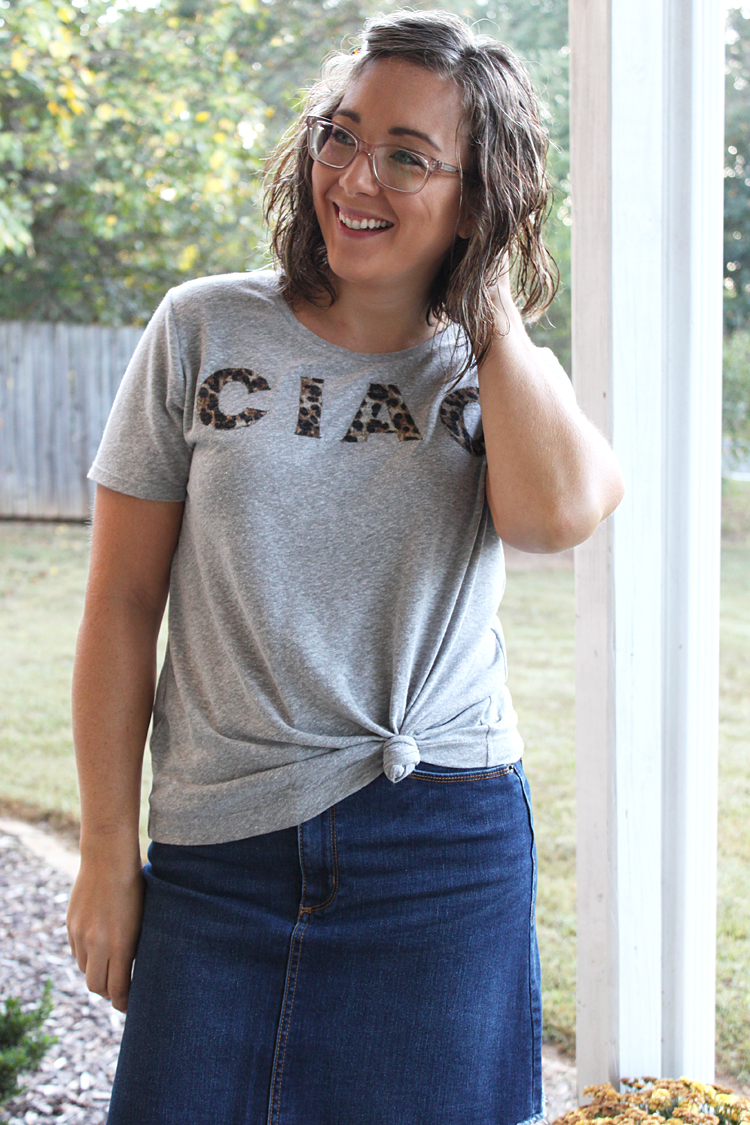
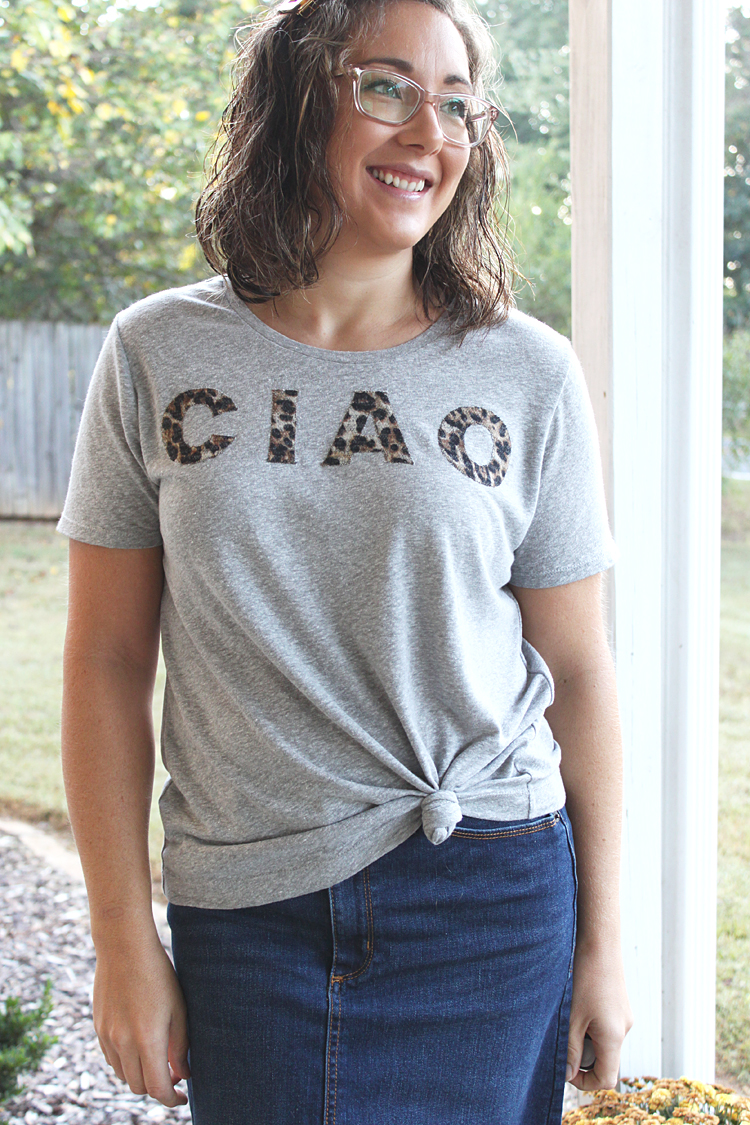
I am bursting with some exciting news for you today. First of all, I finished up this adorable Ciao Tee earlier this week, and I get to post about it!

DIY Anthropologie Inspired Ciao Tee // Tutorial // Sewing For Women

I used the Union St. Tee pattern by Hey June Handmade {aff link}, a linen blend jersey knit from Imagine Gnats, sold out, but there is currently a similar knit in the shop HERE.

DIY Anthropologie Inspired Ciao Tee // Tutorial // Sewing For Women

I made a size medium for a more oversized fit, shortened the bodice 1 inch, and otherwise sewed as per the pattern. My sweet spot with the Union St Tee is a size small for drapier knits, such as rayon or bamboo spandex jerseys. For knits with less stretch such as this linen blend jersey, or cotton knits with little to no spandex, I prefer to sew a medium and tuck or tie at the waist.

For reference, my measurements are B: 36", W: 29", H: 38". I could probably stand to grade down at the hips in a size medium, and that would eliminate the need to tuck or tie, but I'm a huge fan of that look so I'll probably just keep making them more oversized. 😊

DIY Anthropologie Inspired Ciao Tee // Tutorial // Sewing For Women

For the letters, I used scraps from another Union St. Tee that I will post about a little later (IT'S SO GOOD). I fused the letters to the tee using EZ-STEAM II {aff link}.

This brings me to the second part of my exciting news. I put together a little video to show you how to stitch around the edges of the letters in a way that won't pull and distort your delicate knits!

You can watch that on my IGTV channel right here in the post, or you can click HERE and watch it on the Instagram app!


Bear with me as I'm still learning with these IGTV videos. 😉 I feel quite amateur putting them together, but I'm finding out exactly what info I need to add/record/photograph, etc. So hopefully they will get better with time!

DIY Anthropologie Inspired Ciao Tee // Tutorial // Sewing For Women

Regardless of all that, I'm super pleased with how my tee turned out! And I can now twin with my good friend, Teri! 😄 Click HERE to see what I mean!

DIY Anthropologie Inspired Ciao Tee // Tutorial // Sewing For Women


The third and final piece of exciting news is that I now have a LIKEtoKNOW.it page!! This is a place where I can post all of my daily outfits and link to the items I'm wearing for easy shopping for you all, if you are interested!

DIY Anthropologie Inspired Ciao Tee // Tutorial // Sewing For Women


I get a lot of questions about where I purchase my shoes, accessories, and other items that I wear that are not handmade, so this is a place where I can easily gather all of that information for you!

To view my outfits, you simply need to find my account on LIKEtoKNOW.it (My name is Handmade Frenzy) and click on the pictures for all the info. HERE is the link to my account!

I will still be linking all the info in my blog posts here as well, and it will look a bit more polished as you can see below! Simply click on the little icons to shop.


I'm really excited about this little addition, and I hope you all are too! I cannot express how much it means to me for you to support my blog through these links. Thank you!! 😘


Danube Skirt Hack // Sewing For Women

Wednesday, October 2, 2019

Danube Skirt Hack // Sewing For Women

Happy Hump Day friends!

We've made it to the middle of the week! If you're like me you're gasping a little and thinking "already!?!" 😉

Today I wanted to share some details of my Danube Skirt I made recently using denim from Minerva. This fabric was gifted to me, and my style post will be live later on on the Minerva blog, so I'll be sure to share that as well!

I wanted to detail how I hacked the Danube Skirt pattern {aff link} by Itch To Stitch today, since the outcome is quite different than the original pattern. The steps are pretty simple, and I've included pictures I took along the way, but please be sure to reach out via email if you have any questions!

Danube Skirt Hack // Sewing For Women

Let's dive in to the tutorial!

I cut the pattern to exactly the size my measurements placed me in on the size chart (a straight size 6), but then made a few alterations to the pattern before cutting out my fabric.

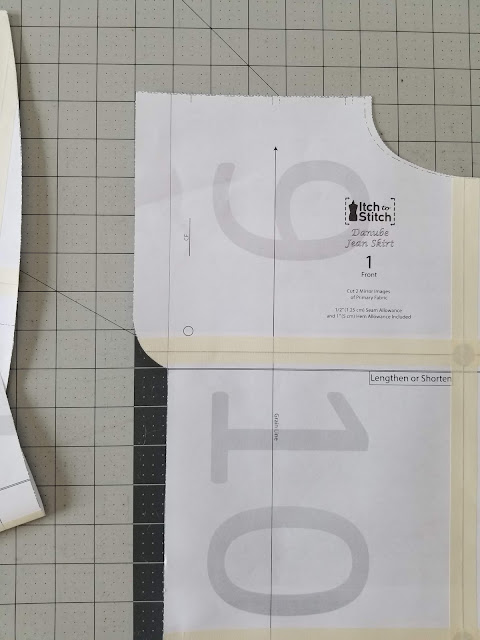
Since the pattern is meant to be quite fitted with side vents, and I was eliminating the side vents, I added a little bit of width to the skirt so that I would still be able to move around with ease.

I did this by simply adjusting the hip curve starting at about the base of the hip, adding width to meet the original seam allowance for the hem vent. It looks like this; notice the extra piece of fabric taped to the right side between the lengthen/shorten line and the hem vent.

Danube Skirt Hack // Sewing For Women

I did the same thing for the back pattern pieces, adding in the extra paper, then laying the front piece on top of the back and traced out the new curve. Adding the width was as easy as that!

Danube Skirt Hack // Sewing For Women

Danube Skirt Hack // Sewing For Women

The next thing to do was to create the front button placket. Disclaimer: I miss-calculated the width I need to add, my center front was off by 1/4", and therefore made my skirt a bit more snug in the front! In the end it all worked out just fine, but as a reference point, I only added 1 1/2" to the center front of the pattern piece and I should have added 1 3/4"!

Since I wanted to keep my original pattern pieces intact as much as possible, I simply folded the fly flush with the center front seam, rather than cutting if off. Then I taped my button placket extension piece to the existing pattern with just a few small pieces of tape to hold it in place.

Danube Skirt Hack // Sewing For Women

Danube Skirt Hack // Sewing For Women

Danube Skirt Hack // Sewing For Women

Danube Skirt Hack // Sewing For Women

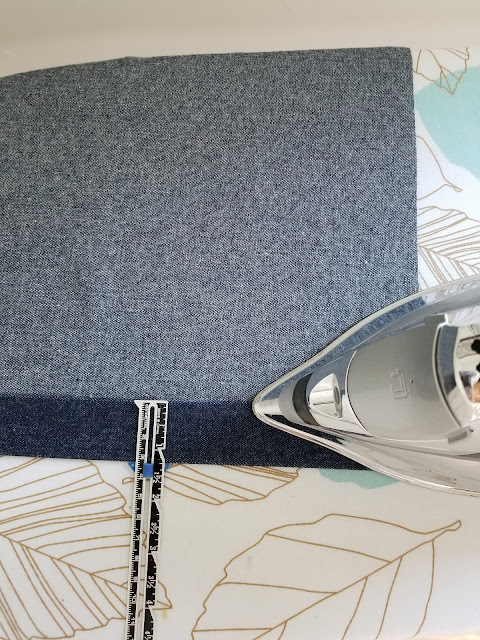
To create the button placket, *FIRST: INTERFACE the button placket area!!* I forgot to do this before the next step, so I had to press the placket twice, haha. Then fold the raw edge of center front in by 1/4" and press. Next fold it in by 1 1/4" and press. Edge stitch the outer edge and top-stitch at 1 1/8" to catch the edge of the placket.

Danube Skirt Hack // Sewing For Women

Danube Skirt Hack // Sewing For Women

Now you are done with altering the front pieces! From here, I just assembled as per the pattern.

Danube Skirt Hack // Sewing For Women

The other two changes I made to the pattern was to shorten the skirt, and I made a construction change to the waistband.

Danube Skirt Hack // Sewing For Women

For the length I determined how long I wanted the skirt to be and cut my front and back panels to that length (taking into consideration the height of the waistband), plus 1" for hem allowance.

The waistband adjustment was a personal preference. The pattern includes a one-piece waistband that is attached to the right side and then folded over and stitched to the wrong side. I do not like one-piece waistband constructions, so I simply cut it in two pieces, adding seam allowances and attached it the way I normally do my waistbands. I follow the method described HERE.

Danube Skirt Hack // Sewing For Women

The waistband included in the Danube Skirt is also straight, not curved, which is not usually as much of a problem in high-waisted garments. But for my shape I do prefer a curved waistband, so for my next one, I'll be swapping in a curved two-piece waistband.

I had one little fitting issue while constructing this skirt. I had some strange pulling and excess fabric in the back. I didn't muslin (don't be like me), so I had already top-stitched the yoke and center back seam when I discovered the issue. While the fit is not "perfect", it is good enough for this one with the adjustment I made!

Danube Skirt Hack // Sewing For Women

I essentially made the back skirt piece a size smaller from about mid-hip to about 4 inches above the hem. I will reflect this change to the pattern pieces before cutting out another one!

Danube Skirt Hack // Sewing For Women

I also scooted the back pockets 1/4" toward the center instead of attaching at the distance suggested by the pattern. This is individual to each person, but that is what worked for me!

I am so pleased with my final skirt! I can't wait to style this so many ways this fall and into the holiday season!

Danube Skirt Hack // Sewing For Women


Links: {Affiliate - thank you for supporting me and this blog!💕}

Skirt:


Sweater: Target (unfortunately this color is sold out, dark colors available) (similar) (similar)
Necklace: Target (similar)
Mules: Target (Color: Blush)

Evans Blazer Style Session // Fashion For Women

Tuesday, September 24, 2019

This post may contain affiliate links. All reviews and opinions are my own.


Happy Tuesday, friends!!

I am so excited to be here with a slightly different kind of post today! Over on Instagram, my good friend Teri and I are teaming up to bring you each a style session showcasing our newly finished Evans Blazers.

You can check out our videos on IGTV by clicking HERE! We each styled the blazer 6 different ways, so you have a huge selection of styles to glean ideas from!

I decided to write this post to provide you with sources for everything from all 6 of my looks! Happy reading and clicking!

LOOK #1:

It sure is hard to pick, but I think Look #1 might be my favorite! I love the pairing of a graphic tee with heels. Maybe not super practical for my mom-life, but for girls' night or date night, I'm all in!! :)

LOOK #2:
Nikko Top // Scarf (similar) // Bag (similar) // Ash Jeans - Fabric: Stretch Modal Denim from Joann (no longer available) // Booties

LOOK #3:
Portia Woven Top (Blogged HERE) // Round Woven Bag (similar) // Cali Demi Boot Jeans (Mine are sold out - linked to current styles) // Sock Booties (similar) (similar)

Again with the favorites! But Look #3 is in the Top 3, for me. I love simple, and this outfit has all those simple pieces that are elevated by little details. My fave.

LOOK #4:

Union St Tee (hacked - blog coming soon!) // High Rise Skinny Jeans (similar) (similar) // Crossbody Bag (Similar Black) (Gray) // Suede Block Heels (similar)

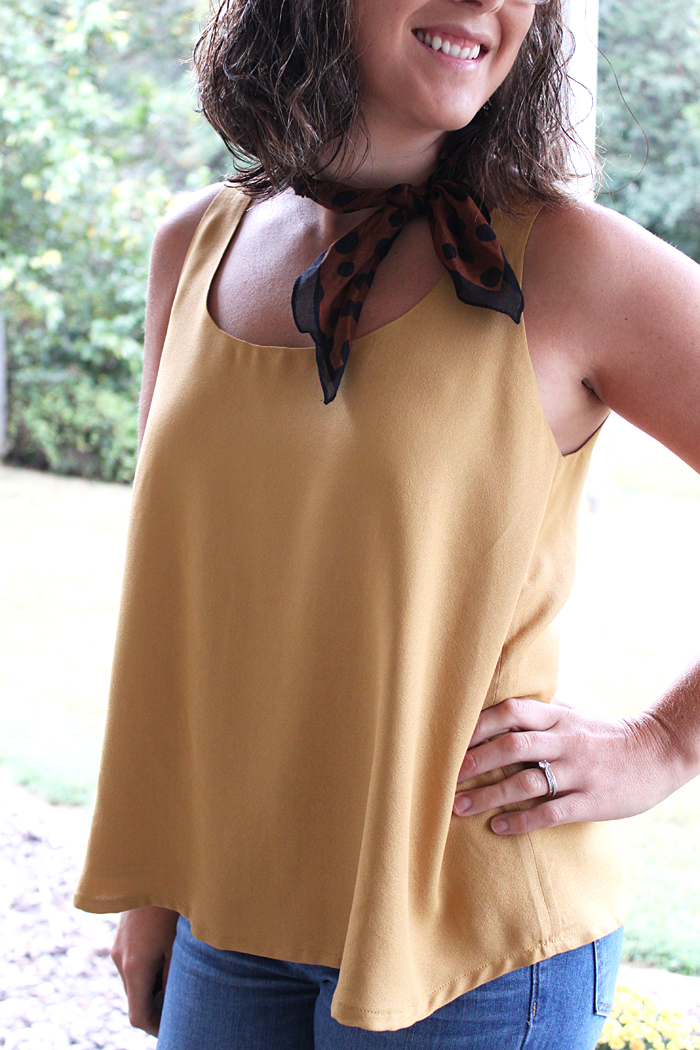
Well, here's the third favorite in my personal Top 3. What can I say? Animal print has my heart right now! And in a bold black & white it is just perfect paired with the navy blazer.

LOOK #5:
Lightweight Ribbed Sweater Tee (sold out) // High Rise Skinny Jeans (similar) (similar) // Pink Crossbody Bag (similar) (similar) // Leopard Print Loafers

LOOK #6:
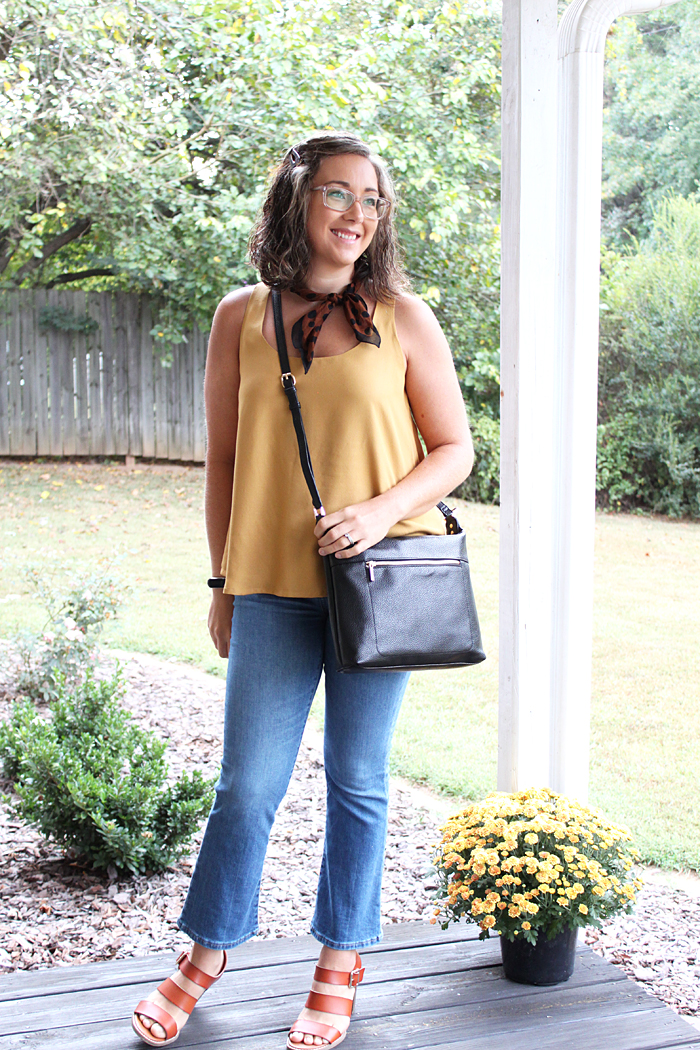
Trevi Top (Mash-up; blogged HERE) // Scarf (similar) // Crossbody Bag (Similar Black) (Gray) // High Rise Slim Boy Jean (Mine are sold out - linked to current in stock styles) // Woven Mules - Black sold out (similar) (similar)

There you have it! Thanks so much for taking the time to read and for shopping my links. I appreciate you so much!!


Evans Blazer // Sewing For Women

Friday, September 20, 2019

This post may contain affiliate links. All reviews and opinions are my own.


Evans Blazer Pattern Review // Sewing For Women

I had the exciting privilege to test the newest pattern from Hey June Handmade! Please welcome the Evans Blazer!

So many of Adrianna's patterns are staples in my wardrobe, and this classic blazer pattern for knit fabrics is joining those ranks as well!

Evans Blazer Pattern Review // Sewing For Women

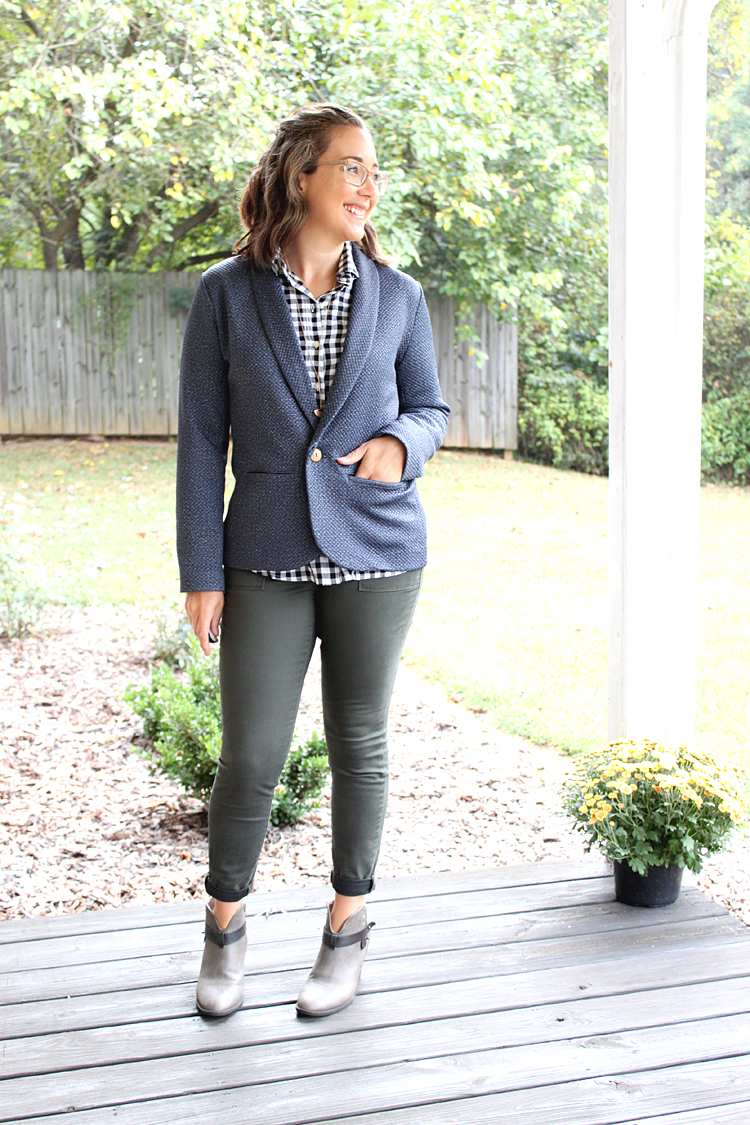
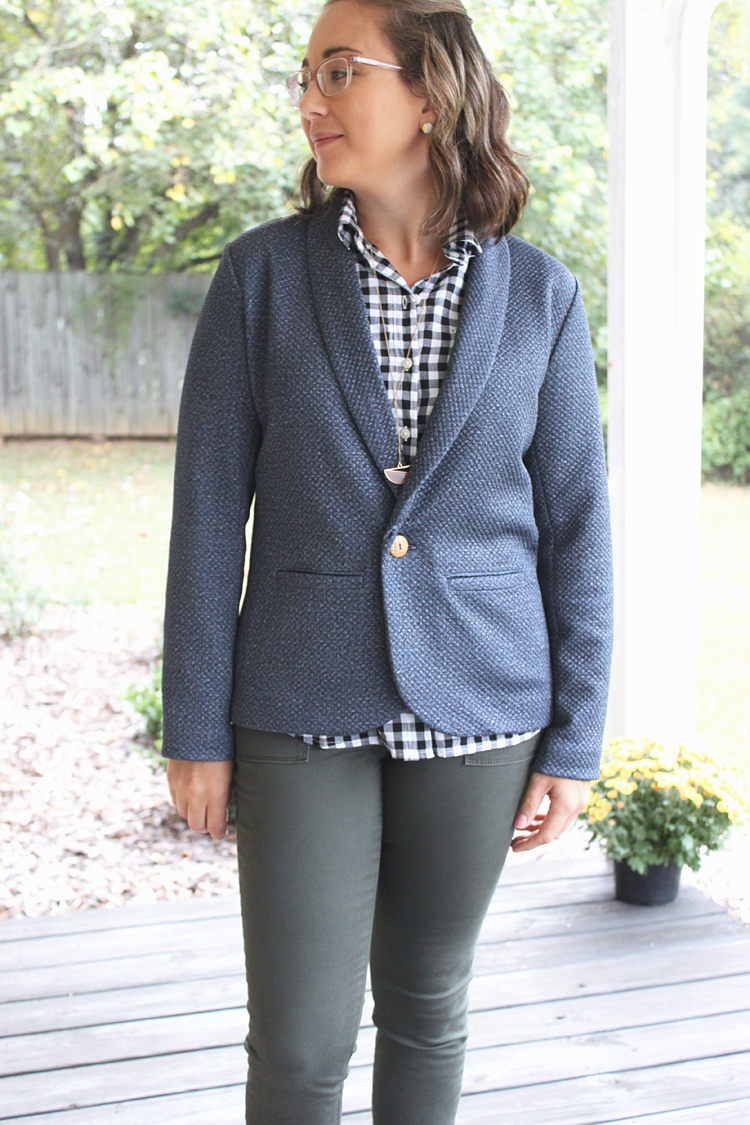
The Evans Blazer pattern includes two views, View A as you can see here, is a very classic blazer style with darts, welt pockets, and a front button closure. This view is intended for sturdy and structured knits, such as ponte, sweatshirt fleece, and double knits.

Evans Blazer Pattern Review // Sewing For Women

View B is more of a cardigan style blazer, with a cascading front lapel, no button closure, and is intended for much more drapey knits.

The sewing went really well during this make. Adrianna's instructions are clear and easy to follow, as always. She guides you through each step and you just need to follow along with confidence to produce a lovely end product!

Evans Blazer Pattern Review // Sewing For Women

The only time I needed to pull out my trusty seam ripper was during the under-stitching of the collar facing. I just got myself turned around, since you have to switch sides at the break point where the collar folds back onto itself. Totally my fault, and not the instructions!

For sizing, I graded between 3 sizes. My upper bust put me in a size 10, my bust and waist in size 8, and my hips a size 6. Hello, inverted triangle. 😏

Evans Blazer Pattern Review // Sewing For Women

I decided to grade between all of these sizes for the best possible fit. I made the size 10 in the shoulders and sleeves, since I was most concerned about it being too snug in those areas. In the end, I could have definitely gone with a straight size 8 down to the hips as the shoulders are a bit wide and the sleeves have plenty of room. Overall, though, I am super super happy with the fit! I can't believe how tailored a knit blazer can look!

I did the tiniest sway back adjustment using the center back seam. A center back seam is so nice for this reason!

Evans Blazer Pattern Review // Sewing For Women

This fabric is Mini Diamond Quilted Jacquard Knit that I purchased from Raspberry Creek Fabrics. I don't know the exact contents, but I'm pretty sure it's 100% polyester, which makes this a very warm blazer that will be perfect for this winter!

Evans Blazer Pattern Review // Sewing For Women

The fabric was quite easy to sew and pressed surprisingly well. I was a little worried about how the welt pockets would turn out with such a lofty knit, but they turned out absolutely perfect! I did edge-stitch the top of the pocket to keep it from falling down onto itself, but otherwise it was not a problem at all.

Evans Blazer Pattern Review // Sewing For Women

I also was undecided about adding a button since I will probably wear it open most of time. However, in the end I decided to add it, and chose a very fun herringbone patterned, faux wood button.

I did manage to sew the buttonhole to the wrong side of the jacket, but I'm hoping no one will notice! 😂😆

Evans Blazer Pattern Review // Sewing For Women

Sweater blazers are a hot item in fashion right now, and I love that I have the option to make my own with this pattern! I would love to make a menswear inspired blazer next!

Evans Blazer Pattern Review // Sewing For Women

Between this and the Fulton Sweater Blazer pattern, all of my fashion dreams are coming true! 😄

Have you sewn a sweater blazer yet? I definitely recommend! It's not as tricky as you might think.

Evans Blazer Pattern Review // Sewing For Women

Links: 

Sewing: 
Outfit: all items are from my closet and older pieces, I have linked to similar items.
  • Shirt - Old Navy (similar HERE and HERE)
  • Necklace - Target
  • Pants - Target
  • Boots - Zulily (linked to similar from Amazon - HERE)
Pattern Suggestions to recreate my outfit:

Victory Tank // Imagine Gnats Contributor

Thursday, September 19, 2019

Victory Tank Pattern Review // Sewing For Women

Hello, friends!

I am over at Imagine Gnats today, talking all about my new Victory Tank! It is such a good one, and I'm absolutely smitten with the fabric and the color.

Victory Tank Pattern Review // Sewing For Women

The tank is fully lined, and I also used lining fabric from the shop as well. You don't want to miss this one! I cannot recommend this pattern and all fabrics I used enough!

Victory Tank Pattern Review // Sewing For Women

Click HERE to read the full post and I forgot to mention the best part... The back detail is everything. 😍

Victory Tank Pattern Review // Sewing For Women

Victory Tank Pattern Review // Sewing For Women

Victory Tank Pattern Review // Sewing For Women

*The materials for this post were sponsored by Imagine Gnats, all opinions expressed are my own*
© Handmade Frenzy • Theme by Maira G.