
Festive Summer Outfit - Boy Version

I'm so excited to show you the Boy Version of the Festive Summer Outfit set! I conquered a couple of firsts with this outfit. Believe it or not it was my first time making a t-shirt. I know! But it was so easy and fun and t-shirts are such a blank canvas, I will be making MANY more in the future.

The second "first" was those shorts. I am so stinkin' pretty proud of them. They have all the bells & whistles, front pockets, back welt pockets (!), and my personal favorite, an ACTUAL fly! With a zipper! And a button! Sorry. I can't help it. I am so excited about them! :) They turned out exactly how I had envisioned. Love when that happens.

So on to the details.
The shirt is Dana's free Basic Tee pattern and tutorial. I am not getting paid to share these links with you, I just want to give credit where credit is due AND pass on awesomeness to you!
And how awesome is Dana for sharing so many free patterns!?
I had a certain look I was going for on the shirt so I changed up the neckline just a bit. I'll show you how I did it. I wanted to encase the neckline rather than sew in ribbing.
Since the ribbing would have added an addition 1/4 inch or so to the neckline and I was omitting it, when cutting out the pattern I cut the neckline approximately 1/4 inch smaller than the pattern. No exact science, just eyeball it.

Next cut out the "bias" tape you will be using to finish the neckline. The fabric I was using had plenty of stretch so there was no need to cut it on the bias. I cut a strip 2 inches wide by 14 inches long. I know just looking at the picture below it looks like it's cut to 15 inches but if you notice on the end it starts at the 1 inch mark. :) This strip can be any length longer than about 13 inches really, you will just cut the excess off at the end.

Now create your "bias tape". Start by folding the strip in half, wrong sides together, the long way and press.


Then unfold and fold both sides in toward the center crease you made in the step above. Press.


Now fold in half again and press.


Super random mom confession: I wear socks during naptime. Not because I'm cold but so that I can stealthily and silently walk past sleeping kids rooms. Please tell me I'm not alone! :)

Ok back to the bias tape! When I made this, I wasn't able to use it immediately. (Had to go make dinner!) So to hold it in place and not unfold and lose it creases I held it in place with a few pins.

Now assemble just ONE of the shoulders.

Then pin the bias tape around the neckline. Be liberal with your pins.

Also as you pin it in place, gently stretch the bias tape (but NOT the shirt). This is kinda hard to get a good picture of, but hopefully you get the idea. :)

Then take it to your machine and slowly and carefully sew around the edge of the bias tape, making sure you are catching both the top and bottom. Another very important thing you will want to do is to use some sort of a stretch stitch or the shirt will not fit over your child's head.
My machine has this cool stitch (it's actually called a straight stretch stitch. ha.) that looks like a normal stitch but has stretch to it. My machine is ancient (1975), so I can't tell you if new machines have this or not... But I know most do have some sort of a stretch stitch built in. Also you can use a small zigzag stitch or a double needle. I like the way a double needle looks, I think I will try that next time I do a neckline like this.
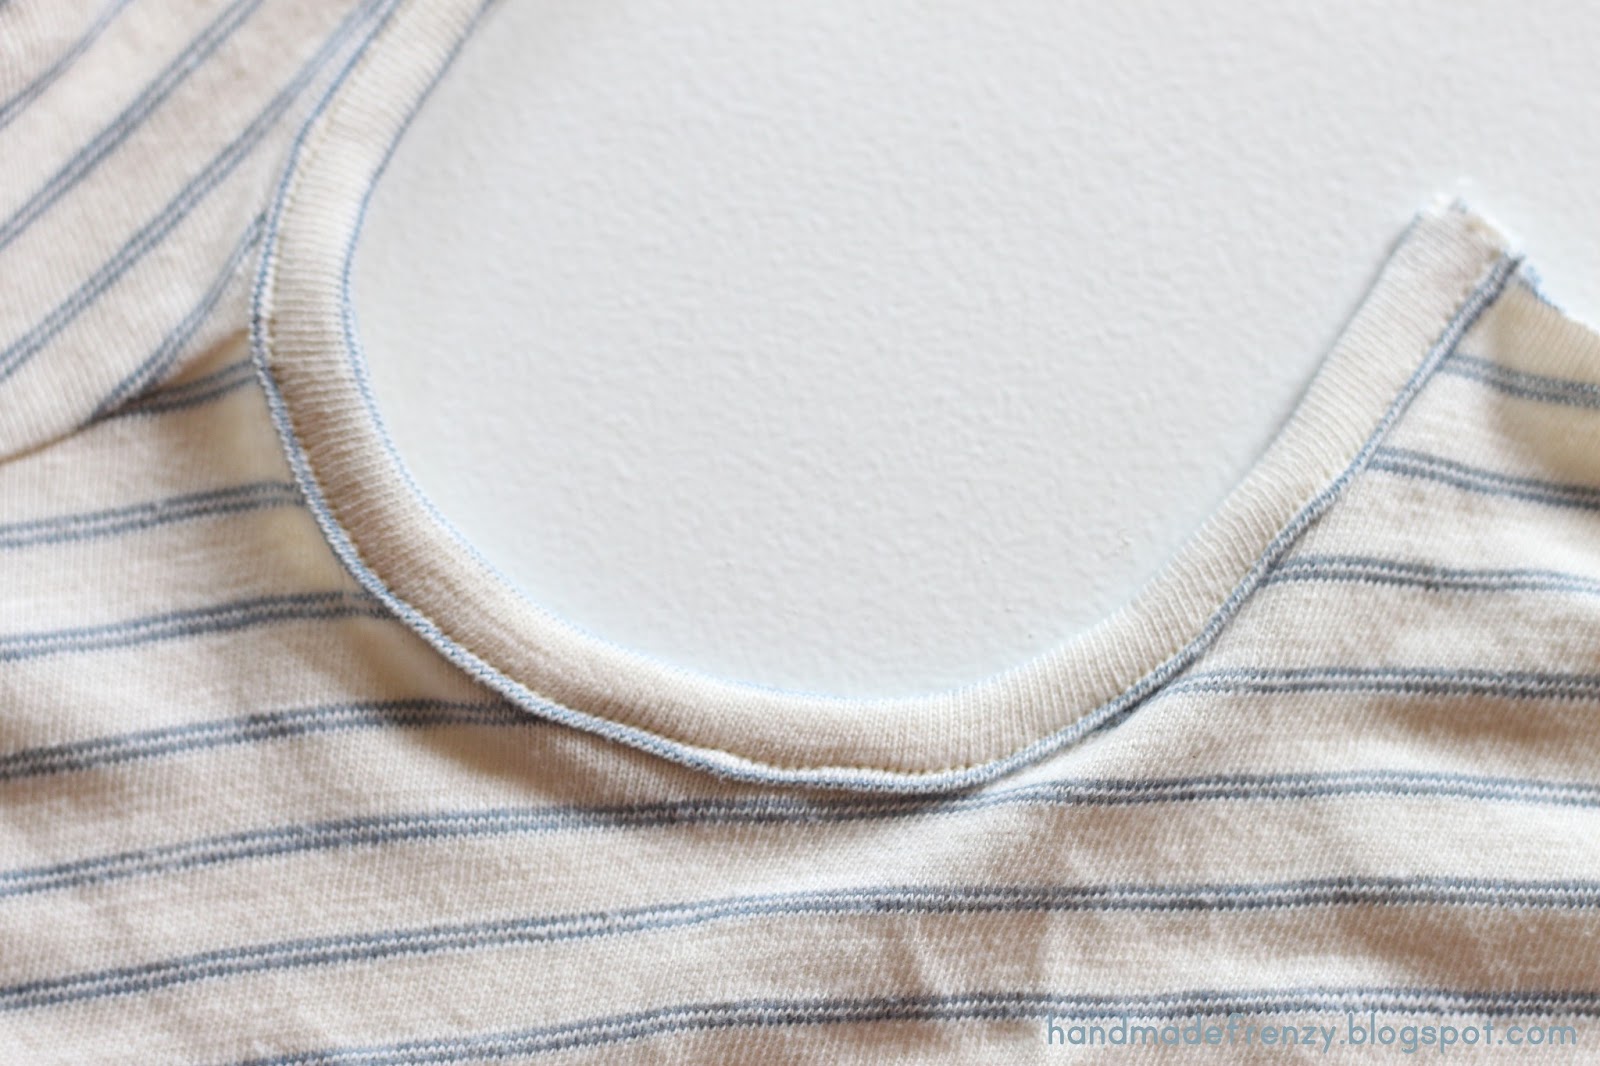
After you have your bias tape sewn on, snip off the excess and sew the other shoulder together. You will have a bit of bulk there so make sure you iron the seam to the back of the shirt and then machine or hand tack it down so it lays flat.
Then continue on with the rest of Dana's tutorial.
You have yourself a shirt!
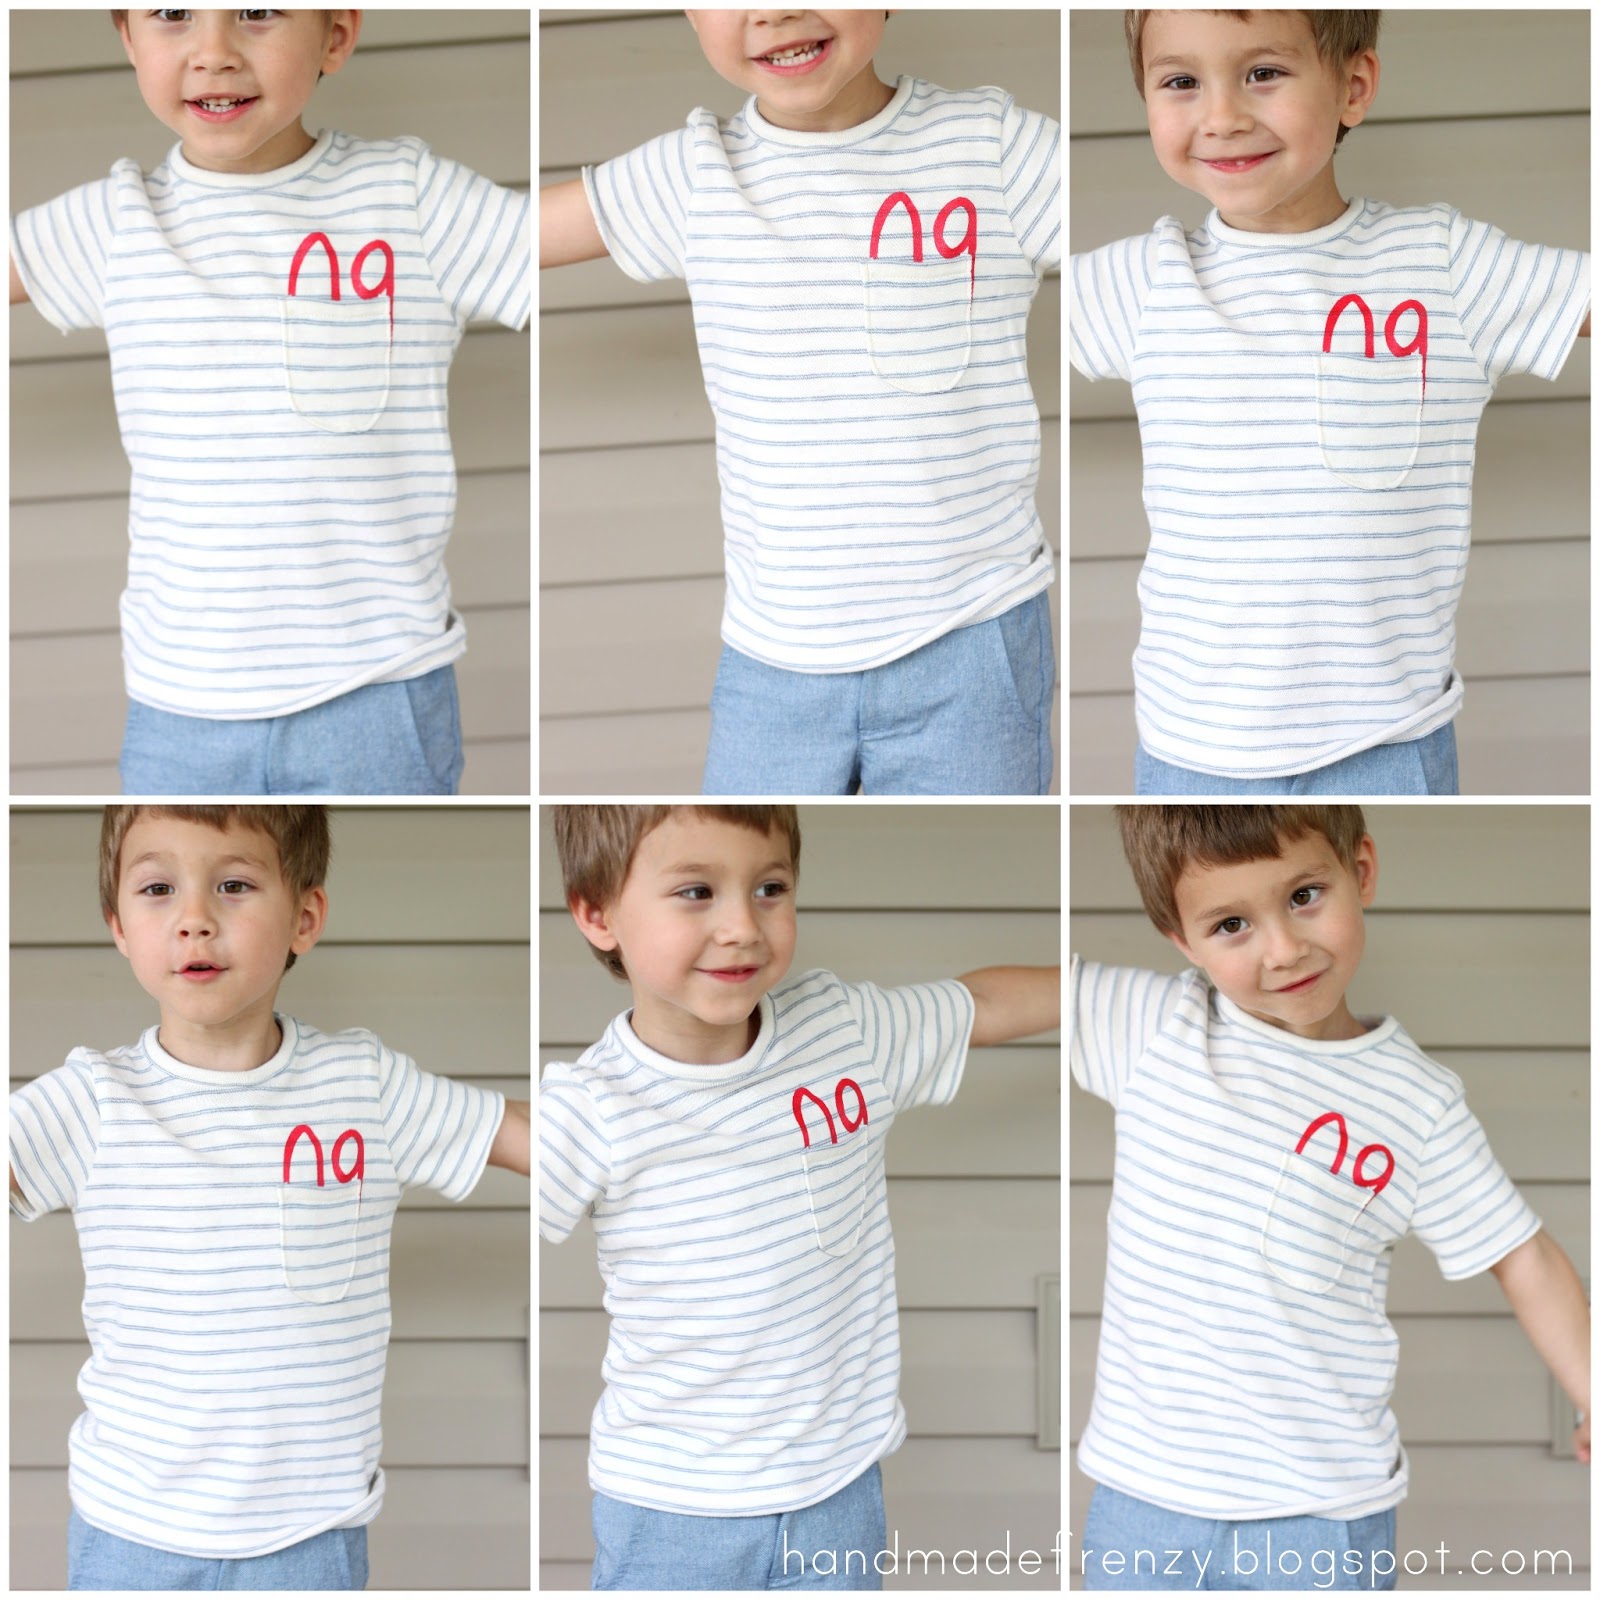
I wanted to do a little something fun and needed to add a bit of red to the outfit to make it more festive. So I did a simple freezer paper stencil and painted his birth year onto the shirt.

Taking off the freezer paper and finding a perfect design underneath is SO fun! :)

I made a pocket by simply drawing a rounded pocket shape and cut it out then folded the edges under and topstitched. Then I placed the pocket on top of the numbers and stitched again, along the same line, to attach it to the shirt.

I have mixed feelings about the pocket. I do really like it, but I'm not so sure it works with the numbers! I've heard from my family, "Why n-o, n-c, and n-g?" Hmm. Not what I was going for! So what do you think, readers? Should the pocket go? Or maybe just make it a bit smaller so you can read the numbers better?


And now for the shorts!

I once again used the Clean Slate Pants pattern from Blank Slate Patterns. (Again, just passing on the awesomness)
The only change I made was to the hemline, which I'll show you in a minute.
Otherwise I made the pattern exactly as written, adding ALL the options!
Back welt pockets.

Button and zipper fly.
I am so amazed that the fly actually works :) But with the great instructions in the pattern it's no surprise that the end result is successful. Since I didn't make a muslin (oopsy) and just dove in, there are a few things I now know to watch out for and I think my next pair will turn out better. The only thing I'm not 100% happy about is the tiny little gap where it opens just a teensy bit and you can see the zipper. But normal wear with a shirt over it you can't even notice it at all.

And front pockets.
I made these in a 3t for my almost 4 year old (next month!) because he is just. so. skinny.! The pattern fits great everywhere except the waist and the length. Seriously. The waist is still too huge on him. I put in a 9 inch piece of elastic, (the pattern calls for 10 1/4") And 8 1/2 or 8 inch would have been fine but I wanted him to be able to wear them for a while.

I also lengthened the shorts by 2 inches and then did a cuffed hem on the bottom. I love the contrast and interest it gives.
And that's it! I hope it inspires you to sew something for your little man. :)
"I'm an airplane Mom, see? Zoom, zoom, zoom." Gosh, he's just so cute. I love him.
I am also participating in the sew-along over at Imagine Gnats called Shorts-On-The-Line and entering these shorts in the flickr group. It's so fun, I hope you go check it out!
If you make anything from any of the tutorials or from inspiration you found on our blog, please share it on the Handmade Frenzy flickr page. I would LOVE to see your creations!
Happy Sewing!


Linking up here:
Naptime Crafters
Thanks for linking up to the Fashionable Type linky party, Heidi. I love how this outfit turned out. Clean Slate shorts turn out great every time and the shirt is super cool.
ReplyDelete