Handmade Summer Series Part Two: Oliver & S Bucket Hat
Over the next 7 weeks, along with Amber's awesome summer tutorials, I will show you some patterns, some techniques & mini tutorials on how I created some fun & ADORABLE summer clothes for my munchkins! And the best part is that it's usually way cheaper than what you can buy things for at the store! Plus you get the added bonus of a truly unique item to show off on your little ones.
The first is this adorable FREE pattern from Oliver & S.
The fabric is from Joann, from their Quilters Showcase collection. I love looking through that section every time I go in the store because regular price is $4.99/yd! And if you watch, they regularly put it on sale for 50% off. Yep. $2.49/yd! And of course that is when I snatched this up :)
So let's do the math:
Free pattern = $0
Fabric @ $2.49/yd, 1/3 yd x 2 needed for this hat = 1.66
Interfacing @ $1.39/yd, 1/2 yd = .69
Total: $2.35!
You REALLY can't beat that!
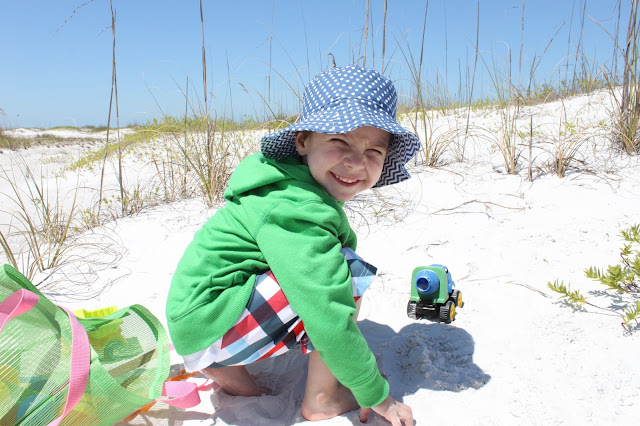
I LOVE this pattern! It really makes the cutest little hats, but then it helps to have the cutest little hat wearers to put them on too, right? :)
Here is a link for the free hat pattern & tutorial: Oliver & S Reversible Bucket Hat
I followed the tutorial until it came to the part of putting the whole hat together - then I did it my way, and I'll show you how I did it!
First make the 2 parts of the cap, then assemble the brim. I also used fusible interfacing rather than sew-in, just personal preference! And maybe because that's what I had on hand :)
Then place your pieces like this:
You will be assembling so all pieces are right sides together, making a sandwich.
1st cap piece and brim, making sure to match up the same fabrics, right sides together.
Then take your 2nd cap piece, this time, inside out.
Place the first 2 pieces inside the 2nd cap piece, again, making sure to match the same fabrics, right sides together.
Then pin, pin, pin!
I pinned first one side of the cap to the brim, then the other. This helps to ensure a better fit, less puckers in the final product.
Then sew around, leaving an opening big enough to turn the whole hat right side out. I left about a 3 inch hole and that was plenty big. Next time I'd probably go a little smaller.
Then turn!
Ta-da!
Then find a super cute kid to try it on :)
Pin your opening shut.
Sew, and you're done!
Then make one for the brother and take them to the beach to get some really good use out of their new hats!!
Tutorial & templates coming on their shirts too!
Happy hat making!
Linking up with these parties!


just pinned! adorable!
ReplyDeletethank you! I hated how the pattern instructed the finish, I'll try it your way!
ReplyDelete